51
Espanol
50
English
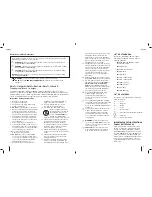
MAINTENANCE
WARNING:
To reduce the risk of
injury, turn appliance off and
disconnect it from power source before
performing any maintenance procedures
or when making repairs.
DO NOT
attempt to disassemble the unit; take it
to an authorized service center when
service or repair is required.
Cleaning
WARNING:
Disconnect the charger from
the AC outlet before cleaning. Dirt
and grease may be removed from the
exterior of the appliance using a cloth or
soft non-metallic brush.
WARNING:
Blow out dirt and dust
with clean, dry air at least once a week. To
minimize the risk of eye injury, always wear
ANSI Z87.1 approved eye protection when
performing this.
WARNING:
NEVER
use solvents or
other harsh chemicals for cleaning the
non-metallic parts of the appliance. These
chemicals may weaken the plastic materials
used in these parts. Use a cloth dampened
only with water and mild soap.
NEVER
let
any liquid get inside the appliance;
NEVER
immerse any part of the appliance into a
liquid.
ACCESSORIES
WARNING:
Since accessories, other
than those offered by D
E
WALT, have not been
tested with this appliance, use of other such
accessories could be hazardous. To reduce
the risk of injury, only D
E
WALT accessories
should be used with this appliance.
Accessories for use with the DWST1-75659-
QW / DWST1-75663-GB / DWST1-75664-XE
are available at extra cost from your local
dealer or authorized service center. If you need
assistance in locating any accessory, please
contact a list of authorised D
E
WALT repair
agents and full details of our after-sales service
and contacts are available on the Internet at:
www.2helpU.com
.
REPAIRS
The battery packs are not serviceable.
To assure product SAFETY and RELIABILITY,
any repairs, maintenance and adjustment
should be performed by a D
E
WALT factory
service center, a D
E
WALT authorized service
center or other qualified service personnel.
Always use identical replacement parts.
REGISTER ONLINE
Thank you for your purchase. Register your
product now for:
•
WARRANTY SERVICE:
Registering your
product will help you obtain more efficient
warranty service in case there is a problem
with your product.
•
CONFIRMATION OF OWNERSHIP:
In case of an insurance loss, such as
fire, flood or theft, your registration of
ownership will serve as your proof of
purchase.
•
FOR YOUR SAFETY:
Registering your
product will allow us to contact you in
the unlikely event a safety notification
is required under the Federal Consumer
Safety Act.
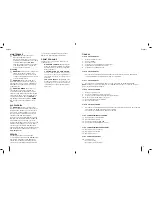
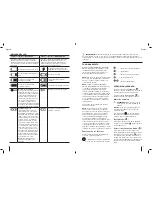
FIGURAS
FIG. 1A VISTA FRONTAL
1. Altavoces delanteros (x2)
2. Asa de traslado
3. Panel de control
4. Fijaciones del compartimiento superior (x4)
5. Cubierta del compartimiento superior
6. Fijaciones de apilamiento (x2)
FIG. 1B VISTA FRONTAL
•
Para abrir el compartimiento superior, libere las 4 fijaciones de bloqueo debajo de la
cubierta amarilla del compartimiento (elemento 4) y ábralo.
FIG. 1C VISTA FRONTAL
•
Para cerrar el compartimiento, empuje en las 4 esquinas de la cubierta amarilla.
NOTA:
Cuando se cierra correctamente, el compartimiento protege su contenido contra el
polvo, la suciedad y la lluvia ligera.
FIG. 2A VISTA POSTERIOR
7. Altavoces traseros (x 2)
8. Puerto de entrada de corriente (24V CC)
9. Fijaciones de la cubierta del paquete de baterías (x 2)
10. Gancho posterior de bloqueo del carro
11. Cubierta del paquete de baterías
12. Ranuras para el carro
FIG. 2B VISTA POSTERIOR
•
Para abrir el compartimiento de baterías, libere las 2 fijaciones de bloqueo de la cubierta
amarilla del compartimiento (elemento 3) y ábralo.
•
Para cerrar el compartimiento, empuje la cubierta.
FIG. 3 COMPARTIMIENTO SUPERIOR
13. Adaptador de corriente CA/CC
14. Enchufe auxiliar (3.5 mm)
15. Puerto de corriente/carga USB
16. Cubierta del compartimiento superior
FIG. 4 COMPARTIMIENTO DE BATERÍAS
17. Battery pack (not included)
18. Battery pack receptacle
19. Battery pack cover
FIG. 5 PANEL DE CONTROL
20. Pantalla LCD
• Fuente de audio
• Recepción (modo de radio)
Summary of Contents for DWST1-75663-GB
Page 1: ...DWST1 75659 QW DWST1 75663 GB DWST1 75664 XE ...
Page 3: ...4 5 7 8 9 10 12 11 Fig 2B Fig 4 Fig 2A Fig 3 17 18 19 13 14 15 16 11 ...
Page 96: ...190 191 Ελληνικά Ελληνικά ...
Page 97: ...192 193 Ελληνικά Ελληνικά ...
Page 98: ...194 195 Ελληνικά Ελληνικά ...
Page 99: ...196 197 Ελληνικά Ελληνικά ...
Page 100: ...198 199 Ελληνικά Ελληνικά ...
Page 101: ...200 201 Ελληνικά Ελληνικά ...
Page 102: ...202 203 Ελληνικά Ελληνικά ...

