29
EnGLIsH
saVE THEsE InsTRUCTIOns FOR FUTURE UsE
Chargers
Your tool uses a
D
e
WALT
18 Volt charger. Be sure to read all
safety instructions before using your charger. Consult the chart
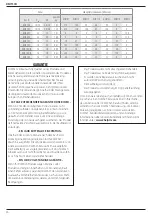
at the end of this manual for compatibility of chargers and
battery packs.
WARNING:
•
DO NOT attempt to charge the battery pack with
any chargers other than the ones in this manual.
The charger and battery pack are specifically designed
to work together.
• Carefully follow all instructions and warnings on
the battery label and package and accompanying
Battery safety Manual.
Personal Safety
•
Stay alert, watch what you are doing and use common
sense when operating a laser product. Do not use tool
while tired or under the influence of drugs, alcohol, or
medication.
A moment of inattention while operating laser
products may result in serious personal injury.
• Use appropriate personal protective equipment including eye
proection when working in a construction environment.
Tool Use and Care
•
Do not use tool if switch does not turn it on or off.
Any
tool that cannot be controlled with the switch is dangerous
and must be repaired.
•
Store idle laser products out of the reach of children and
do not allow persons unfamiliar with the laser product
or these instructions to operate the laser product.
Laser
products are dangerous in the hands of untrained users.
•
Use only accessories that are recommended by the
manufacturer for your model.
Accessories that may be
suitable for one tool, may become hazardous when used on
another tool.
Service
•
Have your laser product serviced by a qualified repair
person using only identical replacement parts.
This will
ensure that the safety of the laser product is maintained.
Description
WARNING:
Never modify the power tool or any part of it.
Damage or personal injury could result.
Laser (Fig. a–D)
1
Power button
2
Mode button
3
Speed button (RPM)
4
Scan mode button
5
Axis selection button
6
Directional button
7
Elevation button
8
Hi Mode LED
9
Power LED
10
Slope mode (tilt)
11
Slope mode (straight)
12
Y-axis LED indicator
13
X-axis LED indicator
14
Battery release button
15
Tripod adapter
16
Plumb mode
17
Level mode
Remote (Fig. E)
18
Scan mode button (remote)
19
Speed button (remote)
20
Axis selection button (remote)
21
Mode button (remote)
22
Up/Counter Clockwise button
23
Down/Clockwise Button
Intended Use
The DCE074R/DCE079R/DCE079G rotary laser has been
designed to project laser lines to aid in professional applications.
The tool can be used both inside and outside for horizontal
(level) and vertical (plumb) alignment. The tool can also
produce a stationary laser dot that can be directed manually to
establish or transfer a mark. The applications range from drop-
ceiling installation and wall layout to foundation leveling and
deck building.
DO nOT
use under wet conditions or in presence of flammable
liquids or gases.
This laser is a professional tool.
DO nOT
let children come
into contact with the tool. Supervision is required when
inexperienced operators use this tool.
• This product is not intended for use by persons (including
children) suffering from diminished physical, sensory or
mental abilities; lack of experience, knowledge or skills
unless they are supervised by a person responsible for their
safety. Children should never be left alone with this product.
ASSEMBLY AND ADJUSTMENT
WARNING: Do not place the laser in a position
which may cause anyone to intentionally or
unintentionally stare into laser beam.
Serious eye
injury may result from staring at the beam.
Setting Up the Laser
The laser facilitates various set-ups, making it useful for
several applications.
Manual Head Rotation
The laser is designed with a protective alloy cage around the
rotary head to prevent accidental damage from work site
activities. You can still direct the beam to establish or transfer
a mark by pressing the scan mode once and jogging the dot
using the Clockwise/counter clockwise buttons.
Summary of Contents for DCE074R
Page 1: ...www eu DCE074R DCE079R DCE079G ...
Page 3: ...1 14 Fig A Fig B 13 12 7 4 5 9 2 11 3 6 1 8 10 7 4 9 2 11 3 6 1 8 10 DCE079R DCE079G DCE074R ...
Page 5: ...Dansk 3 30 Fig G Fig H Fig I 26 27 28 53 54 24 24 29 29 25 Fig J ...
Page 6: ...4 Fig K 33 32 31 Fig M Fig N 42 42 43 45 45 41 39 37 40 40 44 44 Fig L 46 46 ...

