8. Reroute the vent collector drain tube to one of the 1/2”
stubs of the drain trap. Cut the provided 1/2" tubing at
the appropriate length to reach the drain trap.
9. Connect the outlet from the drain trap to the condensate
drain piping using a ½” PVC tee. If a condensate pump
is used, make sure it is approved for acidic condensate.
10. Prime the drain trap with water.
This will ensure
proper furnace drainage at startup and will avoid any
recirculation of flue gas.
11. On the remaining 3 outlet stub, connect caps (1x5/8” and
2x1/2”). These caps are provided in the parts bag.
3.4.2
Alternate drain trap location in
horizontal left position
Figure 11 – Drain trap alternate position
3.4.3
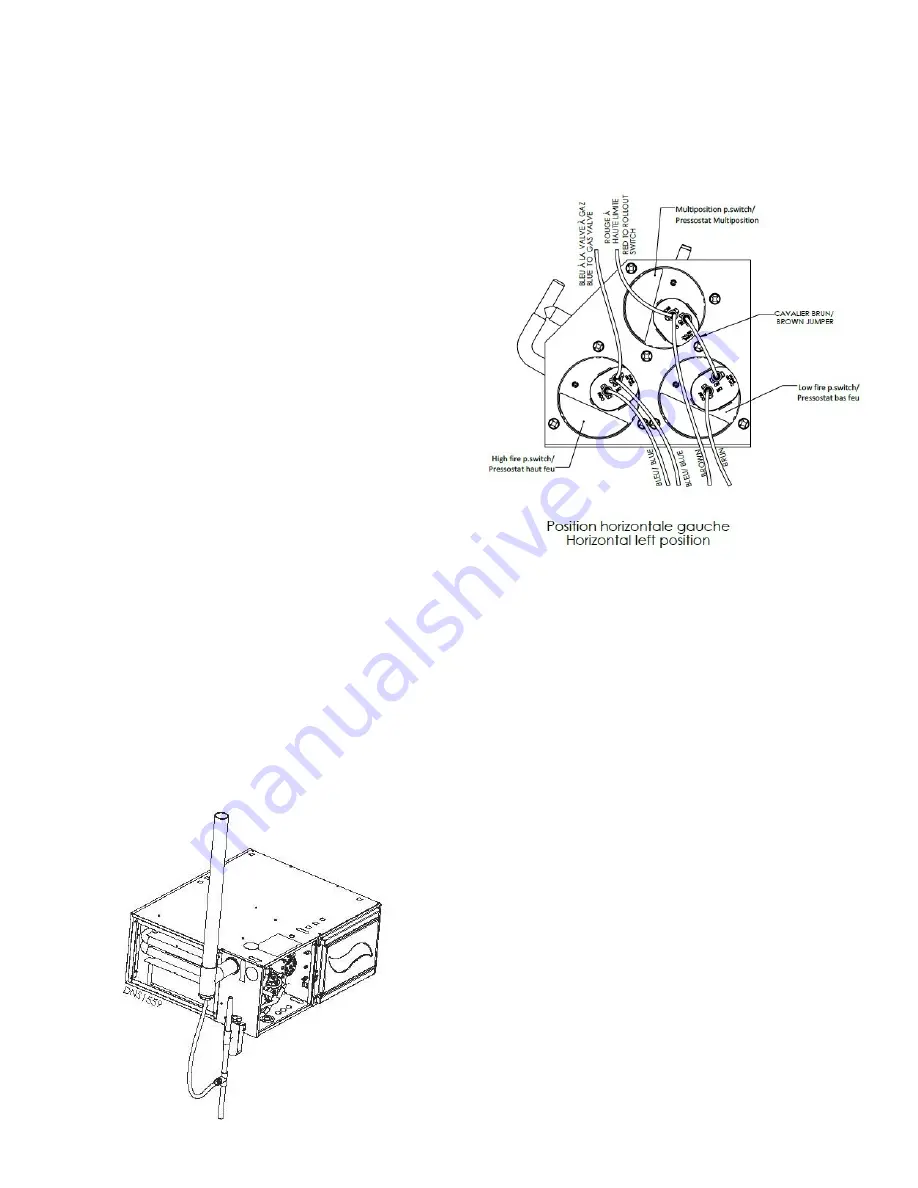
Horizontal left multiposition
pressure switch connection
Figure 12 –
Horizontal left pressure switch
connection
The 3/16" stub just beside the drain of the condensate box must
be drilled or cut open. Use the supplied black squared PVC
tubing to connect the pressure switch (-0.2 in. w.c.) to this stub.
(see figure 10)
The pressure switch must also be electrically connected in
series with the low fire pressure switch (top) using the brown
jumper furnished in the parts bag. Refer to figure 12 for more
details.
3.5
MULTIPOSITION VENTING
DRAINAGE
All furnaces with horizontal exhaust vent piping must have drain
tee assembly and trap installed in the exhaust pipe as close to
the furnace as possible. See Figures 3, 6 and 10.
4
DUCT INSTALLATION
4.1
GENERAL REQUIREMENTS
The duct system should be designed and sized according
to accepted national standards such as those published
by: Air Conditioning Contractors Association (ACCA), Sheet
Metal and Air Conditioning Contractors National Association
(SMACNA) or American Society of Heating, Refrigerating
and Air Conditioning Engineers (ASHRAE). Consult The Air
Systems Design Guidelines reference tables available at your
local distributor.
The duct system should be sized to handle the required system
design aiflow at the design external static pressure.
The
13
Summary of Contents for C105-2-V
Page 24: ...Figure 29 Direct vent clearance 23 ...
Page 25: ...Figure 30 Other than Direct vent clearance 24 ...
Page 32: ...Figure 31 Dimensions 31 ...
Page 33: ...Figure 32 Two Stage ECM Wiring diagram 32 ...
Page 36: ...Figure 33 Exploded view Cxx 2 V part 1 35 ...


