


21
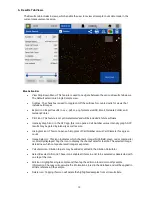
Ethernet
•
Ensure the Ethernet cable is connected.
•
Tap the Edit button to configure Ethernet connection.
Contact your local IT department if additional help setting up WiFi or Ethernet is needed.
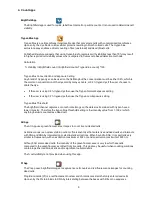
Display
•
Includes controls for screen brightness and when the screen sleeps.
Network Printing
This feature is not yet implemented and will be included in a future software release.
Email Set-up
1.
It is recommended that a new, dedicated POP3
Gmail
account be used for all outgoing email from
the CellDrop. This type of account works very well with the instrument's operating system and
prevents personal incoming email from being stored on the unit.
2.
Ensure that the instrument is connected to WiFi or Ethernet.
3.
Launch the Settings app and navigate to the Email section on the left scroll menu.
4.
Enable the
POP3
option on your Email configuration. Do not use an IMAP account as messages
from IMAP accounts could occupy a significant amount of the instrument's memory.
5.
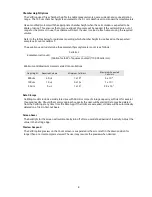
Input Outgoing Server Information:
Email Configuration
Example Input for Gmail
SMTP Server
smtp.gmail.com
Security
SSL
Port
465
Email Username
Email Password
Examplegmail123
Test Email To
Refer to your local IT support group if additional assistance is required
.
Updater App
This app is used to update CellDrop software and firmware to the most current available versions.
Updates may be downloaded using the Updater app when connected to Ethernet or Wifi. An Ethernet
connection is recommended for software updates.
USB updates are not yet implemented and this capability will be included in a future software release.
Diagnostics App
This feature is not yet implemented and will be included in a future software release.
Summary of Contents for CellDrop
Page 1: ...rev MAR 27 2019 ...


