Connections
Setup
Playback
Remote Control
Information
Troubleshooting
Specifications
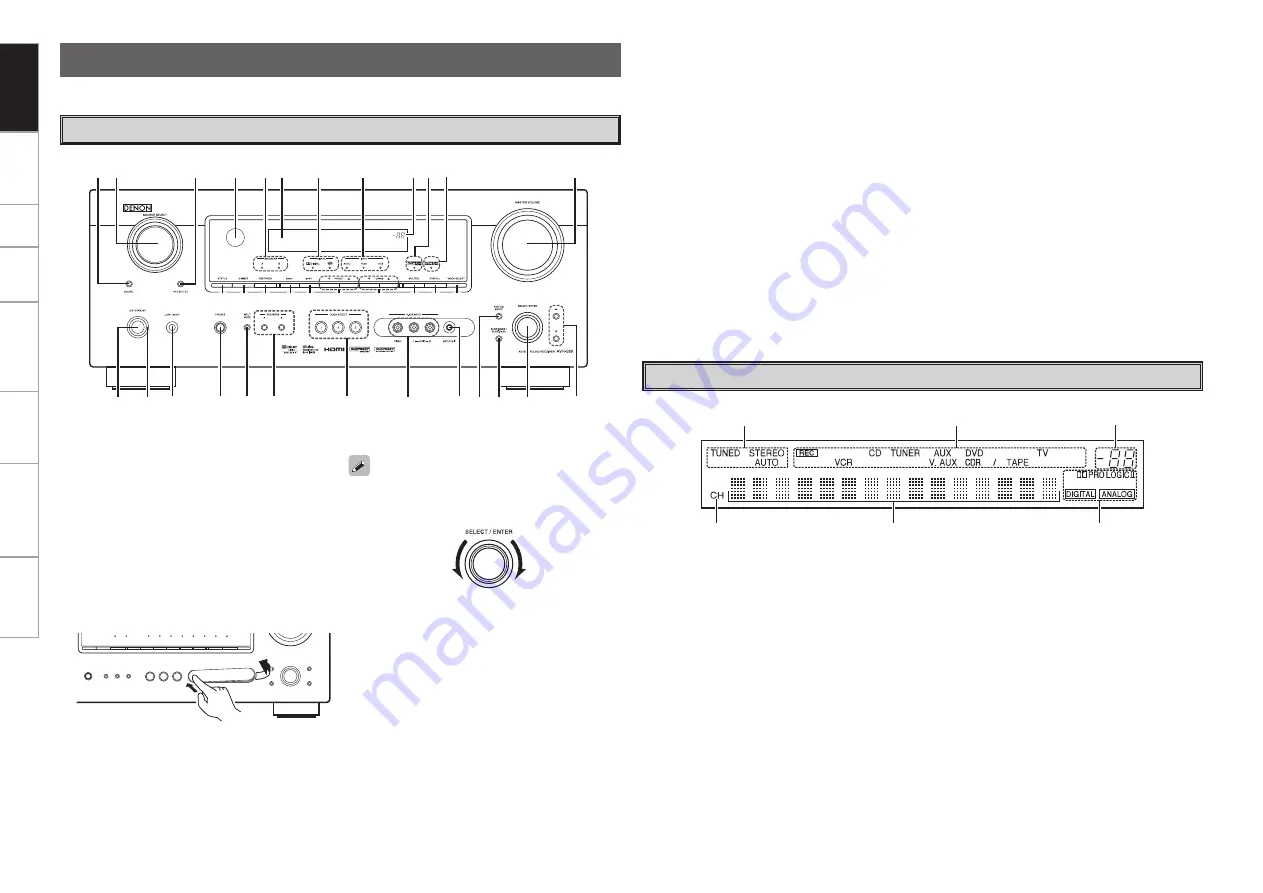
For buttons not explained here, see the page indicated in parentheses ( ).
w e
r
y
o
t
Q4
W4
W3
W5
W2
W1 W0
Q7 Q6 Q5
q
Q0 Q1
Q2
u
i
Q3
Q8
Q9
W6 W7
E0
E3 E4 E5
E1
E2
W8 W9
q
Power operation button
(ON/STANDBY)
·········································· (30)
w
Power indicator
·········································· (30)
e
Power switch (
h
ON
j
OFF)
··············· (30, 35)
r
Headphone jack (PHONES)
························ (31)
t
INPUT MODE button
·································· (30)
y
SPEAKERS button
································ (31, 35)
u
QUICK SELECT buttons
····························· (35)
i
V. AUX INPUT connectors
Remove the cap covering the connectors when
you want to use them.
o
SETUP MIC jack
·········································· (15)
Q0
SYSTEM SETUP button
····························· (18)
Q1
SURR. MODE / SURR. PARA button
·· (23, 25)
Q2
SELECT/ENTER knob
Front Panel
q
y
t
r
w
e
q
Signal channel indicator
Lights when the preset channel is displayed at
w
.
w
Information display
e
Input signal indicators
r
Master volume indicator
This displays the volume level.
The Setup item number is displayed in System
Setup.
t
Recording output source indicator
This lights when the REC OUT mode is
selected. (This indicator is off when “SOURCE”
is selected.)
y
Tuner reception mode indicators
These light according to the reception conditions
when the input source is set to “TUNER”.
•
AUTO
This lights when in the auto tuning mode.
•
STEREO
In the FM mode, this lights when receiving
analog stereo broadcasts.
•
TUNED
This lights when the broadcast is properly tuned
in.
Display
• The
SELECT/ENTER
knob on the main unit
operates in the same way as the cursor
o
and
p
buttons on the remote control unit.
• The control functions in the same way as the
cursor
o
button when turned counterclockwise,
as the cursor
p
button when turned clockwise.
• The control functions in the same way as the
ENTER
button when pressed the knob.
E4
DYNAMIC VOLUME button
··················(27, 28)
b
About Dynamic Volume
Audyssey Dynamic Volume™ solves the problem
of large variations in volume level between
television programs, commercials, and between
the soft and loud passages of movies.
Audyssey Dynamic EQ™ is integrated into
Dynamic Volume so that as the playback volume
is adjusted automatically, the perceived bass
response, tonal balance, surround impression,
and dialog clarity remain the same.
b
About Dynamic EQ
Audyssey Dynamic EQ solves the problem of
deteriorating sound quality as volume is decreased
by taking into account human perception and
room acoustics. Audyssey Dynamic EQ works in
tandem with Audyssey MultEQ® to provide well-
balanced sound for every listener at any volume
level.
E5
VIDEO SELECT button
······························· (31)
Q3
Cursor buttons (
ui
)
································· (18)
Q4
MASTER VOLUME control knob
··············· (30)
Q5
Dynamic Volume indicator
························ (28)
Q6
MultEQ indicator
········································ (27)
Q7
Master volume indicator
Q8
INPUT mode indicators
······························ (30)
Q9
SIGNAL indicators
W0
Display
W1
SPEAKERS indicators
································· (31)
W2
Remote control sensor
································ (3)
W3
REC SELECT button
··································· (34)
W4
SOURCE SELECT knob
······························ (30)
W5
SOURCE button
·········································· (30)
W6
STATUS button
·········································· (29)
W7
DIMMER button
·········································· (31)
W8
RESTORER button
······································ (28)
W9
BAND button
·············································· (31)
E0
SHIFT button
··············································· (31)
E1
PRESET CHANNEL buttons (
df
)
·············· (31)
E2
TUNING buttons (
df
)
································ (31)
E3
MULTEQ button
········································· (27)
Part Names and Functions
Getting Started


