background image

OPERATION

Your drill press is to be used with drill bits of 5/8" or less in
diameter. The following directions will give the inexperi-
enced operator a start on common drill press operations.
Use scrap material for practice to get a feel of the machine
before attempting regular work.

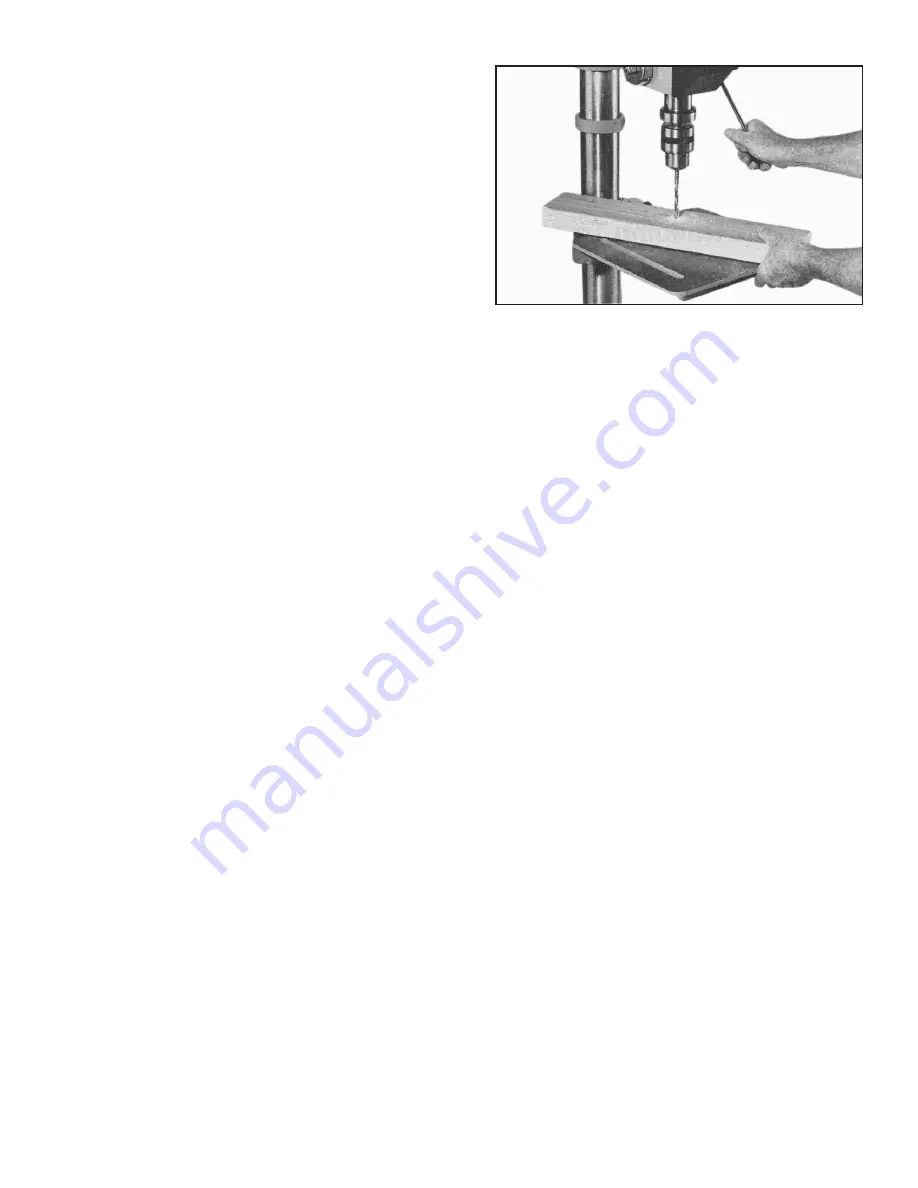
IMPORTANT: When the workpiece is long enough it should
always be positioned on the table with one end against the
column, as shown in Fig. 26. This prevents the workpiece
from rotating with the drill bit or cutting tool, causing dam-
age to the workpiece or personal injury to the operator. If it
is not possible to support the workpiece against the col-
umn, the workpiece should always be fastened to thetable
using clamps or a vise.

CORRECT DRILLING SPEEDS

Factors which determine the best speed to use in any drill press operations are: kind of material
being worked, size of hole, type of drill or other cutter, and quality of cut desired. The smaller the
drill, the greater the required RPM. In soft materials, the speed should be higher than for hard met-
als.
WARNING: Use the recommended speed for the drill press bit and workpiece material. As a guide-
line for the speed to use for different drill diameters and materials, refer to the chart located on the
inside top cover of the drill press for your convenience.

BORING IN WOOD

Twist drills, although intended for metal drilling, may also be used for boring holes in wood.
However, machine spur bits are generally preferred for working in wood; they cut a square bottom
hole and are designed for removal of wood chips. Do not use hand bits which have a screw tip; at
drill press speeds they turn into the wood so rapidly as to lift the work off the table and whirl it.
For through boring, line up the table so that the bit will enter the center hole to avoid damage.
Scribe a vertical line on the front of the column and a matchmark on the table bracket, so that the
table can be clamped in the center position at any height.
Feed slowly when the bit is about to cut through the wood to prevent splintering the bottom face.
Use a scrap piece of wood for a base block under the work. This helps to reduce splintering and
protects the point of the bit.

DRILLING IN METAL

Use clamps to hold the work when drilling in metal. The work should never be held in the bare
hand; the lips of the drill may seize the work at any time, especially when breaking through the
stock. If the piece is whirled out of the operator’s hand, he may be injured. In any case, the drill will
be broken when the work strikes the column.
The work must be clamped firmly while drilling; any tilting, twisting or shifting results not only in a
rough hole, but also increases drill breakage. For flat work, lay the piece on a wooden base and
clamp it firmly down against the table to prevent it from turning. If the piece is of irregular shape
and cannot be laid flat on the table, it should be securely blocked and clamped.

Fig. 26

Summary of Contents for 14-070

Page 1: ...INSTRUCTION MANUAL 14 Floor Drill Press PART NO 1046995 Delta Machinery International Machinery Corp 1995 MODEL 14 070 Dated 6 30 95...

Page 2: ...CTRICAL REQUIREMENTS Motor Specifications 10 Power Connections 10 Extension Cords 10 Grounding Instructions 11 SPINDLE SPEEDS 12 CHANGING SPINDLE SPEEDS AND ADJUSTING BELT TENSION 13 SWITCH 14 LOCKING...

Page 3: ...or which it was designed 11 USE RIGHT TOOL Don t force tool or attachment to do a job for which it was not designed 12 WEAR PROPER APPAREL No loose clothing gloves neckties rings bracelets or other je...

Page 4: ...s are tightened before starting the machine 14 NEVER perform layout assembly or set up work on the table while the drill is operating 15 BE SURE drill bit or cutting tool is not damaged and is properl...

Page 5: ...SS TO THE POWER SOURCE UNTIL THE MACHINE IS COMPLETELY ASSEMBLED AND YOU HAVE READ AND UNDER STOOD THE ENTIRE INSTRUCTION MANUAL Fig 2 A Head Assembly B Column With Raising Rack C Table D Worm Gear Fo...

Page 6: ...with kerosene DO NOT use acetone gasoline or lacquer thinner for this pur pose ASSEMBLY INSTRUCTIONS 1 Assemble the column A Fig 3 to the base B using the four screws three of which are shown at C 2...

Page 7: ...shown Make sure bottom of raising rack E is engaged with flange K on base of column 6 Re assemble ring D Fig 7 which was removed in STEP 2 to column IMPORTANT Bottom of ring D MUST NOT be pushed all...

Page 8: ...ock screw O Fig 8 into hole in table bracket as shown 9 Place the drill press head onto the column as far as it will go After the drill press spindle is aligned with the table and base tighten the two...

Page 9: ...the spindle IMPORTANT To avoid damage to the chuck NEVER drive the chuck onto the spindle with a metal hammer FASTENING DRILL PRESS TO A SUPPORTING SURFACE PERMANENT MOUNTING If your drill press is to...

Page 10: ...120 Volts 60 Hz alternating cur rent Never use a motor that runs faster than 1720 RPM power connections A separate grounded electrical circuit should be used for your drill press This circuit should...

Page 11: ...e the adapter illustrated in Fig 14 may be used to connect this plug to a 2 pole receptacle as shown in Fig 14 if a properly grounded outlet is not avail able The temporary adapter should be used only...

Page 12: ...pindle speeds of 250 360 410 540 590 650 1090 1280 1450 1820 2180 and 3000 RPM are avail able with the 14 Drill Press Fig 15 illustrates which steps of the pulleys the belts must be placed to obtain t...

Page 13: ...sitioning chart E and a drill speed chart F is provided on the inside top cover of the drill press for your convenience 6 After the belts are positioned on the desired steps of the motor center and sp...

Page 14: ...ever should the switch toggle be removed while the drill press is operating the switch can be turned OFF once but cannot be restarted without inserting the switch toggle B Fig 18 TABLE ADJUSTMENTS 1 T...

Page 15: ...ilt table to the desired angle and tighten bolt D 4 When returning table to the level position replace table alignment pin C Fig 21 This will automatically position the table surface at 90 degrees to...

Page 16: ...hole has been drilled a spindle return spring is provided in the spring housing A Fig 24 This spring has been properly adjusted at the factory and should not be disturbed unless absolutely necessary T...

Page 17: ...g may also be used for boring holes in wood However machine spur bits are generally preferred for working in wood they cut a square bottom hole and are designed for removal of wood chips Do not use ha...

Page 18: ...repaid to the supplying distributor or authorized service center for inspection and repair or replace ment Delta Machinery will not be responsible for any asserted defect which has resulted from mis u...

Reviews: