VIVOTEK
User's Manual - 47
Configuration Area
Client Settings: Click this button to access the client setting page. For more information, please refer to
Configuration: Click this button to access the configuration page of the Network Camera. It is suggested
that a password be applied to the Network Camera so that only the administrator can configure the
Network Camera. For more information,
please refer to Configuration on page 56.
Language: Click this button to choose a language for the user interface. Language options are available
in: English, Deutsch, Español, Français, Italiano,
日本語
, Português,
簡体中文
, and
繁體中文
. Please
note that you can also change a language on the Configuration page;
Hide Button
You can click the hide button to hide or display the control panel.
Resize Buttons
:
Click the Auto button, the video cell will resize automatically to fit the monitor.
Click 100% is to display the original homepage size.
Click 50% is to resize the homepage to 50% of its original size.
Click 25% is to resize the homepage to 25% of its original size.
Live Video Window
■
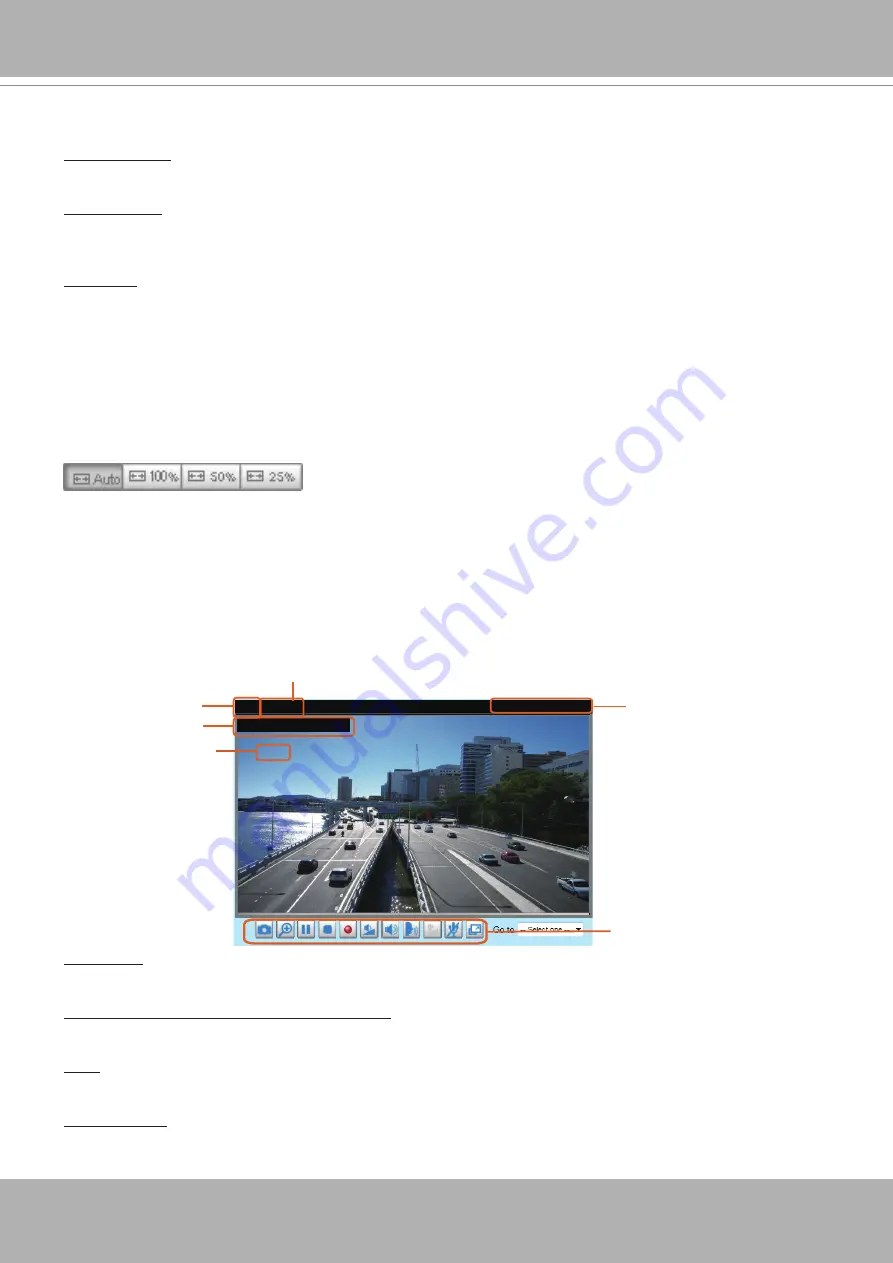
The following window is displayed when the video mode is set to H.264 or H.265:
Video Title
: The video title can be configured.
For more information, please refer to Video Settings on
H.264 or H. 265 Protocol and Media Options: The transmission protocol and media options for H.264 or
H.265 video streaming. For further configuration,
please refer to Client Settings on page 51.
Time: Display the current time.
For further configuration, please refer to Media > Image > Genral settings
Title and Time: The video title and time can be stamped on the streaming video.
please refer to Media > Image > General settings on page 75.
Video 17:08:56 2018/03/25
Title and Time
2018/03/25 17:08:56
Time
Video (TPC-AV)
H.265/264 Protocol and Media Options
Video Title
x4.0
Zoom Indicator
Video Control Buttons
Summary of Contents for Vivotek FD9189-H-V2
Page 9: ...VIVOTEK User s Manual 9 Lens IR LEDs Reset button MicroSD card slot LEDst ...
Page 13: ...VIVOTEK User s Manual 13 7 Connect the Ethernet cable to the RJ45 socket ...
Page 26: ...VIVOTEK 26 User s Manual 10 Secure the camera to wall or ceiling using the included screws ...
Page 104: ...VIVOTEK 104 User s Manual ...


