


Great user manuals database on
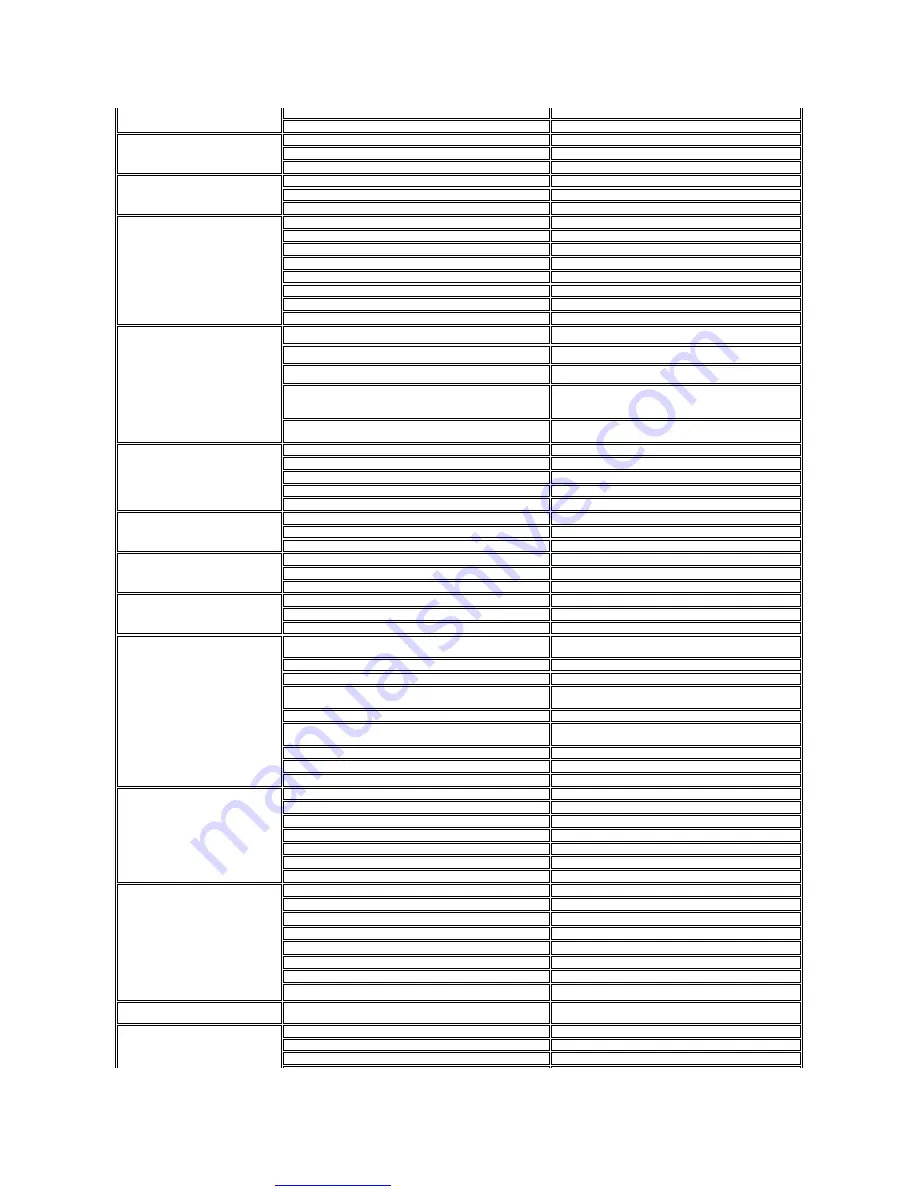
Switchboard
671 16800
Fax Switchboard
671 16865
Panama
Online Support
www.dell.com/pa
Technical Support, Customer Service, Sales
001-800-507-1264
Peru
Online Support
www.dell.com/pe
Technical Support, Customer Service, Sales
0800-50-669
Poland (Warsaw)
International Access Code: 011
Country Code: 48
City Code: 22
Online Support
support.euro.dell.com
Customer Service Phone
57 95 700
Customer Service
57 95 999
Sales
57 95 999
Customer Service Fax
57 95 806
Reception Desk Fax
57 95 998
Switchboard
57 95 999
Portugal
International Access Code: 00
Country Code: 351
Online Support
support.euro.dell.com
Technical Support
707200149
Customer Service
800 300 413
Sales
800 300 410 or 800 300 411 or 800 300 412 or 21 422
07 10
Fax
21 424 01 12
Puerto Rico
Online Support
www.dell.com/pr
Technical Support
toll-free:1-866-390-4695
or 1-866-851-1760
Customer Service and Sales
1-877-537-3355
St. Kitts and Nevis
Online Support
www.dell.com/kn
Technical Support, Customer Service, Sales
toll-free: 1-866-540-3355
St. Lucia
Online Support
www.dell.com/lc
Technical Support, Customer Service, Sales
toll-free:1-866-464-4352
St. Vincent and the Grenadines
Online Support
www.dell.com/vc
Technical Support, Customer Service, Sales
toll-free: 1-866-464-4353
Singapore (Singapore)
International Access Code: 005
Country Code: 65
NOTE:
The phone numbers in this section should be
called from within Singapore or Malaysia only.
Online Support
support.ap.dell.com
Technical Support
–
XPS computers only
toll-free: 1800 394 7464
Technical Support
–
Dimension, Inspiron, and Electronics
and Accessories
toll-free: 1800 394 7430
Technical Support
–
OptiPlex, Latitude, and Dell Precision
toll-free: 1800 394 7488
Technical Support
–
PowerApp, PowerEdge, PowerConnect,
and PowerVault
toll-free: 1800 394 7478
Customer Service
toll-free: 1 800 394 7430 (option 6)
Transaction Sales
toll-free: 1 800 394 7412
Corporate Sales
toll-free: 1 800 394 7419
Slovakia (Prague)
International Access Code: 00
Country Code: 421
Online Support
support.euro.dell.com
Technical Support
02 5441 5727
Customer Service
420 22537 2707
Fax
02 5441 8328
Tech Fax
02 5441 8328
Switchboard (Sales)
02 5441 7585
South Africa (Johannesburg)
International Access Code:
09/091
Country Code: 27
City Code: 11
Online Support
support.euro.dell.com
Gold Queue
011 709 7713
Technical Support
011 709 7710
Customer Service
011 709 7707
Sales
011 709 7700
Fax
011 706 0495
Switchboard
011 709 7700
Southeast Asian and Pacific
Countries
Technical Support, Customer Service, and Sales (Penang,
Malaysia)
604 633 4810
Spain (Madrid)
International Access Code: 00
Online Support
support.euro.dell.com
Home and Small Business
Technical Support
902 100 130


