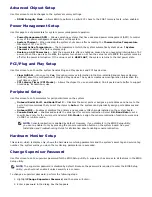
13. In the
File
pull-down menu, select
Load BIOS and Flash
.
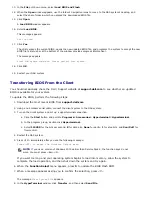
14. When the
Open
window appears, use the folder's navigation icons to move to the NAS system's desktop, and
select the share folder in which you placed the downloaded BIOS file.
15. Click
Open
.
A
Load BIOS
window appears.
16. Select
Load BIOS
.
This message appears:
Are You Sure?
17. Click
Yes
.
The utility erases the current BIOS, opens the new updated BIOS file, and programs the system to accept the new
BIOS file (a status bar at the bottom of the window provides progress information).
The message appears:
Flash ROM update complete. Please restart your system.
18. Click
OK
.
19. Restart your NAS system.
Transferring BIOS From the Client
You should occasionally check the Dell | Support website at
support.dell.com
to see whether an updated
BIOS is available for your system.
To update the BIOS, perform the following steps:
1.
Download the most recent BIOS from
support.dell.com
.
2. Using a null modem serial cable, connect the client system to the NAS system.
3. Turn on the client system and set up a Hyperterminal connection.
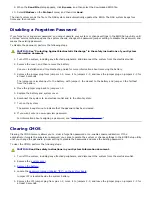
a. Click the
Start
button and point to
Programs
®
Accessories
®
Hyperterminal
®
Hyperterminal
.
b. In the program group, double-click
Hyperterminal.
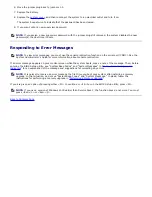
c. Select
115200
for the bits per second,
8
for data bits,
None
for parity,
1
for stop bits, and
Xon/Xoff
for
flow control.
4. Restart the NAS system.
5. Press <F2> immediately after you see the following message:
Press <F2> to enter the Function Select menu
NOTE:
If you use a version of Windows 2000 earlier than Service Pack 2, the function keys do not
work. You must press <Esc><2>.
If you wait too long and your operating system begins to load into memory, allow the system to
complete the load operation, and then shut down the system and try again.
6.
When the
Function Select
menu appears, press
5
to update the BIOS Flash ROM.
7.
When a message appears asking you to confirm the selection, press <Y>.
The message
Flash System BIOS
appears.
8. In the
HyperTerminal
window, click
Transfer
, and then select
Send File
.
Summary of Contents for PowerVault 715N
Page 10: ...Back to Contents Page ...


