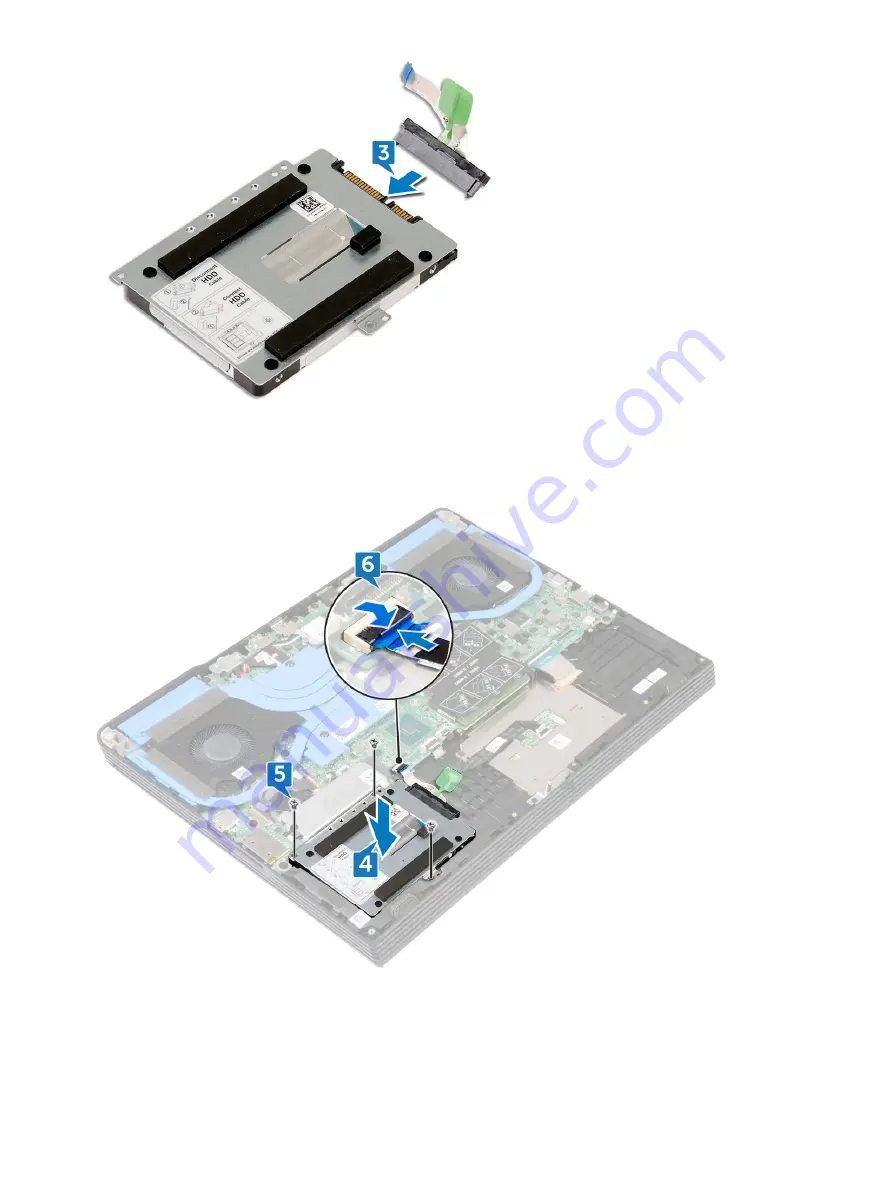
4
Align the screw holes on the hard-drive assembly with the screw holes on the palm-rest assembly.
5
Replace the three screws (M2x4) that secure the hard-drive assembly to the palm-rest assembly.
6
Slide the hard-drive cable into the connector on the system board and close the latch to secure the hard-drive cable.
Replacing the hard drive
37
Summary of Contents for G5 5590
Page 1: ...Dell G5 5590 Service Manual Regulatory Model P82F Regulatory Type P82F001 ...
Page 22: ...22 Replacing the base cover ...
Page 25: ...Removing the battery 25 ...
Page 35: ...Removing the hard drive 35 ...
Page 40: ...40 Removing the coin cell battery ...
Page 44: ...44 Removing the speakers ...
Page 48: ...48 Removing the touchpad ...
Page 53: ...Removing the solid state drive Intel Optane memory module 53 ...
Page 61: ...Removing the wireless card 61 ...
Page 65: ...Removing the graphics card fan 65 ...
Page 69: ...Removing the processor fan 69 ...
Page 73: ...Removing the heat sink 73 ...
Page 77: ...Removing the power adapter port 77 ...
Page 81: ...Removing the I O board 81 ...
Page 94: ...94 Removing the system board ...
Page 100: ...100 Removing the power button with fingerprint reader ...
Page 104: ...4 Lift the keyboard along with its cable off the palm rest assembly 104 Removing the keyboard ...
Page 108: ...108 Removing the palm rest ...
Page 124: ...4 Connect the power adapter to your computer 5 Turn on your computer 124 Troubleshooting ...


