10
User Preset 'User Preset': Use the plus and minus buttons to increase or decrease each of the
three colors (R, G, B) independently, in single digit increments, from '0' to '100'.
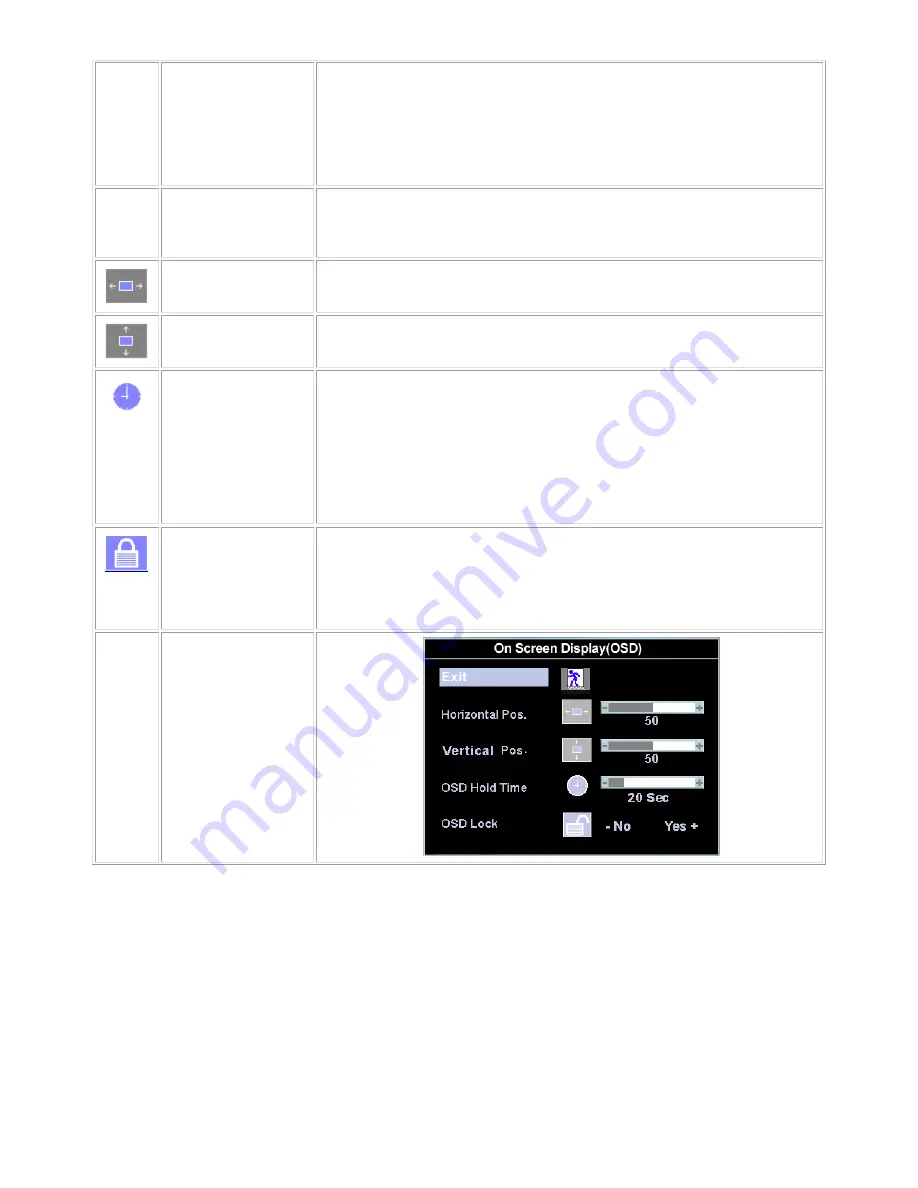
OSD Settings:
Each time the OSD opens, it displays in the same location on the screen. 'OSD
Settings' (horizontal/vertical) provides control over this location.
Horizontal Position
-
and + buttons move OSD to the left and right.
Vertical Position
-
and + buttons move OSD down and up.
OSD Hold Time: The OSD stays active for as long as it is in use.
'OSD Hold Time': Sets the length of time the OSD will remain active after the last
time you pressed a button.
Use the
-
and + buttons to adjust the slider in 5 second increments, from 5 to 60
seconds.
OSD Lock 'OSD Lock': Controls user access to adjustments. When 'Yes' (+) is selected, no
user adjustments are allowed. All buttons are locked except the menu button.
All buttons can be locked or unlocked when the 'Menu' button is pushed and held
for over 15 seconds.
Summary of Contents for E153FPTc
Page 14: ...14 4 4 Panel Specification 4 4 1 Display Characteristics For HSD panel For CPT panel ...
Page 16: ...16 For CPT panel ...
Page 18: ...18 5 Block Diagram 5 1 Exploded View ...
Page 21: ...21 5 3 Electrical Block Diagram 5 3 1 Main Board ...
Page 27: ...27 The end The angle between CCFL line and vertical direction should be 30 40 degree ...
Page 33: ...DELL E153FPTc 33 7 2 Power Board ...
Page 34: ...DELL E153FPTc 34 ...
Page 35: ...DELL E153FPTc 35 8 PCB Layout 8 1 Main Board ...
Page 36: ...DELL E153FPTc 36 8 2 Inverter Power Board ...
Page 37: ...DELL E153FPTc 37 ...
Page 48: ...DELL E153FPTc 48 b Click the Select Chip button and choose the type you are going to program ...
Page 50: ...DELL E153FPTc 50 d Select the communication Setting Port Name e Click the ConNect button ...
Page 67: ...DELL E153FPTc 67 15 Definition Of Pixel Defects 15 1 CLAA150XP 01 ...


