6
3. Operation instructions
3.1 General Instructions
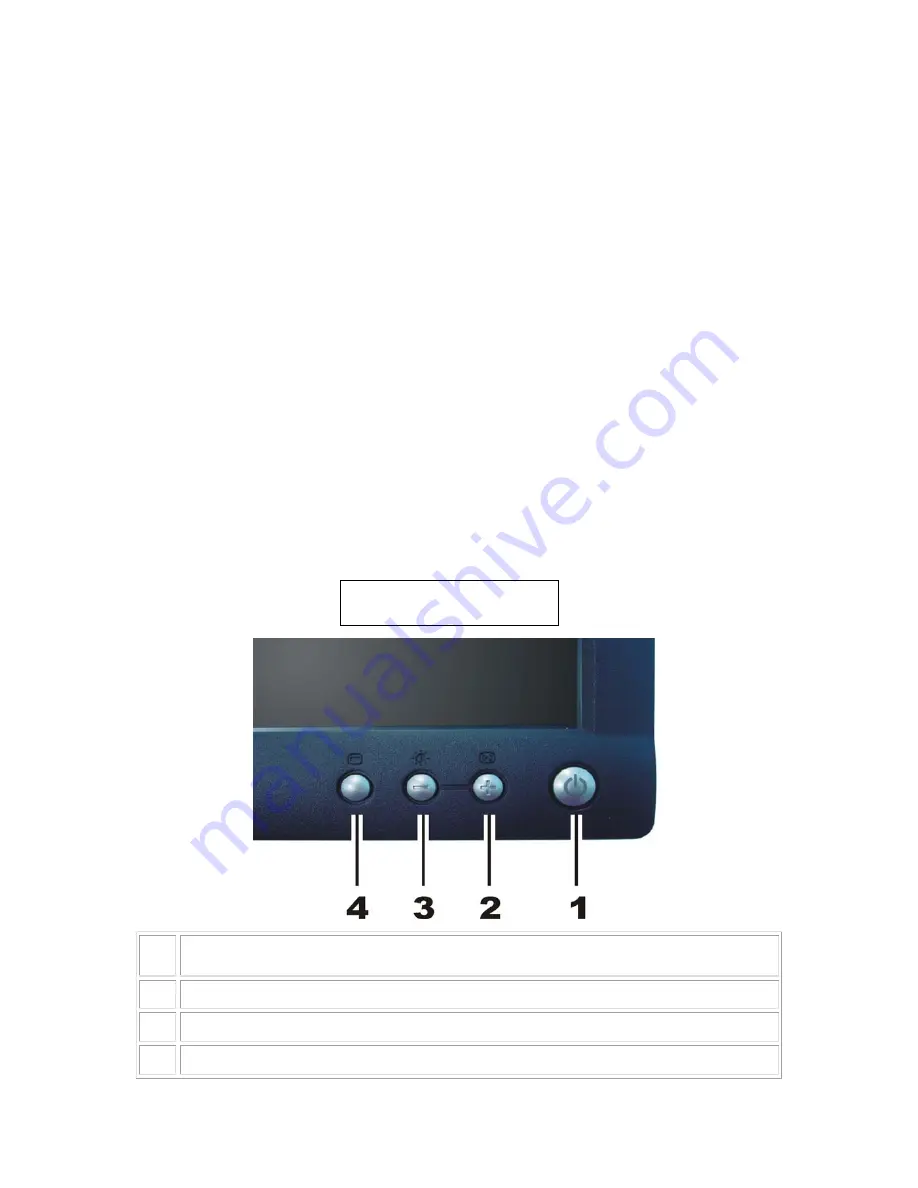
Press the power button to turn the monitor on or off. The other control buttons are located at front panel of the
monitor. By changing these settings, the picture can be adjusted to your personal preferences.
-
The power cord should be connected.
-
Connect the video cable from the monitor to the video card.
-
Press the power button to turn on the monitor, the power indicator will light up.
3.2 Control Buttons
Power Button:
When pressed, the monitor enters the off mode, and the LED turns blank. Press again to
restore normal status.
Brightness Button:
The Brightness Button is used to select the Brightness/Contrast adjust functions.
Press to switch functions or adjust settings.
Auto Adjust Key:
The Auto Adjust Key is used to automatically set the H Position, V
Position, Clock and Phase.
Power Indicator:
Green — Power On mode.
Amber — Power Saving mode.
Blank —Power Off Mode.
1
Power On/Off button with LED Indicator
2
Auto Adjust and + button
3
Brightness / Contrast Hotkey and - button
4
Menu button
Control Button
Summary of Contents for E153FPTc
Page 14: ...14 4 4 Panel Specification 4 4 1 Display Characteristics For HSD panel For CPT panel ...
Page 16: ...16 For CPT panel ...
Page 18: ...18 5 Block Diagram 5 1 Exploded View ...
Page 21: ...21 5 3 Electrical Block Diagram 5 3 1 Main Board ...
Page 27: ...27 The end The angle between CCFL line and vertical direction should be 30 40 degree ...
Page 33: ...DELL E153FPTc 33 7 2 Power Board ...
Page 34: ...DELL E153FPTc 34 ...
Page 35: ...DELL E153FPTc 35 8 PCB Layout 8 1 Main Board ...
Page 36: ...DELL E153FPTc 36 8 2 Inverter Power Board ...
Page 37: ...DELL E153FPTc 37 ...
Page 48: ...DELL E153FPTc 48 b Click the Select Chip button and choose the type you are going to program ...
Page 50: ...DELL E153FPTc 50 d Select the communication Setting Port Name e Click the ConNect button ...
Page 67: ...DELL E153FPTc 67 15 Definition Of Pixel Defects 15 1 CLAA150XP 01 ...


