7
3.3 Adjusting the Picture
1.
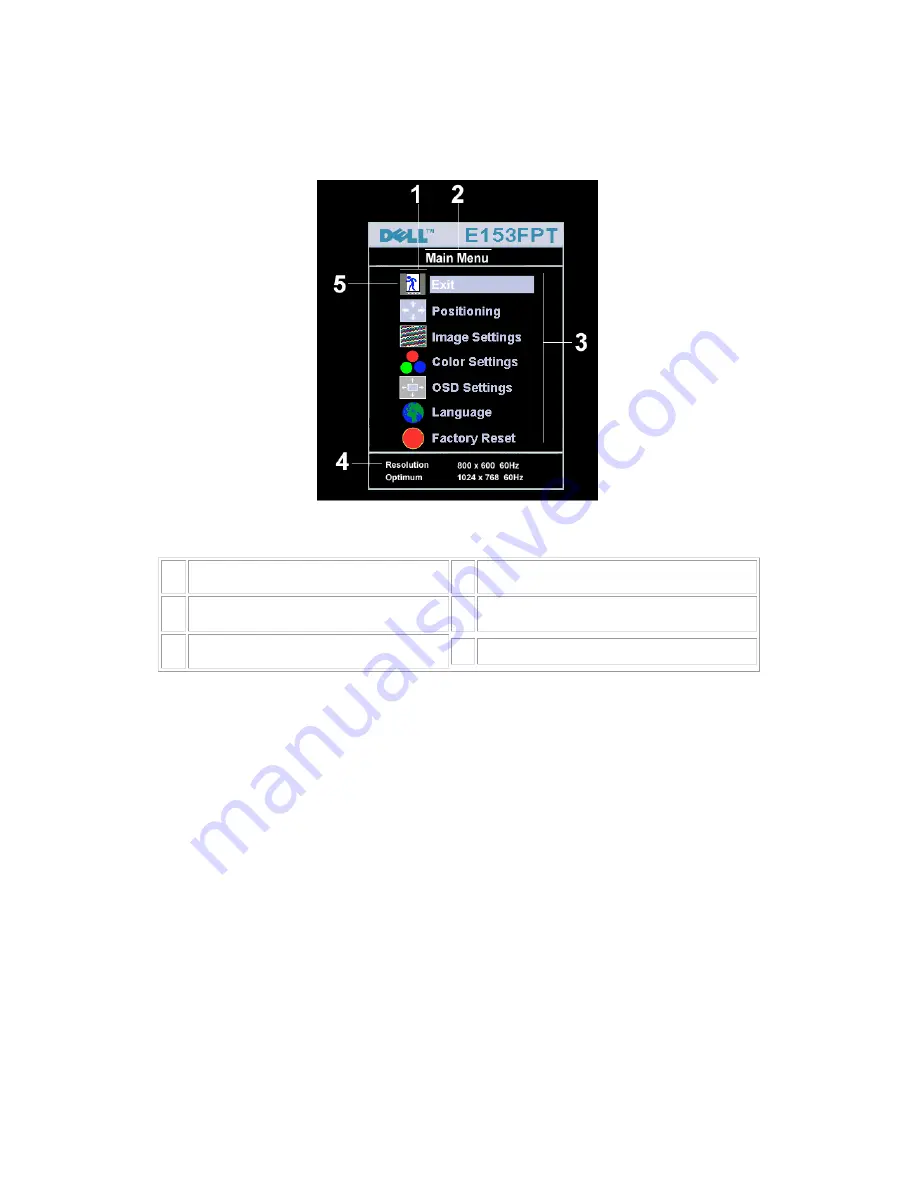
With the menu off, push the 'MENU' button to open the OSD system and display the main features menu.
1
Function icons
4
Resolution
2
Main Menu
5
Menu icon
3
Sub-Menu name
2.
Push the - and + buttons to move between the function icons. As you move from one icon to another, the
function name is highlighted to reflect the function or group of functions (sub-menus) represented by that
icon. See the table below for a complete list of all the functions available for the monitor.
3.
Push the 'MENU' button once to activate the highlighted function; Push -/+ to select the desired parameter,
push menu to enter the slide bar
then use the - and + buttons, according to the indicators on the menu, to make your changes.
4.
Push the 'Menu' button once to return to the main menu to select another function or push the 'Menu'
button two or three times to exit from the OSD.
Summary of Contents for E153FPTc
Page 14: ...14 4 4 Panel Specification 4 4 1 Display Characteristics For HSD panel For CPT panel ...
Page 16: ...16 For CPT panel ...
Page 18: ...18 5 Block Diagram 5 1 Exploded View ...
Page 21: ...21 5 3 Electrical Block Diagram 5 3 1 Main Board ...
Page 27: ...27 The end The angle between CCFL line and vertical direction should be 30 40 degree ...
Page 33: ...DELL E153FPTc 33 7 2 Power Board ...
Page 34: ...DELL E153FPTc 34 ...
Page 35: ...DELL E153FPTc 35 8 PCB Layout 8 1 Main Board ...
Page 36: ...DELL E153FPTc 36 8 2 Inverter Power Board ...
Page 37: ...DELL E153FPTc 37 ...
Page 48: ...DELL E153FPTc 48 b Click the Select Chip button and choose the type you are going to program ...
Page 50: ...DELL E153FPTc 50 d Select the communication Setting Port Name e Click the ConNect button ...
Page 67: ...DELL E153FPTc 67 15 Definition Of Pixel Defects 15 1 CLAA150XP 01 ...


