


Removing and Replacing Parts
4-27
5HPRYH WKH PRXQWLQJ EUDFNHW IURP WKH EDFN RI WKH V\VWHP ERDUG
VHH )LJXUH
)LJXUH %UDFNHW 5HPRYDO
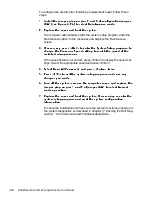
To install a replacement system board, install the guide bracket assembly
for the SEC cartridge. The assembly is keyed for correct insertion (see
Figure 4-24). Then install the SEC cartridge and heat sink assembly. Transfer
the DIMMs to the new system board.
When installing a replacement system board, angle the back of the board
downward and carefully align the connectors on the back edge of the board
with the cutouts in the I/O gasket (see Figure 4-23). When properly aligned,
the board connectors slide into the I/O gasket as you seat the board, lowering
it into position in the chassis.Replace the three screws and the system-board
mounting screw.
NOTE: The system-board mounting screw pulls the system board against the
I/O gasket to prevent EMI leakage.
After installing the replacement system board, replace the expansion cards
that you removed from the old system board.
When reconnecting the cables to a system board with integrated sound, be
sure to connect the CD-ROM drive audio cable to the connector nearest the
back edge of the system board. The middle audio connector is used with a
modem.
system board
system-board
mounting bracket
1.
2.
Summary of Contents for Dimension XPS R Series
Page 1: ...ZZZ GHOO FRP HOO LPHQVLRQ 36 5 6 VWHPV 6 59 0 18 ...
Page 7: ...ix ...
Page 16: ...1 8 Dell Dimension XPS Rxxx Systems Service Manual LJXUH 3RZHU DEOHV P1 P7 P2 P3 P6 P5 P4 ...
Page 30: ...1 22 Dell Dimension XPS Rxxx Systems Service Manual ...
Page 38: ...2 8 Dell Dimension XPS Rxxx Systems Service Manual ...
Page 44: ...3 6 Dell Dimension XPS Rxxx Systems Service Manual ...


