


3. Remove the
.
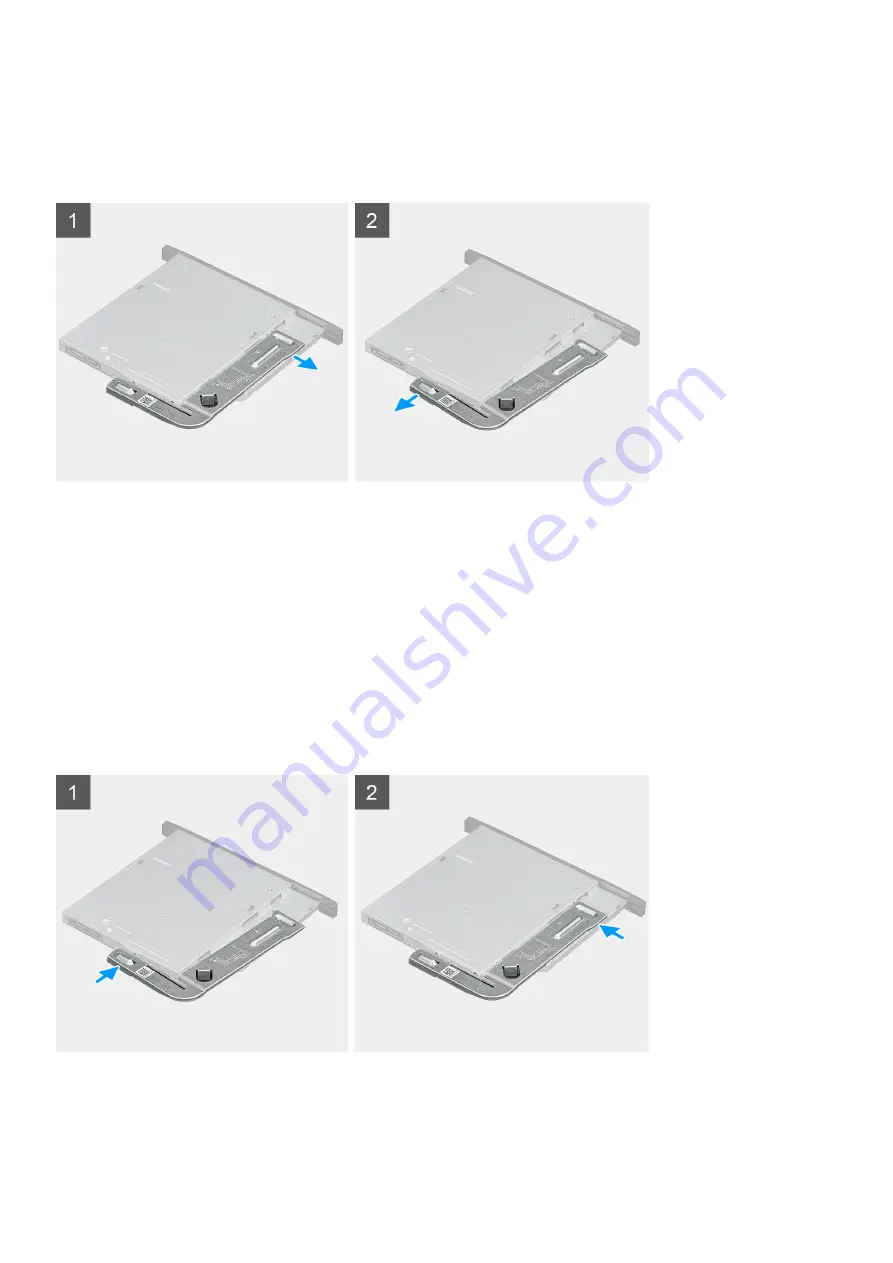
About this task
The following images indicate the location of the slim-ODD bracket and provide a visual representation of the removal
procedure.
Steps
1. Pry the slim-ODD bracket to release it from the slot on the ODD.
2. Remove the slim-ODD bracket off the ODD.
Installing the slim-ODD bracket
Prerequisites
If you are replacing a component, remove the existing component before performing the installation procedure.
About this task
The following images indicate the location of the slim-ODD bracket and provide a visual representation of the installation
procedure.
Steps
1. Align and place the slim-ODD bracket on the ODD slots.
2. Snap the slim-ODD bracket into the slim ODD.
52
Removing and installing components
Summary of Contents for D31M
Page 6: ...Chapter 6 Getting help and contacting Dell 123 6 Contents ...
Page 55: ...Removing and installing components 55 ...
Page 58: ...58 Removing and installing components ...
Page 96: ...96 Removing and installing components ...
Page 100: ...100 Removing and installing components ...


