background image


Docking 

 
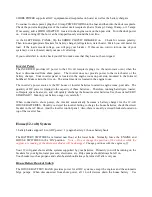
During docking, use the FLYBRIDGE HELM


for greater visibility to the stern.  Have your crew make ready 

the lines and fenders and give clear instructions on how you will be docking.  Often times your crew will 
need to step off from the swim step with the stern line.  Another crew member will need to be at the bow or 
mid-ships to hand over the next lines. 


Fueling Up 


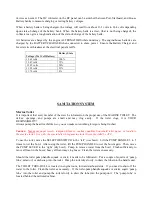
OPEN FILLER CAP(S) located  midships on both sides


with a DECK FITTING KEY  which is kept in 

forward galley drawer. 
 

MAKE SURE YOU HAVE THE RIGHT FUEL!   DIESEL! DIESEL! DIESEL!  MAKE SURE IT IS 

GOING INTO THE RIGHT DECK FILL!  

DOUBLE-CHECK!


Before pumping, have an oil/fuel sorbs handy to soak up spilled fuel.  You should have a rough idea of the 
number of gallons you will need by the engine hour indicator.  Also periodically have someone turn on the 
key to watch the fuel gauge.   


Place the DIESEL  nozzle into the tank opening, pump slowly and evenly, and note the sound of the fuel 
flow.  Pumping too fast may not allow enough time for air to escape, which may result in spouting from the 
tank opening.  As the tank fills, the sound will rise in pitch or gurgle.  Pay attention to the TANK 
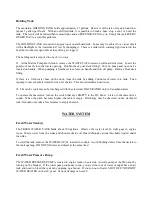
OVERFLOW VENT


on the outside of the hull near the tank opening.  The sound may indicate that the tank 

is nearly full.  Top off carefully, and be prepared to catch spilled fuel. Spillage may result in a nasty fine 
from law enforcement. 
 
 Replace each tank cap.  Turn on blower before starting engines. 

Caution -- Clean up splatter and spillage 

immediately for environmental and health reasons.  Wash hands with soap and water thoroughly.


BOAT ELECTRICAL 

The electrical system is divided into two distribution systems: 110-volt AC and 12-volt DC

 
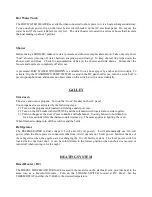
The systems are controlled from the AC  ELECTRICAL PANEL located  in the salon at the helm,  the DC 
AUXILIARY PANEL located  in the same location and is the top portion.  The BATTERY SWITCHES 
FOUND  near floor by helm.   When not connected to shore power, batteries are providing all power.  
Therefore, monitor the use of onboard electricity carefully with your volt meter located in DC panel and turn 
off electrical devices that are not needed. 
 
Most breakers are labeled by colored dots.  Green signifies “usually on”.  Red is “usually off”  Blue dots are 
water pressure or water-related like pumps.  Yellow signifies electronics or items to use cautiously.  No dots 
are breakers signify irregular use or use with discretion.  


110-Volt AC System 


Summary of Contents for Shani II

Page 1: ...the Pacific Northwest You won t find another Grand Banks sedan like this one with the custom framed structure over the aft deck making the dinghy launch very easy and keeping it stowed out of your way We trust this manual will help you become familiar with the boat If you have questions about the boat or about places to visit please do not hesitate to ask the AYC staff ...

Page 2: ...Electrical A C Shore Systems Inverter D C House Systems Batteries Sanitation Systems Marine Toilet Holding Tank Y Valve Water Systems Fresh Water Tanks Fresh Water Pump Hot Water Shower Galley Stove Oven Refrigeration Ice Maker Heating Systems Diesel Heater DC Built in Cabin Heaters AC Engine generated Heat DC Electronics ...

Page 3: ... oil level is below the way mark Please use a paper towel or oil rag not the dish towels Check the general condition of the BELTS HOSES and FUEL LINES Ensure the valve on each RAW WATER THRU HULL is in the open position lever in line with valve Observe the glass of each RAW WATER STRAINER for debris If necessary close the seacock open the strainer cover clean the strainer and reassemble Remember t...

Page 4: ...clean re assemble and reopen the raw water intake valve seacock Restart the engine and re check water flow from the exhaust If water is not flowing properly the RAW WATER PUMP may need to be serviced Seek help Shut Down Before shutting down allow the engines idle for about 5 minutes to cool them gradually and uniformly The time engaged in preparing to dock the boat is usually sufficient Ensure eac...

Page 5: ... in pitch or gurgle Pay attention to the TANK OVERFLOW VENT on the outside of the hull near the tank opening The sound may indicate that the tank is nearly full Top off carefully and be prepared to catch spilled fuel Spillage may result in a nasty fine from law enforcement Replace each tank cap Turn on blower before starting engines Caution Clean up splatter and spillage immediately for environmen...

Page 6: ...use or inverter batteries located in engine room port side The quantity of DC power is limited to the capacity of these batteries Therefore running hair dryers toaster coffeepots space heater etc and will quickly discharge the house inverter batteries Use these items VERY SPARINGLY Monitor your battery usage very carefully When connected to shore power the inverter automatically becomes a battery ...

Page 7: ...it is YOUR RESONSIBILITY Always pump the head for children so you can make sure nothing foreign is being flushed Caution Never put paper towels tampons Kleenex sanitary napkins household toilet paper or food into the marine toilet Use only the special dissolving marine toilet tissue provided by AYC To use the toilet move the SELECTOR SWITCH to the left wet bowl Lift the PUMP HANDLE 3 to 5 times to...

Page 8: ...f water into tank Then repump to leave the tank rinsed for the next charter This also eliminates head odors 2 The tank s contents can be discharged with the electronic MACERATOR only in Canadian waters To operate the macerator turn on the switch that says EMPTY in the DC Panel Listen to the macerator s sound When the pitch becomes higher the tank is empty Discharge may be observed on the starboard...

Page 9: ... propane Turn on the stove breaker on the AC panel Your propane stove is activated by the following steps 1 Turn on the propane tank located on flybridge under port seat 2 Turn on the DC breaker labeled STOVE and the solenoid switch located above sink in galley 3 Turn on the gas at the stove Press in knob and light burner You might need to hold knob in for a few seconds while the thermo coupler wa...

Page 10: ...h Sounder There are 2 DEPTH SOUNDERS one at lower and the upper helm To activate the upper DEPTH SOUNDER press the switch bridge instrument panel Set the scale shallow alarm and deep alarm as desired The sounder should provide reliable readings in shallow waters If in doubt switch it off then turn it back on to reset sounder If your reading is blinking it is a FALSE reading False readings can occu...

Page 11: ...Turn on the WINDLASS SWITCH and as the boat moves toward the anchor press the up control to take up slack line Give the windlass short rests as you are pulling it up Place yourself in position to guide the anchor onto the roller As the anchor rises be careful not to allow it to swing against the hull Wash it down if you have a wash down pump before it goes into anchor locker Reconnect the keeper b...

Page 12: ...oy the dinghy clip the snap clip of the DINGHY ROPE to the top of the rail near the oarlock and route the line through the pulley block on the bridge ladder then the pulley block on the line Holding the dinghy and the line detach the STANDOFF BARS and lower the dinghy with the line into the water noting that the dinghy gets heavier as it nears the water When towing your dinghy always keep it tight...

Page 13: ...flares and safety equipment are located in the cockpit is equipped with an AUTOMATIC BILGE PUMP The master switch is located on the electrical panel Normally the switch will be left in the AUTO position You may occasionally hear the pump operate due to condensation and water from the shaft log accumulating in the bilge The ENGINE SPARES BOX is stowed in the engine room starboard side This includes...

Reviews: