background image

42 Sequencer

Dave Smith Instruments

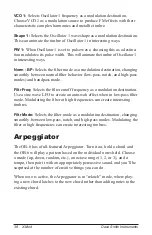
Most factory programs have a sequence associated with them. Recall a 

program and press the Sequencer’s 

play


button to hear its associated sequence.

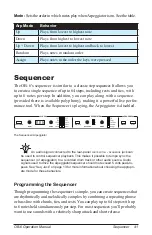
To program a note sequence: 

1.  Press the 

record

 button.

2.  Perform the sequence on the keyboard. The display indicates the 

current step as you play. 

When recording a chord as a step, as long as you continue to hold at least one 

note down, you can keep adding notes to the chord/step, and even use the 

transpose


buttons to extend the keyboard range while doing it.

3.  To add a rest as you play, press the 

tens

/

increment

 button for that step, 

then continue playing. 

4.  To add a “tie” that extends the length of a note, continue to hold down 

the note(s) and press the 

tens

/

increment

 button repeatedly to extend the 

note the number of steps you want.

5.  To step back a step in the sequence, press the 

bank


select

/

decrement


button. This will step back to the previous step so that you can rerecord 

it. (Stepping back erases the step.)

6.  When you’re done, press 

play

 to listen to your sequence. 

7.  To save the sequence, save the program and they are saved together. 

(See “Saving a Program” on page 5.)

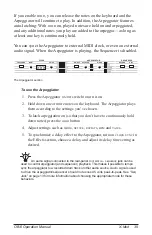
If you want to play live along with the sequencer, be sure to leave voices avail-

able. In other words, don’t play 6-note chords for every step in the sequence!

To play a sequence:

1.  Press 

play

. The sequence plays back at the current BPM setting. 

2.  To stop playback, press 

play


again

.

Alternatively, you can start and stop sequencer playback using a footswitch 

connected to the rear-panel 

seq

 jack or using MIDI start/stop messages sent from a 

DAW or other MIDI device. See “Seq Jack” on page 13 for more information. 

Summary of Contents for ob-6

Page 1: ...Operation Manual...

Page 2: ......

Page 3: ...Operation Manual Version 1 0 March 2016 Dave Smith Instruments LLC 1527 Stockton Street 3rd Floor San Francisco CA 94133 USA 2016 Dave Smith Instruments LLC www davesmithinstruments com...

Page 4: ...ept any interference received including interference that may cause undesired operation This Class B digital apparatus meets all requirements of the Canadian Interference Causing Equipment Regulations...

Page 5: ...ng a Program from Scratch 4 Live Panel Mode 4 Saving a Program 5 Canceling Save 6 Moving to the Next Level 7 Connections 8 Global Settings 10 Globals Top Row 11 Globals Bottom Row 12 Oscillators 15 Os...

Page 6: ...47 Unison 48 Using Chord Memory 49 Write 51 Canceling Save 52 Comparing Before You Save 52 Globals 53 Manual 54 Pitch and Mod Wheels 55 Pitch Wheel 55 Modulation Wheel 56 Aftertouch 56 Exporting Prog...

Page 7: ...63 Appendix B Troubleshooting and Support 67 Troubleshooting 67 Contacting Technical Support 69 Warranty Repair 70 Appendix C MIDI Implementation 71 MIDI Messages 72 NRPN Messages 76 Control NRPN Data...

Page 8: ...eumann Bob Oxley Robert Rich Matia Simovich James Terris Mitch Thomas Taiho Yamada Lorenz Rhode The DSI Crew Fabien Cesari Bob Coover Carson Day Chris Hector Tony Karavidas Mark Kono Justin Labreque A...

Page 9: ...al Tom and I are again making the instruments that we love After I reacquired the Sequential brand and released the Prophet 6 and saw how much people liked it the DSI gang and I thought it would be fu...

Page 10: ......

Page 11: ...ETUNE VCO 1 VCO 2 LOUDNESS ENVELOPE FILTER ENVELOPE VCO 1 VCO 2 NOISE RESONANCE ATTACK DECAY SUSTAIN RELEASE AMOUNT TRACK HALF FULL VELOCITY ATTACK DECAY SUSTAIN RELEASE AMOUNT VELOCITY BP FREQUENCY N...

Page 12: ...e bank tens and program selector buttons to select and recall programs To choose a program 1 Press a program selector button 0 9 to specify the ones digit of the program 2 Hold down the tens button th...

Page 13: ...nt panel editing an existing program is simple just turn a knob and listen to its effect Keep turning knobs and pressing buttons and if you like what you ve created save the program See Saving a Progr...

Page 14: ...tinue editing press the write button It stops flashing and saving is canceled When you re editing a preset the OB 6 has a convenient way of indicating the programmed saved value for any knob parameter...

Page 15: ...nel mode that the current settings of the OB 6 knobs and switches may be such that no sound is produced This could be because the Mixer levels are all set to zero or some other reason See Appendix B T...

Page 16: ...ogram selector button to specify the hundreds bank of the program You can only save to Banks 0 4 3 Hold down the tens button then press a program selector button 0 9 to specify the tens digit of the p...

Page 17: ...tion with the program buttons The sound is saved 6 Alternatively if you want to cancel saving and continue editing press the write button It stops flashing and saving is canceled Moving to the Next Le...

Page 18: ...h Sequence Accepts a momentary normally open or normally closed footswitch to turn the sequencer or arpeggiator on and off Alternatively an audio signal connected to this jack can be used to either co...

Page 19: ...er Accepts a standard expression pedal that has a variable resistor on a TRS tip ring sleeve inch phone plug Once connected you can use the pedal to control the cutoff frequency of the filter to add e...

Page 20: ...tive The yellow LED indicates that the lower row is active GLOBALS The Globals button 1 0 2 3 4 5 6 Local Ctrl Seq Jack Pot Mode Sustain Alt Tuning Vel Response AT Response S Transpose Master Tune MID...

Page 21: ...0 is centered Steps in semitones up to one octave up 12 or down 12 1 Master Tune 50 50 Master Fine Tune control 0 centered Steps in cents as much as a quarter tone up 50 or down 50 2 MIDI Channel All...

Page 22: ...nges are received via MIDI As with transmission NRPNs are the preferred method 7 MIDI Control Off On When On the synth will respond to MIDI controllers including Pitch Wheel Mod Wheel Pedal Volume 8 M...

Page 23: ...Relative Passthru Jump The rotary controls on the front panel are a mixture of endless rotary encoders and potenti ometers or pots The pots are identifiable by their lined knobs and the fact that the...

Page 24: ...that can be used to emulate ethnic instruments or in other creative ways See Appendix A Alternative Tunings on page 63 for a description of each tuning Additional tunings can be imported into the OB...

Page 25: ...xt as you turn the shape knob This provides a variety of in between waveshapes The oscillators on the OB 6 are extremely stable To emulate the random pitch drift and oscillator instability of vintage...

Page 26: ...transition from one shape to the next as you turn the shape knob This provides a variety of in between waveshapes Pulse Width Changes the width of the pulse wave from a square wave when the pulse widt...

Page 27: ...a low frequency oscillator essentially providing another LFO source for modulation using X Mod The frequency detune shape and pulse width controls still apply and will affect the character of any low...

Page 28: ...ge tone to what is otherwise a very stable modern instrument detune amount is adjustable from subtle to wildly out of tune When unison is enabled detune detunes the unison voices by a fixed amount Usi...

Page 29: ...ath This gives you the option to overload things in interesting ways if you wish to do so If not try reducing the levels of the oscillators in the mixer section the env amount parameter in the Loudnes...

Page 30: ...s to notch to high pass operation allowing a blending of these modes Band pass operation is selected with the BP switch Each filter mode has its own characteristic sound and function Low pass passes f...

Page 31: ...s not self oscillate This is faithful to the original Oberheim SEM design High levels of resonance can sometimes cause the OB 6 outputs to clip if its sound generators are also set to high output in t...

Page 32: ...d stay open or closed by a fixed amount that wouldn t change over the duration of a sound That s not very interesting to listen to and it s not how instru ments behave in the real world In general sou...

Page 33: ...frequency If the amount is set to a positive value in low pass filter mode the harder you play the more the filter will open and the brighter the sound will be Conversely if the amount is set to a ne...

Page 34: ...such as a synth brass sound that has a slightly soft but bright attack 2 Repeatedly play a series of notes or chords on the keyboard so you can hear the effect of the adjustments as you follow the ste...

Page 35: ...begin immediately remain at its full volume for the duration of the note then end immediately when the note was released Again that s not very interesting sonically and it s not typi cally how instru...

Page 36: ...will be The sound will stay at this level for as long as a note is held on the keyboard Release Sets the release time of the envelope This controls how quickly a sound dies out after a note is releas...

Page 37: ...e OB 6 is analog The on off switch enables and disables both Effect A and Effect B using a true bypass ensuring a pure analog signal path Effects settings are saved individually with each program Time...

Page 38: ...modulator design Effect B Delay 1 bbd vintage bucket brigade emulation Delay 2 ddl classic standard digital delay Chorus CHO vintage chorus Flanger 1 FL1 vintage through zero flanger high resonance F...

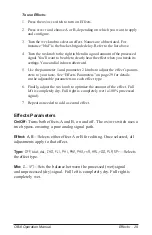
Page 39: ...am eters to your taste See Effects Parameters on page 29 for details on the adjustable parameters on each effect type 6 Finally adjust the mix knob to optimize the amount of the effect Full left is co...

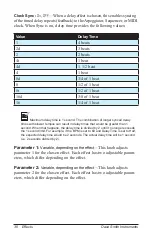
Page 40: ...tempos can result in delay times that would be greater than 1 second When that happens the delay time is divided by 2 until it no longer exceeds the 1 second limit For example if the BPM is set to 60...

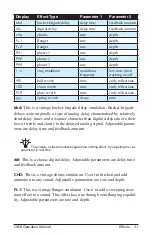
Page 41: ...et brigade delays were originally a type of analog delay characterized by relatively short delay times and a warmer character than digital delays due to their loss of treble and clarity in the delayed...

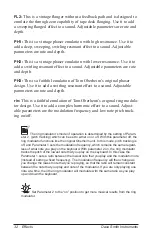
Page 42: ...are the modulation frequency and low note pitch track ing on off The ring modulator s mode of operation is determined by the setting of Param eter 2 pitch tracking which can be set to either on or of...

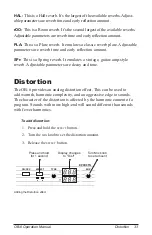
Page 43: ...rb It emulates a vintage guitar amp style reverb Adjustable parameters are decay and tone Distortion The OB 6 provides an analog distortion effect This can be used to add warmth harmonic complexity an...

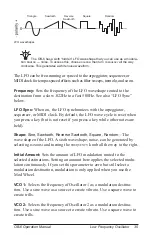
Page 44: ...reme effects LFO VCO 1 VCO 2 PULSE WIDTH AMP FILTR FREQ FILTR MODE INITIAL AMT LFO SYNC SHAPE FREQUENCY 1 2 SAWTOOTH SINE REV SAW RANDOM SQUARE The Low Frequency Oscillator Sine and Random waves are b...

Page 45: ...FO wave cycle is reset when you press a key but is not reset if you press a key while other notes are held Shape Sine Sawtooth Reverse Sawtooth Square Random The wave shape of the LFO A sixth waveshap...

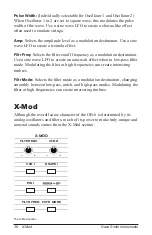
Page 46: ...on destination Use a sine wave LFO to create an auto wah effect when in low pass filter mode Modulating the filter at high frequencies can create interesting timbres Filtr Mode Selects the filter mode...

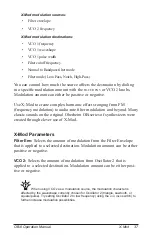
Page 47: ...ilter modulation and beyond Many classic sounds on the original Oberheim OB series of synthesizers were created through clever use of X Mod X Mod Parameters Filter Env Selects the amount of modulation...

Page 48: ...ects the filter cutoff frequency as a modulation destination Use a sine wave LFO to create an auto wah effect when in low pass filter mode Modulating the filter at high frequencies can create interest...

Page 49: ...o turn it on 2 Hold down one or more notes on the keyboard The Arpeggiator plays them according to the settings you ve chosen 3 To latch arpeggiation on so that you don t have to continuously hold dow...

Page 50: ...BPM setting has no effect Value Selects a basic note value relative to the BPM See the table below Name Tempo Timing Division Half BPM 2 Half note Qtr BPM Quarter note 8th BPM x 2 Eighth note 8th D B...

Page 51: ...d ARPEGGIATOR SEQUENCER CLOCK OCTAVES VALUE MODE TAP TEMPO BPM ON OFF PLAY RECORD The Sequencer Arpeggiator An audio signal connected to the rear panel footswitch sequence jack can be used to control...

Page 52: ...s the tens increment button repeatedly to extend the note the number of steps you want 5 To step back a step in the sequence press the bank select decrement button This will step back to the previous...

Page 53: ...Parameters Here are the controls and parameters used when interacting with the sequencer Record On Off This switch turns sequencer recording on and off Play On Off This switch turns sequencer playbac...

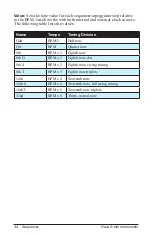
Page 54: ...e following table lists the values Name Tempo Timing Division Half BPM 2 Half note Qtr BPM Quarter note 8th BPM x 2 Eighth note 8th D BPM x 2 Eighth note dot 8th S BPM x 2 Eighth note swing timing 8th...

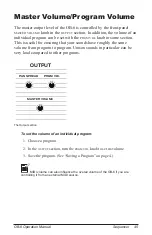
Page 55: ...g that your sounds have roughly the same volume from program to program Unison sounds in particular can be very loud compared to other programs PAN SPREAD PRGM VOL MASTER VOLUME OUTPUT The Output sect...

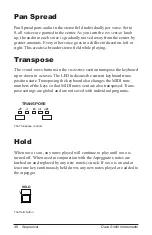
Page 56: ...transpose the keyboard up or down in octaves The LED indicates the current keyboard trans position state Transposing the keyboard also changes the MIDI note numbers of the keys so that MIDI notes sent...

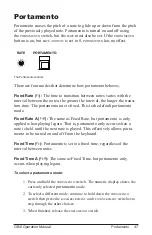
Page 57: ...his is the default portamento mode Fixed Rate A FRA The same as Fixed Rate but portamento is only applied when playing legato That is portamento only occurs when a note is held until the next note is...

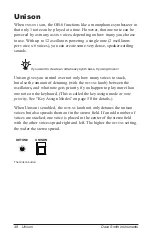
Page 58: ...gives you control over not only how many voices to stack but also the amount of detuning with the detune knob between the oscillators and what note gets priority if you happen to play more than one n...

Page 59: ...ful chord stabs and hits If you save a program that uses chord memory the chord is saved with the program CHD will then appear as a choice if you step through voice stacking options using the banks de...

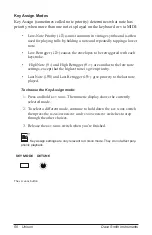
Page 60: ...Retrigger Hir are similar to the low note settings except that the highest note is given priority Last Note LAS and Last Retrigger LAr give priority to the last note played To choose the Key Assign mo...

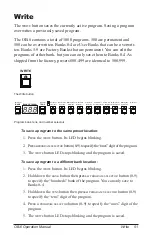
Page 61: ...Decrement Master Tune MIDI Channel MIDI Clock Clock Port Param Xmit Param Rcv MIDI Control MIDI SysEx MIDI Out Program bank tens and number selectors To save a program to the same preset location 1 Pr...

Page 62: ...ou overwrite it 1 Get ready to save by pressing the write button It starts flashing 2 Press the global button Both LEDs on the button light up indicating compare mode 3 Use the program buttons to navi...

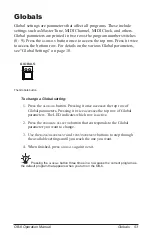
Page 63: ...Globals button To change a Global setting 1 Press the globals button Pressing it once accesses the top row of Global parameters Pressing it twice accesses the top row of Global parameters The LED ind...

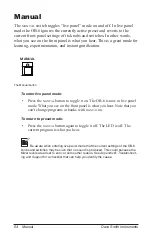
Page 64: ...de Press the manual button to toggle it on The OB 6 is now in live panel mode What you see on the front panel is what you hear Note that you can t change programs or banks with manual on To return to...

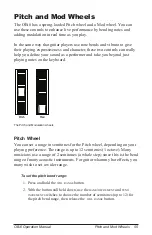
Page 65: ...ust playing notes on the keyboard Pitch Mod The Pitch and Modulation wheels Pitch Wheel You can set a range in semitones for the Pitch wheel depending on your playing preference The range is up to 12...

Page 66: ...on destinations in the low frequency oscillator section This adds vibrato when you push the mod wheel forward Set the initial amt knob to zero to apply vibrato only when using the Mod wheel Aftertouch...

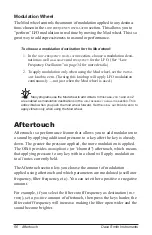
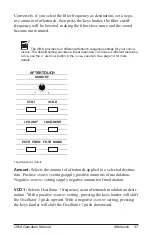
Page 67: ...he at response button in the globals section See page 14 for more details FILTR FREQ VCO 1 VCO 2 LFO AMT LOUDNESS FILTR MODE AMOUNT AFTERTOUCH The Aftertouch controls Amount Selects the amount of afte...

Page 68: ...ness Selects Amplitude as an aftertouch modulation destination With a positive amount setting pressing the keys harder will increase the volume of a sound With a negative amount setting pressing the k...

Page 69: ...ers then press program selector 8 to select the midi sysex command 2 Use the bank decrement and tens increment buttons to select the appropriate MIDI port MIDI MID or USB usb 3 Press globals a second...

Page 70: ...veral minutes and come to its normal operating temperature before doing so Repeat the calibration procedure as needed over the next few days of use The OB 6 learns the range of temperatures at your lo...

Page 71: ...ld down the manual button and press 7 To calibrate the Pitch wheel s center position With the Pitch wheel centered hold down the manual button and press 8 To calibrate the Pitch and Mod wheel s high p...

Page 72: ...the same time and transmit the same data USB Notes Under Mac OS X OB 6 Keyboard will appear as a MIDI port when connected via USB and can be configured using the Mac s Audio MIDI Setup utility typical...

Page 73: ...efault Western tuning based on the twelfth root of two 1 Harmonic Series MIDI notes 36 95 reflect harmonics 2 through 60 based on the funda mental of A 27 5 Hz The low C on a standard 5 octave keyboar...

Page 74: ...a very narrow palate of good chords to choose from C 1 1 261 625 Hz 1 1 256 243 9 8 32 27 81 64 4 3 729 512 3 2 128 81 27 16 16 9 243 128 8 Just Intonation in A with 7 limit Tritone at D A rather vani...

Page 75: ...a creative way to incorporate the inevitable line hum into his scale Bb B 1 1 60 Hz 1 1 1 1 9 8 7 6 5 4 4 3 11 8 3 2 3 2 7 4 7 4 15 8 13 Yamaha Just Major C When Yamaha decided to put preset microtuni...

Page 76: ...d organs to perform glissando like passages G 1 1 392 Hz MIDI note 67 1 1 81 80 33 32 21 20 16 15 12 11 11 10 10 9 9 8 8 7 7 6 32 27 6 5 11 9 5 4 14 11 9 7 21 16 4 3 27 20 11 8 7 5 10 7 16 11 40 27 3...

Page 77: ...zero values These parameters include VCO 1 2 pitch VCO 1 2 mixer levels Program volume Master volume Set the Loudness Envelope amount to max Use a fast envelope with Sustain at max Set VCO 1 2 to saw...

Page 78: ...MIDI System Exclusive data is not transmitted received Make sure that the MIDI SysEx setting in the Global settings is set to usb or midi depending on which you are using to transmit or receive MIDI...

Page 79: ...ts to 0 another countdown will begin between the main display and the FX Parameter 1 display Do not power down until this countdown has finished The OB 6 will restart itself when it is done Contacting...

Page 80: ...ermine the best course of action for getting your OB 6 repaired For your own protec tion as well as ours please do not return any product to Dave Smith Instruments without a return authorization RA nu...

Page 81: ...t not sent Slave Thru i 0 MIDI Clock is received and passed to MIDI Out In No Start Stop n55 Receives MIDI Clock but does not respond to MIDI Start or Stop command When set to in or slave thru if no M...

Page 82: ...I data will be transmit ted MIDI or USB MIDI Messages System Real Time Messages Status Description 1111 1000 MIDI Timing Clock Received Channel Messages Status Second Third Description 1000 nnnn 0kkkk...

Page 83: ...n 123 0vvvvvvv All Notes Off Clear all MIDI notes 1011 nnnn 121 0vvvvvvv Reset All Controllers Clears all MIDI controllers to 0 MIDI volume to maximum See sections below for additional Continuous Cont...

Page 84: ...2 1011 nnnn 0000 0111 0vvvvvvv Volume When assigned to Pedal 1 or Pedal 2 1011 nnnn 0100 1010 0vvvvvvv Brightness When assigned to Pedal 1 or Pedal 2 1011 nnnn 0010 0000 0vvvvvvv Bank Select 0 9 1011...

Page 85: ...v Sustain 46 VCA Env Release 47 Filter Env Amt 50 Filter Env Attack 51 Filter Env Decay 52 Filter Env Sustain 53 Filter Env Release 58 Arp On Off 59 Arp Mode 60 Arp Octave 62 Arp Clock Division 64 Dam...

Page 86: ...MSB 0010 0110 NRPN parameter value LSB CC 0vvv vvvv Parameter value LSB The parameter number can be found in the two tables below one for Global parameters and the other for Program parameters The pa...

Page 87: ...g NRPN number when sent received individually NRPN Range Description 1024 0 100 Master Fine Tune 1025 0 24 Master Coarse Tune 1026 0 16 MIDI Channel 0 All 1027 0 3 MIDI Clock Mode 0 Off 1 Master 2 Sla...

Page 88: ...Normal Bandpass 62 0 127 Voice Volume 63 0 127 Pan Spread 64 0 127 Distortion Amt 66 0 127 VCA Env Amt 67 0 127 VCA Env Attack 68 0 127 VCA Env Decay NRPN Value Description 69 0 127 VCA Env Sustain 7...

Page 89: ...6 255 32 125 Name 0 19 256 319 12 108 Seq Step 1 64 Note 1 320 383 0 127 Seq Step 1 64 Vel 1 384 447 12 108 Seq Step 1 64 Note 2 NRPN Value Description 448 511 0 127 Seq Step 1 64 Vel 2 512 575 12 108...

Page 90: ...el is set to 1 16 0vvvvvvv must match unless MIDI Channel ALL always responds if 0vvvvvvv 0111 1111 0000 0110 Inquiry Message 0000 0001 Inquiry Request 1111 0111 End of Exclusive EOX The OB 6 responds...

Page 91: ...p Status Description 1111 0000 System Exclusive SysEx 0000 0001 DSI ID 0010 1110 OB 6 ID 0000 0110 Request Program Edit Buffer Transmit 1111 0111 End of Exclusive EOX The OB 6 will respond by sending...

Page 92: ...scription 1111 0000 System Exclusive SysEx 0000 0001 DSI ID 0010 1110 OB 6 ID 0000 0011 Edit Buffer Data 0vvv vvvv 1024 bytes expanded to 1171 MIDI bytes in packed MS bit format 1111 0111 End of Exclu...

Page 93: ...a 1 A7 A6 A5 A4 A3 A2 A1 A0 1 00 G7 F7 E7 D7 C7 B7 A7 2 B7 B6 B5 B4 B3 B2 B1 B0 2 00 A6 A5 A4 A3 A2 A1 A0 3 C7 C6 C5 C4 C3 C2 C1 C0 3 00 B6 B5 B4 B3 B2 B1 B0 4 D7 D6 D5 D4 D3 D2 D1 D0 4 00 C6 C5 C4 C3...

Page 94: ...84 Appendix C MIDI Implementation Dave Smith Instruments...

Page 95: ......

Page 96: ...Dave Smith Instruments LLC 1527 Stockton Street 3rd Floor San Francisco CA 94133 USA www davesmithinstruments com DSI 10139R...

Reviews: