164
H-Class
Windows 2000 Driver and Port Installation (continued)
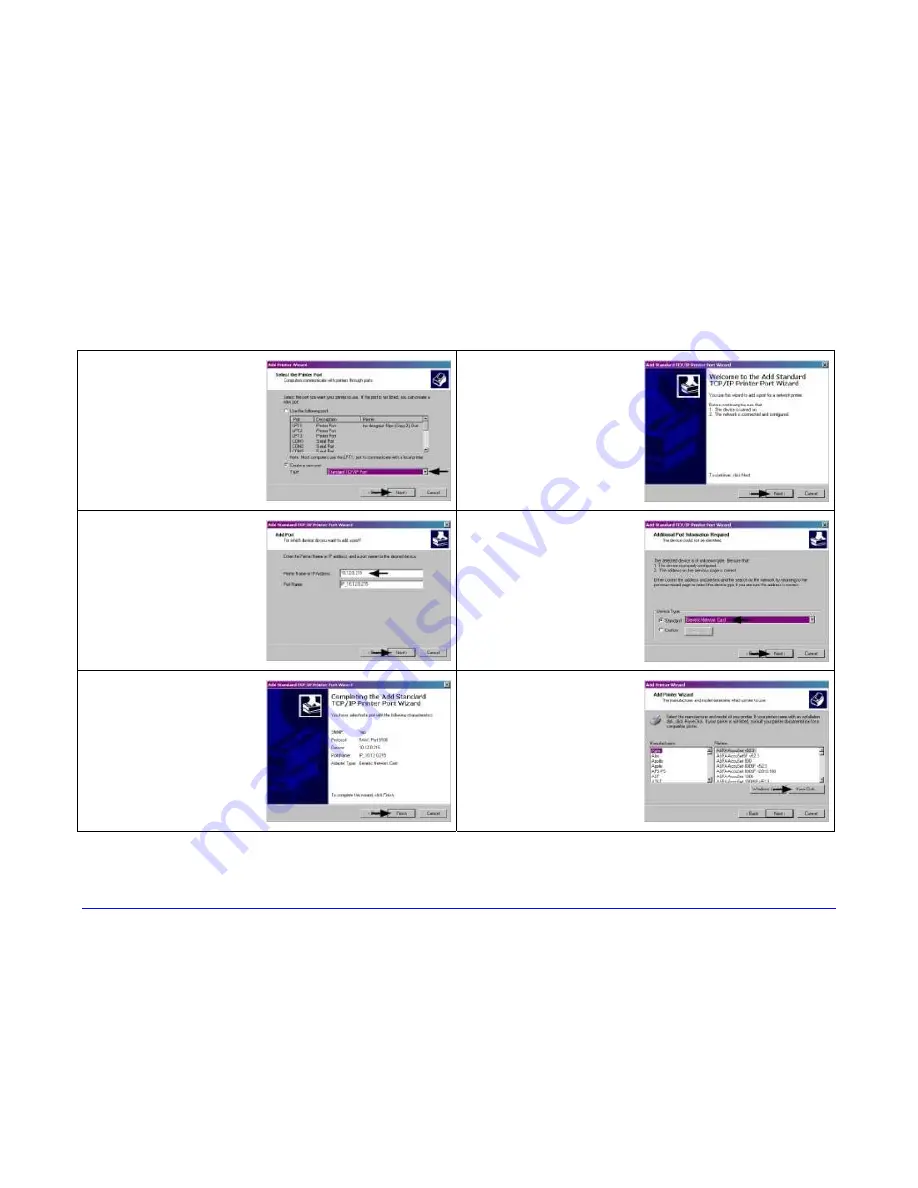
3
Select on ‘Create a
new port:’ and then
select ‘Standard
TCP/IP Port’ from
the drop down
menu. Click ‘Next’.
4
Click ‘Next’.
5
In the ‘Printer
Name or IP
Address:’ field
enter the IP
address of your
printer. The ‘Port
Name’ field does
not need to be
changed. When
finished click ‘Next’.
6
Ensure ‘Standard’ is
selected and then
click ‘Next’.
7
Confirm your
settings and then
click ‘Finish’.
8
Click on ‘Have
Disk’.
Summary of Contents for H-4212X
Page 1: ...Operator s Manual...
Page 2: ......
Page 5: ......
Page 40: ...30 H Class...
Page 84: ...74 H Class...
Page 144: ...134 H Class...
Page 148: ...138 H Class...
Page 156: ...146 H Class...
Page 160: ...150 H Class Network Status page TCP IP Configuration page...
Page 162: ...152 H Class...
Page 163: ...H Class 153 Printer Options Communications and Diagnostics pages...
Page 164: ...154 H Class Network Print Options page...
Page 165: ...H Class 155 Reset Network Parameters page Change Password page...
Page 166: ...156 H Class...
Page 180: ...170 H Class...
Page 186: ...176 H Class...


