10
Chapter 2 – Printer Setup
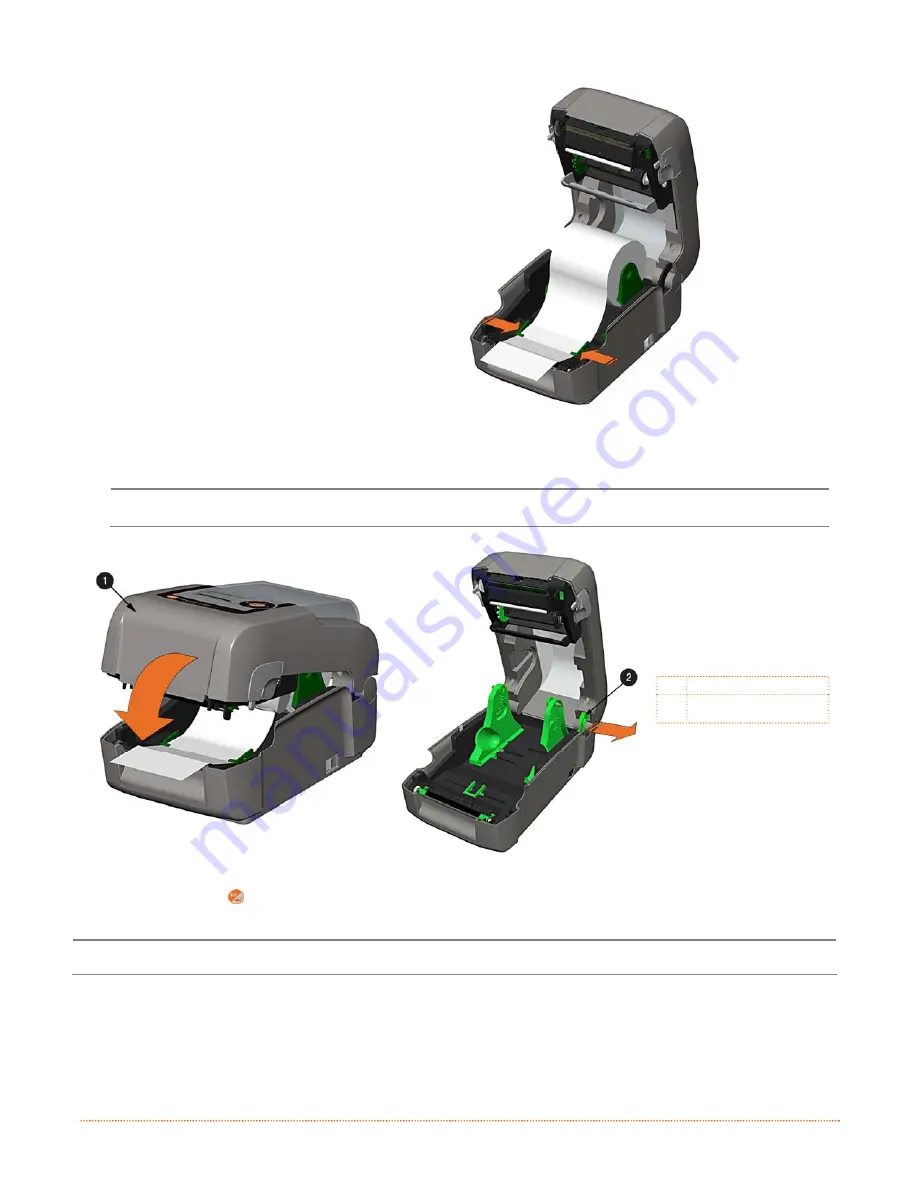
4) Pull out enough media to exit the front of
the printer. Adjust the Media Guides so
they are lightly touching the edge of the
media.
5) If using thermal transfer media (ribbon) proceed to Section 2.4 Loading Ribbon. Otherwise close
the printer’s Cover and press downward until latched. Pro
Pro+ models are equipped with a Cover Release Latch. Press outward on the latch to release cover.
312
Cover
Cover Release Latch
(Pro+ models only)
6) Press the
button to advance the media (if the Fault Light is lit, see Section 3.7.)
The printer is factory set to use gap media. If using another media type (for example, continuous
media), printer setup must be reconfigured; see Section 3.4
.
Summary of Contents for E-Class Mark III Professional+
Page 1: ...Operator s Manual Professional and Professional Models Professional Professional ...
Page 2: ......
Page 26: ...20 Chapter 2 Printer Setup ...
Page 68: ...62 Chapter 5 Maintenance Adjustments ...
Page 72: ...66 Chapter 6 Troubleshooting ...
Page 76: ...70 Appendix A Specifications ...
Page 84: ...78 Appendix B WLAN LAN Setup ...
Page 86: ...80 Appendix C Bluetooth Setup ...
Page 92: ......


