MX-U81 Hardware Guide
Setting Up the System
1-5
Datalogic S.r.l..
3. Mount the MX-U81 Processor and power supply in their desired positions as indicated in the mounting instruc-
tions (see “Processor Installation” on page 2-3). Make sure all vents have at least 1.5 inches (38.1 mm) of clear-
ance for sufficient ventilation. Be aware of USB camera connector cable length limits.
4.
Connect the I/O cable, optional monitor, and optional keyboard to the MX-U81 Processor. Connect the I/O cable
to the terminal block. When a new processor is powered on the first time, a monitor, keyboard, and mouse must be
connected to the processor to approve the license agreement.
5. Attach the appropriate lens for the application to the camera. Mount the MX-U81 camera, lighting, and optional
power supply. See “Mounting the Camera” on page 3-3.
NOTE: Do not leave the camera imager uncovered. When you remove the lens cap, you must replace it with a lens.
your MX-U81 system. Wiring specifications for all cables are described in “Cable Reference” on page 5-1.
8. Wire the MX-U81 camera’s strobe and trigger connections to the camera’s terminal blocks. See “Connecting the
9. Wire the MX-U81 Processor power connector to the optional power supply. Wire AC power to the power supply.
Connect the power supply plug to the processor connector. See “Power Supply Connection” on page 2-5.
10.Connect the cables from the MX-U81 terminal blocks to their cameras.
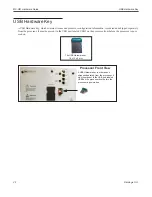
11.IMPORTANT: A USB Hardware key is ordered and shipped separately from the processor. It must be present in
12.Plug the power supplies into an appropriate
grounded
power source. To protect your system, we recommend using
a surge protector.
13.Turn on the MX-U81 Processor power switch. Turn on the camera power supply.
NOTE
: Default network IP addresses were assigned to the MX-U81 Processor and Cameras at the factory. You will prob-
ably not need to change them unless there is a conflict with other devices on your network.
14.Start the Impact Software program Vision Program Manager and click on the Settings tab, then the Camera system
object. Select the Assign tab and assign the desired camera.
15.Check your camera and lighting setup, calibrate the camera, configure your inspection parameters, then put the
camera online. For more information about using Impact software, refer to the Impact Reference Guide.
If your system does not work when you are finished with the setup, review the instructions and diagrams to make sure you
made all connections properly.
Please note that Datalogic cannot guarantee the performance of MX-U81 systems which have additional software
installed on them, including, but not limited to, anti-virus and firewall software. Datalogic recommends that MX-U81 sys-
tems remain disconnected from networks that access the Internet in order to minimize security risks. Datalogic will
attempt to support systems with antivirus software installed, but we cannot guarantee system performance.
Summary of Contents for MX-U81
Page 1: ...MX U81 Hardware Guide for Processor and Cameras Revision Date October 26 2017 ...
Page 4: ......
Page 26: ...Battery MX U81 Hardware Guide Datalogic S r l 2 10 ...
Page 33: ...MX U81 Hardware Guide U1xx Camera Connection 3 7 Datalogic S r l U1xx Terminal Connections ...
Page 52: ...JAI Camera MX U81 Hardware Guide Datalogic S r l 3 26 ...
Page 64: ...U1xx MX U81 Hardware Guide Datalogic S r l 5 4 ...


