background image

+44 (0) 1761 404870 [email protected] 

www.dartsystems.co.uk 

Dart Systems Ltd, Environment House, First Avenue, Westfield Industrial Estate, 
Radstock, Somerset BA3 4BS 


T E L E S C O P I C   P O L E   C A M E R A


–   U S E R   G U I D E  


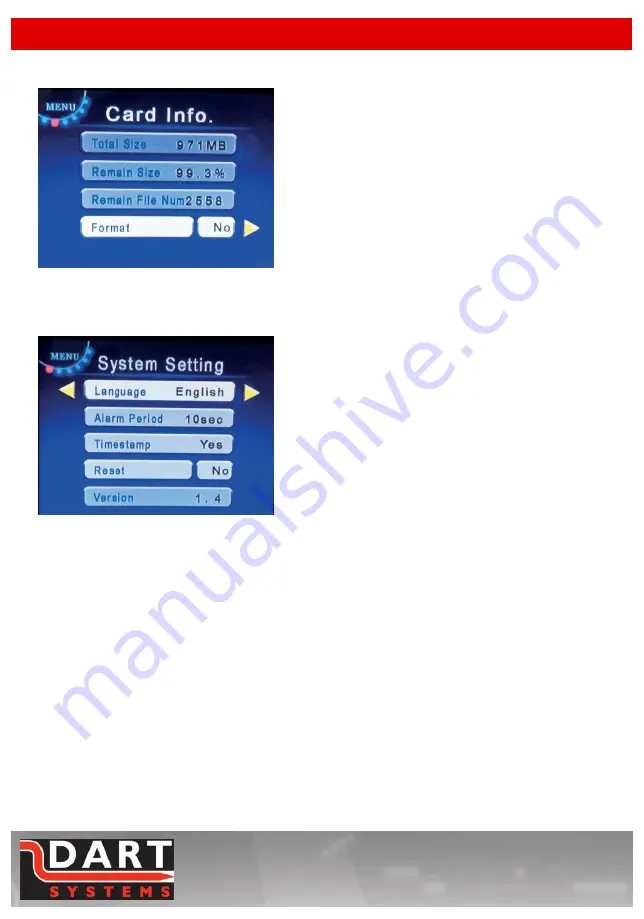
SD Card Settings:

 Screen 5 

Navigate and change the settings as per 
the above instructions. 

Size: Displays SD Card capacity.


Remain Size: SD Card memory available.


Remain File Num: Approx number of 
recorded files left on SD Card. Format: 
Format SD Card on recording.


System Settings:

 Screen 6 

Navigate and change the settings as per 
the above instructions. 

Language: Select language.


Alarm Period: Set the alarm time frame, 
set by motion detection. Time Stamp: Set 
time and date to appear on video and 
images. Reset: Reset to default settings.


Version: Software version number.


Summary of Contents for DS100

Page 1: ...artsystems co uk Dart Systems Ltd Environment House First Avenue Westfield Industrial Estate Radstock Somerset BA3 4BS Environment House First Avenue Westfield Industrial Estate Radstock BA3 4BS 561 USER001 REV 2 DS100 TELESCOPIC POLE CAMERA USER GUIDE ...

Page 2: ...escopic Pole Camera Initial Setup DS100 Initial Setup DS100 Operating Functions DVR System Settings Set Time Date menu Manual Capture menu Auto Capture menu Motion Detect menu Advanced Setting menu Using the Display controls Using the DVR Controls Screen Icons Keypad Controls Still Image Capture Manual Record and Playback Charging the Batteries Powering the system from AC adapter Quick Tips Specif...

Page 3: ...ment House First Avenue Westfield Industrial Estate Radstock Somerset BA3 4BS 2 TELESCOPIC POLE CAM ERA USER GUIDE DS100 MONITOR CONTROLS 2 3 7 4 1 5 6 1 On Off Switch 2 Monitor Controls 3 Recording Controls 4 Battery Charge Socket 5 12v Adapter Socket 6 SD Card Slot 7 Camera Connection Socket ...

Page 4: ...LE CAM ERA USER GUIDE TELESCOPIC POLE CAMERA INITIAL SETUP Attach the DS100 Monitor to the Camera Pole using the mounting bracket and star knobs provided Do not over tighten DS100 INITIAL SET UP Connecting the interlink cable Connect the curly cable interconnect cable to the 4 Pin socket located on the reverse of the DS100 and to the connector located at the bottom of the Camera Pole ...

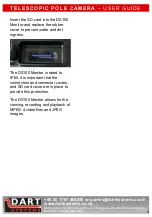
Page 5: ...C POLE CAM ERA USER GUIDE Insert the SD card into the DS100 Monitor and replace the rubber cover to prevent water and dirt ingress The DS100 Monitor is rated to IP65 it is important that the connectors and connector covers and SD card cover are in place to provide this protection The DS100 Monitor allows for the viewing recording and playback of MPEG 4 video files and JPEG images ...

Page 6: ...70 enquiries dartsystems co uk www dartsystems co uk Dart Systems Ltd Environment House First Avenue Westfield Industrial Estate Radstock Somerset BA3 4BS 5 TELESCOPIC POLE CAM ERA USER GUIDE DS100 OPERATING FUNCTIONS ...

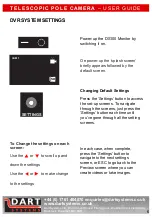
Page 7: ... to the settings In each case when complete press the Settings button to navigate to the next settings screen or ESC to go back to the Preview screen where you can create videos or take images CAM 1 SD SETTINGS Power up the DS100 Monitor by switching it on On power up the splash screen briefly appears followed by the default screen Changing Default Settings Press the Settings button to access the ...

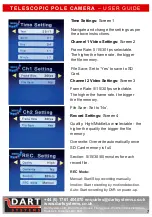
Page 8: ...Navigate and change the settings as per the above instructions Channel 1 Video Settings Screen 2 Frame Rate 5 15 30 fps selectable The higher the frame rate the bigger the file memory File Save Set to Yes to save to SD Card Record Settings Screen 4 Quality High Middle Low selectable the higher the quality the bigger the file memory Overwrite Overwrite automatically once SD Card memory is full Sect...

Page 9: ...ove instructions Size Displays SD Card capacity Remain Size SD Card memory available Remain File Num Approx number of recorded files left on SD Card Format Format SD Card on recording System Settings Screen 6 Navigate and change the settings as per the above instructions Language Select language Alarm Period Set the alarm time frame set by motion detection Time Stamp Set time and date to appear on...

Page 10: ...DE USING THE DISPLAY CONTROLS The display controls are on the right hand side of the Display Handset and are as follows a To change PICTURE settings press Menu once then Sel to select either Bright Contrast Colour or Language Use Up Down key to adjust level or language b To flip screen image Press Menu twice then Up Down to select picture orientation N B SYSTEM and CLOCK menus are not currently ut...

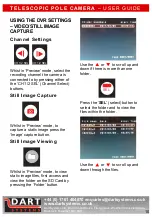
Page 11: ...d to by pressing either of the CH 1 2 SEL Channel Select buttons Still Image Capture Whilst in Preview mode to capture a static image press the Image capture button Still Image Viewing Whilst in Preview mode to view static image files first access and view the folder on the SD Card by pressing the Folder button Use the or to scroll up and down if there is more than one folder Press the SEL select ...

Page 12: ...le and to view the image Manual Record Video Whilst in Preview mode to record video press the REC record button To stop recording press the STOP button Viewing Recorded Video Whilst in Preview mode to view record video files first access and view the folder on the SD Card by pressing the Folder button Use the or to scroll up and down if there is more than one folder Press the SEL button to select ...

Page 13: ...ould be switched off and the charger 3 pin plug connected to the socket on the underside of the monitor The charger can then be plugged into a suitable mains outlet and switched on The charger will display a Red LED until fully charged then it will display Green To Charge the CMOS Backup Battery The CMOS backup battery is constantly being charged whilst the DS100 monitor is switched on If the moni...

Page 14: ...nt that the battery is exhausted or if prolonged surveillance is being carried out from a stationary position A 12V AC adapter can be plugged into the power jack on the back of the Handset to supply power to the system QUICK TIPS If you see a Stick Figure symbol in the bottom right corner of the screen the unit has been switched to Imotion and will start recording when there is movement in front o...

Page 15: ...lay mode Normally White Transmissive Dot pitch 0 0529 W X0 1587 H mm Active area 101 568 W X76 176 H mm DVR Frame rate PAL 5 15 30 fps for each channel Resolution D1 640x480 Compression Format MPEG4 and Standard JPEG Detect Mode Motion Detection Working Mode Recording Snapshot Memory SDHC card 128GB SYSTEM Power Supply internal external Battery Lithium 11 1V 4400maH Battery Lithium 11 1V 4400maH o...

Page 16: ...1761 404870 enquiries dartsystems co uk www dartsystems co uk Dart Systems Ltd Environment House First Avenue Westfield Industrial Estate Radstock Somerset BA3 4BS 15 TELESCOPIC POLE CAM ERA USER GUIDE NOTES ...

Page 17: ...1761 404870 enquiries dartsystems co uk www dartsystems co uk Dart Systems Ltd Environment House First Avenue Westfield Industrial Estate Radstock Somerset BA3 4BS 16 TELESCOPIC POLE CAM ERA USER GUIDE NOTES ...

Page 18: ...1761 404870 enquiries dartsystems co uk www dartsystems co uk Dart Systems Ltd Environment House First Avenue Westfield Industrial Estate Radstock Somerset BA3 4BS 17 TELESCOPIC POLE CAM ERA USER GUIDE NOTES ...

Page 19: ...1761 404870 enquiries dartsystems co uk www dartsystems co uk Dart Systems Ltd Environment House First Avenue Westfield Industrial Estate Radstock Somerset BA3 4BS 18 TELESCOPIC POLE CAM ERA USER GUIDE NOTES ...

Reviews: