7
Set Up and Operation
Before plugging the unit in, always make sure that the power supply matches the product specification
voltage. Do not attempt to operate a 120V specification product on 230V power, or vice versa.
Press the powerswitch to turn the COM-54 on. Turn volume down, by pressing SET. The display shows
AF
out
, then the display shows
VR1
. Adjust the Functions to the desired position.
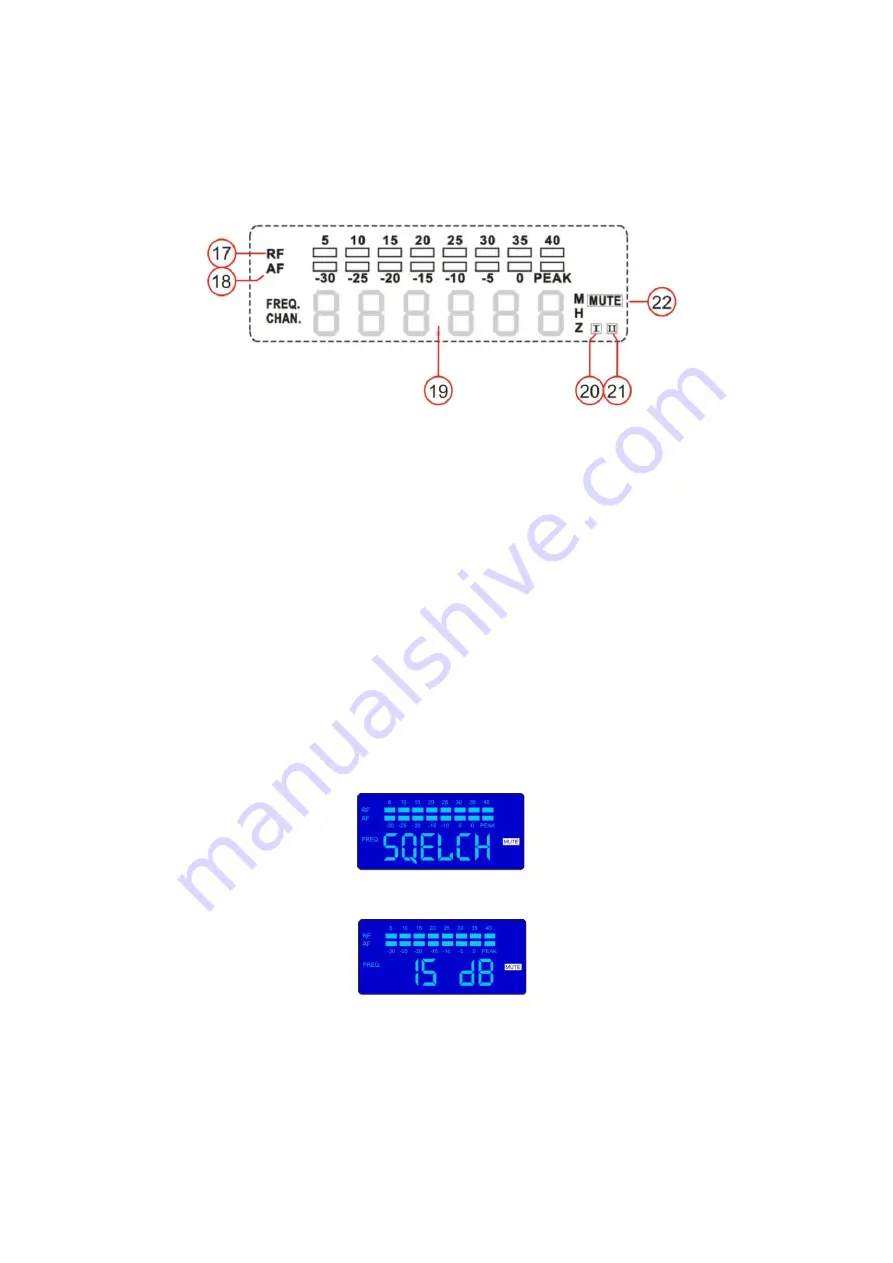
Fig. 4
17)
RF Indicator
18)
Audio Frequency Indicator
19)
Signal Channel Indicator
20)
Antenna A Receiving Indicator
21)
Antenna B Receiving Indicator
22)
MUTE Indicator
MENU Options
1. SQUELCH
0-40 dB, in 5 dB steps
2. DISPLAY
FREQU / CHANNL
3. TUNE
785.100 – 811.000, in steps of 0.025 Hz
4. LOCK
LOC OFF / LOC ON
Sensitivity Adjustment Menu (SQUELCH)
Scroll through the menu by using the
SET
button, until the LCD shows:
after a second the display shows:
This menu is for adjusting the sensitivity (Mute Control). It is used to strengthen the system’s capacity of
preventing disturbing: The range is from 0 – 40 dB. The greater the value, the lower the sensitivity is, the
smaller the receiving distance, the stronger capacity of preventing disturbance. On the other hand, a
lower value (Minimum 15dB), provides a higher sensitivity and increases the receiving distance, the
capacity of preventing disturbance however will reduce. Usually, the normal setup is 20 dB (Factory is
15dB).


