Danfoss VLT DSD 510, Operating Manual
Discover the comprehensive operating manual for the Danfoss VLT DSD 510. Ensure optimal performance and troubleshooting with detailed guidance available for free download. Get your manual today exclusively from manualshive.com, your reliable source for all essential documentation. Perfect for technical support and operation clarification.
Share
Download


Reviews:
No comments
Related manuals for VLT DSD 510

WPD-05
Brand: WPT POWER Pages: 9

AKD EtherCAT
Brand: National Instruments Pages: 30

FMV 2107
Brand: Leroy-Somer Pages: 60

profiLINE 140
Brand: IEF Werner Pages: 48
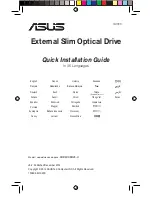
SDRW-08D2S-U
Brand: Asus Pages: 28

Travelair AC
Brand: Asus Pages: 9

SDRW-08U9M-U
Brand: Asus Pages: 36

59017-200-0003
Brand: TTP Ventus Pages: 13

HE2008-A
Brand: Malmbergs Pages: 8

WMS-ZM
Brand: WAREMA Pages: 14

176F6619
Brand: Danfoss Pages: 4

8201
Brand: Lenze Pages: 74

S-7 Series
Brand: YASKAWA Pages: 191

VLT 28
Brand: Danfoss Pages: 28

VLT 4000 VT
Brand: Danfoss Pages: 142

Classic Q3 15-150A 4 Quadrant
Brand: Unitek Pages: 35

sonesse 30 rts
Brand: SOMFY Pages: 108

SDCP-CEN0723
Brand: Franklin Electric Pages: 56


