


Installation Guide AX Center
Doc no. AXCNTR-8001-A-4
Rev. date 221023
Page 9 of 19
Installation of DAD Thunderbolt 3 driver for MacOS
The driver software has to be installed completely before it can work properly.
When you install the driver, it is of no importance whether you have units or other peripherical
devices connected to the Thunderbolt 3 / USB-C port on the computer. In the process described
below there are no devices connected before installation.
The installation sequence:
1.
Copy the driver .pkg file to the computer desktop and double click to start the installation.
2.
Follow the installation instructions. Click
Next
and then
Install.
3.
Enter Administrator password and click
Install.
4.
If the driver has not been installed before on the computer, you get the message “System extension
blocked”. Click on
Open Security Preferences
.
5.
In the “Security and Privacy” window you have to click on the lock symbol in the bottom left corner and
unlock settings and click
Allow.
6.
Restart the Computer and open the Thunderbolt 3 driver application and connect the DAD
Thunder|Core interface to the USB-C/Thunderbolt 3 port on the Computer. Make sure that you are
using a high-speed (20Gbps) Thunderbolt 3 USB-C cable.
For mor information how to install and configure the Thunderbolt 3 driver please refer to the Thunder|Core
installation guide on
www.digitalaudiosupport.com
.
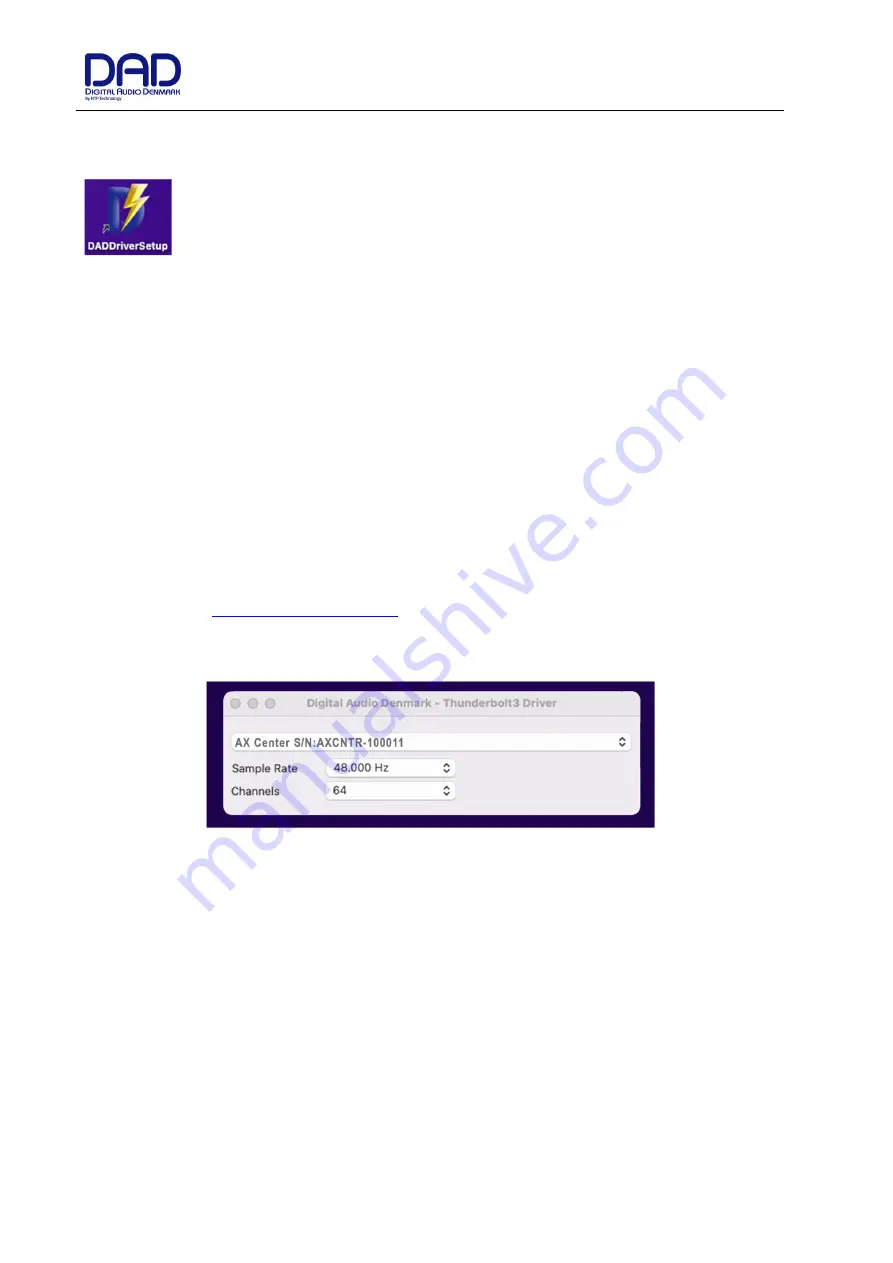
Once the driver is installed the device can be attached to via the setup window.
Figure 4, DADDriver setup window
for MacOS


