background image

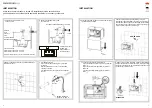
1000 mm*

IMPORTANT! 

Secure blind plug in the cap to provide an airtight seal.

Make sure to position the 


plugs correctly.

INSTALLATION

13. Place fan for the hand dryer behind the wall.

13. Mount the hand dryer fan under the sink.

Depth required to 

install hand dryer: 

≥170 mm

Make sure there is enough 

space behind the wall to 

mount the tap.

170 mm

INSTALLATION

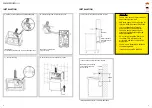
9. Close wires and earthing with suitable blind plugs.

10. Connect plugs to timer via respective ports.

11. Connect earthing.

12. Mount cabinet front and tighten (2) screws.

• 

Ensure easy access to maintenance 

and cleaning of the unit.

• 

Add extra space (+30 mm) at the air 

inlet if a HEPA filter should be fitted.

• 

It is recommended to install a 

power switch to the hand dryer 

to ensure easy disconnection of 

electricity supply before cleaning 

and maintenance.

• 

Do not turn or bend the flexi hose 

too sharp. This will reduce the 

air velocity and thus increase the 

drying time. 

• 

Ensure unit is installed on solid and 

stable background.

• 

If in doubt, contact 

DAN DRYER

950 mm*

IMPORTANT!

* Standard measures for 1200 mm flexi hose

8

9

Summary of Contents for 372-373

Page 1: ...USER MANUAL AIRTAP BUILD IN HAND DRYER Model 372 373 ...

Page 2: ...L 372 373 Stainless steel satin finish AirTap Wall 230V 110V IMPORTANT This product falls within the scope of the WEEE directive on recycling and recovery of waste electrical and electronic equipment This product should not be disposed of with general household waste This product must be reused if possible Contact your local authority for further details This product may also be returned to the ma...

Page 3: ... recommended by the manufacturer The product should be checked on a regular basis Never use a defective or malfunctioning unit Never make alterations to the product affecting its performance DAN DRYER s product warranty does not cover product problems that result from misuse or alteration NOTE Type Y connection If the power supply cord is damaged it must be replaced immediately Only qualified pers...

Page 4: ...the tap A Push the screwed bushing through the hole in the wall B Place gasket disc and nut on the threaded coupling of the tap C Tighten with tool be careful not to overtighten the nut Recommended wall thickness 10 30 mm Gasket Disc Nut 5 Unscrew 2 bottom screws and remove cabinet using the allen wrench included 1 Check the required distance from sensor to sink 30 Ceramic 250 mm Brushed steel 300...

Page 5: ...mer via respective ports 11 Connect earthing 12 Mount cabinet front and tighten 2 screws Ensure easy access to maintenance and cleaning of the unit Add extra space 30 mm at the air inlet if a HEPA filter should be fitted It is recommended to install a power switch to the hand dryer to ensure easy disconnection of electricity supply before cleaning and maintenance Do not turn or bend the flexi hose...

Page 6: ...rtighten screws INSTALLATION HEIGHT RECOMMENDATION Tolerance for position of flexi hose from centre line 2 cm If tolerance for any reason deviates more than 2 cm on the determined installation position it must be ensured that the hose is not bent or curved A bent or curved hose can cause reduced air velocity and air volume CLEANING AND MAINTENANCE Routine cleaning and maintenance is recommended ev...

Page 7: ...ows only cold air during a full cycle Disconnect the power Remove cabinet and disassemble the blower fan unit Test the thermostat for open circuit Check the heating element for defects Replace defect heating element LED indicator does not work Confirm the unit works properly If yes replace LED circuit board Hand dryer does not run smoothly Check carbon brushes Replace if they are worn or damaged I...

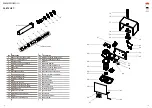
Page 8: ... Cabinet front part 10 Threaded bushing 30 Hexagonal security screw 11 Small rubber gasket 31 Filter set filter and holder 12 Large rubber gasket 32 Rubber bush 13 Stainless steel disc 33 Earthing 14 Nut 34 Sensor cable 15 Flexi hose 30 cm 35 Nylon bushing 16 Clamp for flexi hose 2 pcs 36 Back plate 17 Stainless steel cabinet back 37 Earthing screw 18 Mounting cap 38 Insulation mylar 19 Gasket for...

Page 9: ...DAN DRYER A S Alsikevej 8 DK 8920 Randers NV Tel 45 8641 5711 Email info dandryer com dandryer com ...

Reviews: