16
Electrical Installation
4.
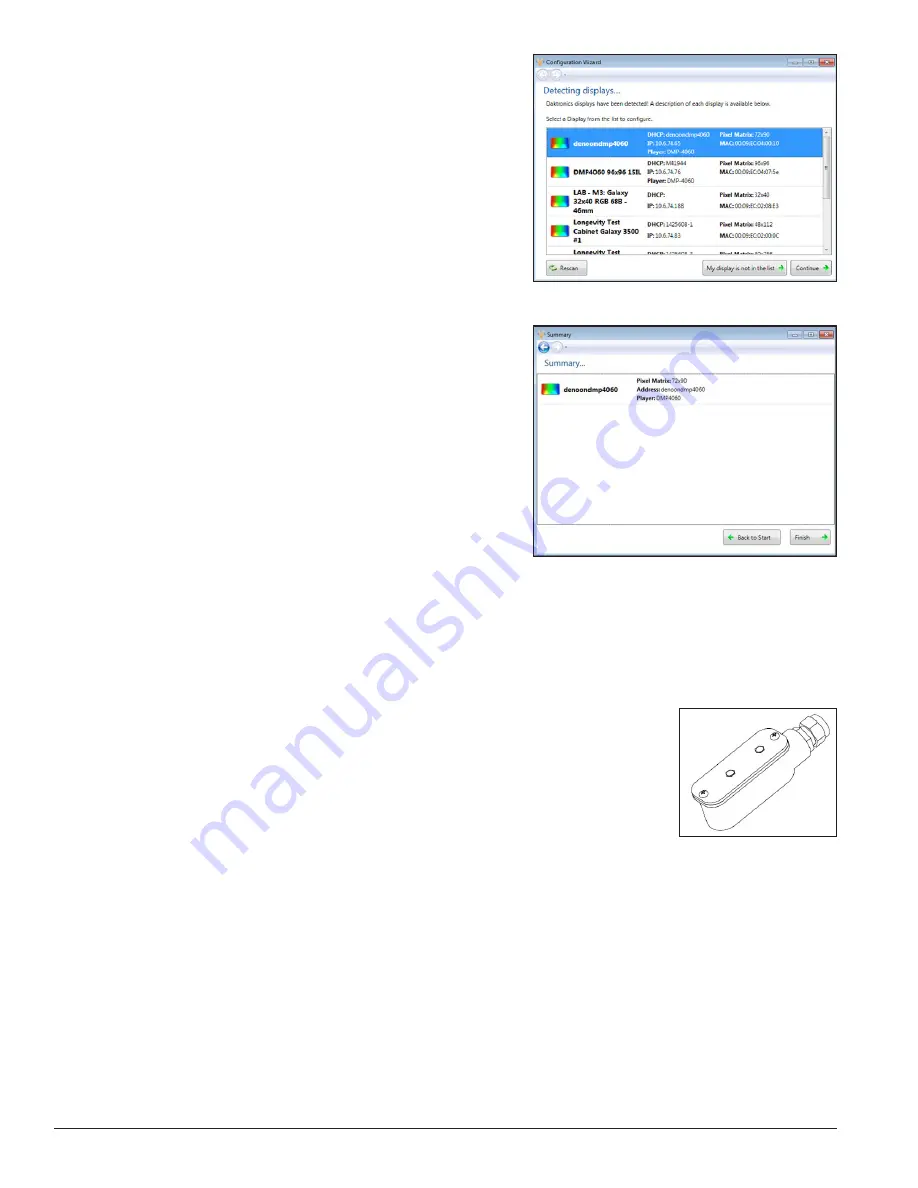
Select the desired display to configure and click
Continue
. Refer to
Figure 20
.
Note:
If the display is password-protected, enter
the password on the
Authentication
page. Save the
password in a secure location. Physical access to the
display is required to reset the password.
5.
Give the display a name to easily identify it when
the
Display Found
prompt opens. This prompt also
provides a brief description of the display.
Click
Continue
.
Note:
If the display is not found, refer
to the
Venus
®
1500 Help File
for manual
configuration instructions
.
6.
Select the correct time zone for the display's
location. Greenwich Mean Time (GMT) with
country and city/region are the guides used to
select the correct time zone.
7.
Click
Back to Start
in the
Summary
box to return
to the beginning of the process to configure
another display. Click
Finish
to complete display
configuration. Refer to
Figure 21
.
3.13 DSF-600 with Embedded Controller
Light Sensor Mounting
Reference Drawing:
Assembly, Light Sensor, 3.5' Harness, 12V; SF
.............................................................
Drawing B-1122209
Light detectors, illustrated in
Figure 22
, monitor the light levels around the
display and adjust the LED intensity accordingly.
To mount the light sensor on the display border (if not previously factory-
installed), refer to the instructions on Assembly, Light Sensor, 3.5' Harness; SF
Drawing B-1122209
in
Appendix A
. Connect the light sensor harness to the 4
pin to circular harness connected to the PLR. Refer to display schematic for more
details.
Figure 20:
List of Displays
Figure 21:
Display Configuration Summary
Figure 22:
Photo Sensor
Summary of Contents for DSF-600 Series
Page 10: ...6 Cabinet Installation...
Page 28: ...24 Maintenance Troubleshooting...
Page 32: ......
Page 34: ......
Page 36: ......
Page 41: ......
Page 61: ......


