22
7.3 Connecting a Laptop
Sometime it is necessary to connect a laptop to the display for service. For displays without
shared internet, locate the red cross-over cable coming from out of port 5 of the network switch.
For displays with shared internet, disconnect the webcam from port 4 of the network switch and
connect a Cat-5 cable from port 4 to the laptop.
7.4 Replacing Control Equipment
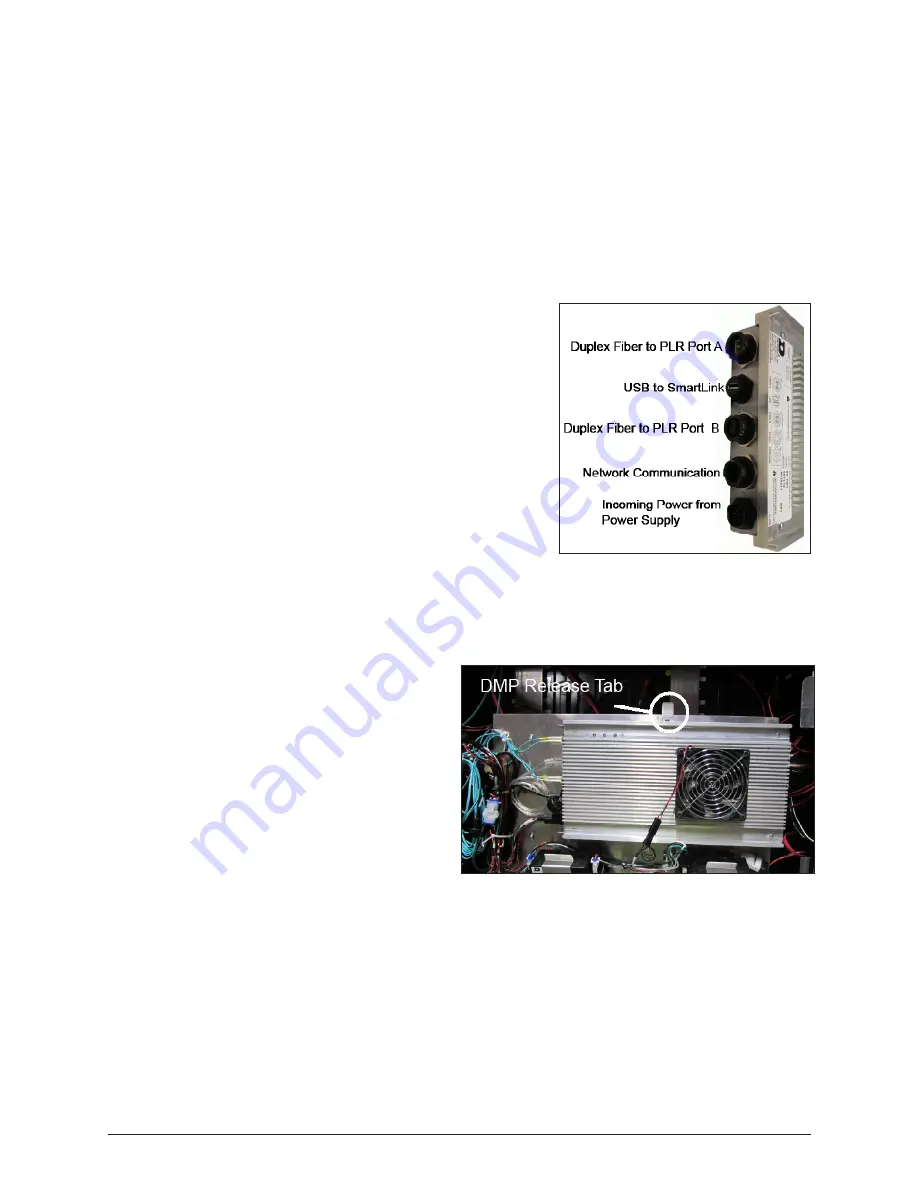
Replacing the DMP-8065
1. Disconnect the incoming power to the DMP-8065.
2.
Disconnect the duplex fiber to PLR port A from the
DMP-8065. Refer to Figure 18.
3. Disconnect the USB cable from the SmartLink
TM
.
4.
Disconnect the duplex fiber to PLR port B from the
DMP-8065.
5. Disconnect the network communication cable.
6. Disconnect power to the fan on the DMP-8065.
7. Pull the DMP-8065 release tab and carefully lift the
DMP off of the DMP mounting plate. Refer to Figure
19.
8. Reverse Steps 1 - 7 to reinstall the DMP-8065.
Caution: Risk of explosion if a battery is replaced by
an incorrect type. Return the controller to Daktronics
for repair or disposal.
Replacing DMP Power Supplies
Each DMP has a power supply and a
redundant power supply. If one power
supply fails, the DMP-8065 will still
function on the redundant power supply.
To replace a failed DMP-8065 power
supply:
1. Disconnect any power cables to the
power supply and from that power
supply to the DMP-8065.
2. Pull the power supply tab. Refer to
Figure 13.
3. Rotate the power supply forward
and lift it off of the pegs.
4. Reverse Steps 1 - 3 to install a replacement power supply.
Figure 18:
DMP-8065 Jacks
Figure 19:
DMP-8065 Release Tab
Control Equipment Overview, Service, and Replacement
Summary of Contents for 4200 Series
Page 10: ...6 Display and Control Overview ...
Page 16: ...12 Accessing Internal Components ...
Page 24: ...20 Testing and Replacing Display Components ...
Page 30: ...26 Control Equipment Overview Service and Replacement ...
Page 34: ...30 Webcam Access and Troubleshooting ...
Page 36: ...32 Display Maintenance ...
Page 38: ...34 ...


