


15
|
Piping installation
Installer and user reference guide
88
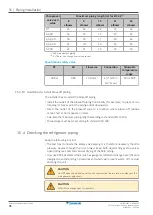
LREN8~12A7 + LRNUN5A7
CO₂ ZEAS outdoor unit and capacity up unit
4P704142-1 – 2022.08
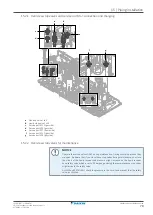
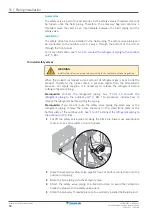
1
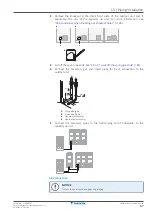
Remove the left front panel of the outdoor unit and, if applicable, the one of
the capacity up unit. See
"14.2.2 To open the outdoor unit"
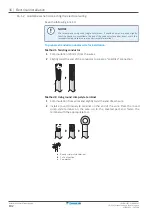
2
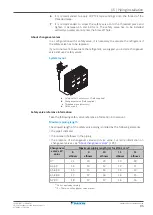
Unscrew the 4 screws to remove the side plate of the outdoor unit.
a
4×
b
a
Screw
b
Side plate
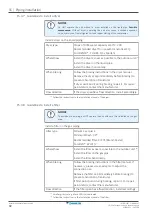
3
Dispose of the plate and its screws.
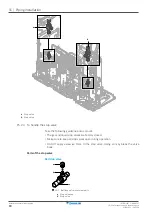
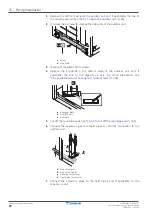
4
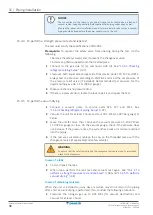
Remove the knockout in the bottom plate of the outdoor unit and, if
applicable, the one of the capacity up unit. For more information, see
"16.3 Guidelines when knocking out knockout holes"
106].
2×
b
c
a
a
Knockout plate
b
Drill (Ø6 mm)
c
Drill here
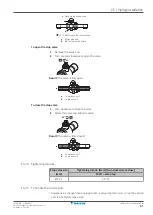
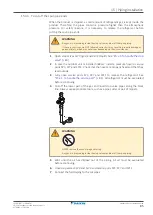
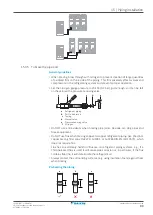
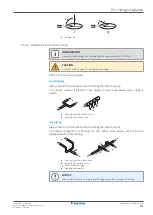
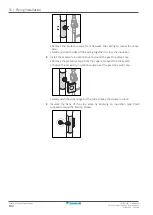
5
Cut off the spun pipe ends. See
"15.3.3 To cut off the spun pipe ends"
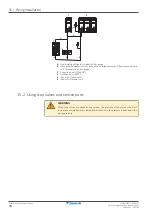
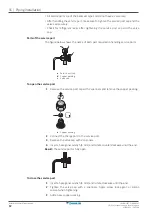
6
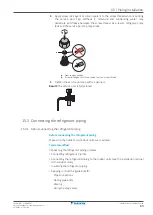
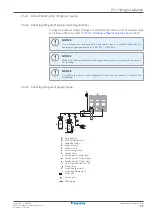
Connect the accessory gas and liquid pipes for bottom connection to the
outdoor unit.
b
a
A
B
A
Stop valve (gas)
B
Stop valve (liquid)
a
Gas pipe (accessory)
b
Liquid pipe (accessory)
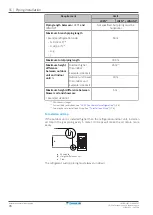
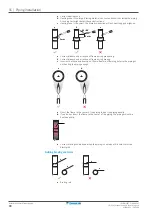
7
Connect the accessory pipes to the field piping and if applicable, to the
capacity up unit.


