44
English
(Red):
Start event
(Green): Stop event
(Black):
Event other than start/stop events
The marks on the bar indicate the time frame (half-hour unit, for
example: 0:00 to 0:29, 0:30 to 0:59) within which the event
should occur. (See the examples in the Screen 5.)
If the setting is satisfactory, click the “
” button.
Return to the main scheduling screen (Screen 6).
7.
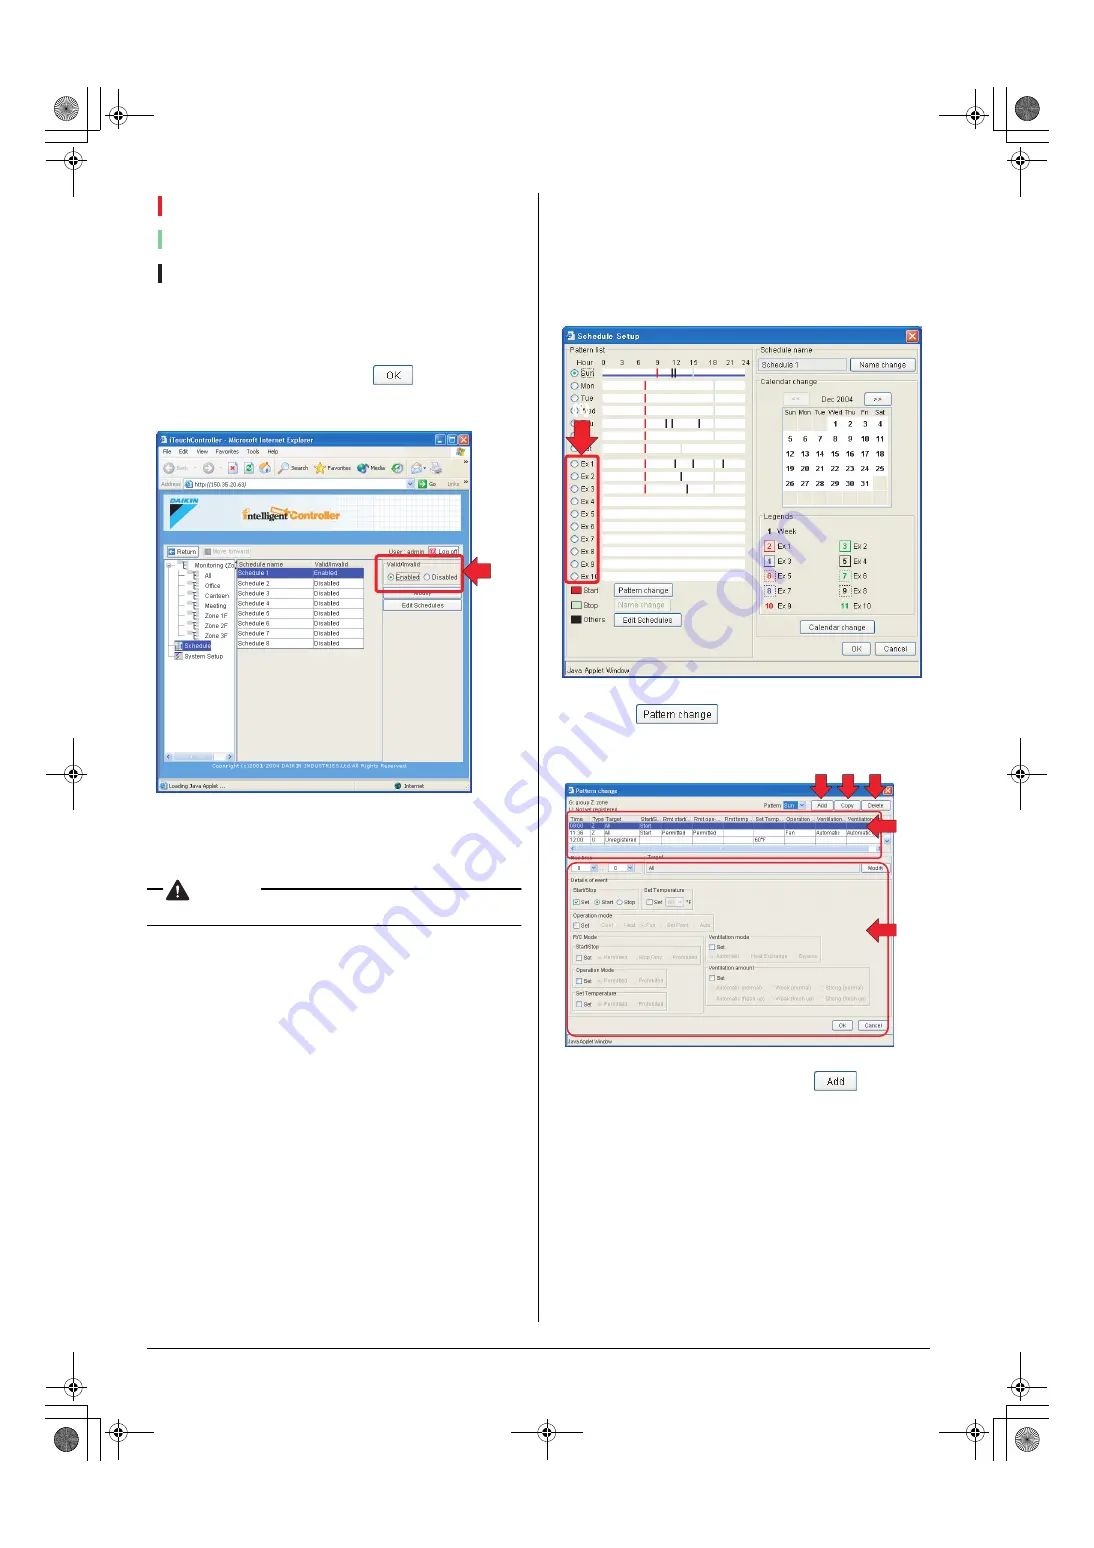
In this screen you can enable the schedule program just cre-
ated. By default it is disabled. Click the Enable (1) radio but-
ton to enable it.
CAUTION
•
Disabled schedule programs do not work.
The regular schedule patterns are now created.
8-5 Creating Ex Schedule Patterns
■
■
■
■
To create Ex schedule patterns
1.
You can also create 10 extra schedule patterns (Ex1 to 10) in
the Schedule Setup screen (Screen 1). Click an appropriate
radio button (1) to select the Ex schedule pattern to be set up
or changed.
2.
Click the “
” button to display the Pattern
change dialog box (Screen 2).
3.
To add a new schedule event, click the “
” button (3).
A new event item appears in the top row of the schedule
event list (6).
You can set up or change a new or existing event in this list.
4.
Select the new event added in the step 3 or an existing
event, and set up or change various variables of the event
using options in the schedule event setup area (7).
To set up or change these variables, select the Set check-
box in each frame and click a desired radio button. For the
description of the setting options, see the “Creating Regular
Schedule Patterns” section.
(1)
Screen 6: Main scheduling screen
(1)
Screen 1: Schedule Setup screen
Screen 2: Pattern change dialog box
(3) (4) (5)
(6)
(7)
01_EN_EM05A059.fm Page 44 Wednesday, October 19, 2005 7:13 PM


