


English
43
3.
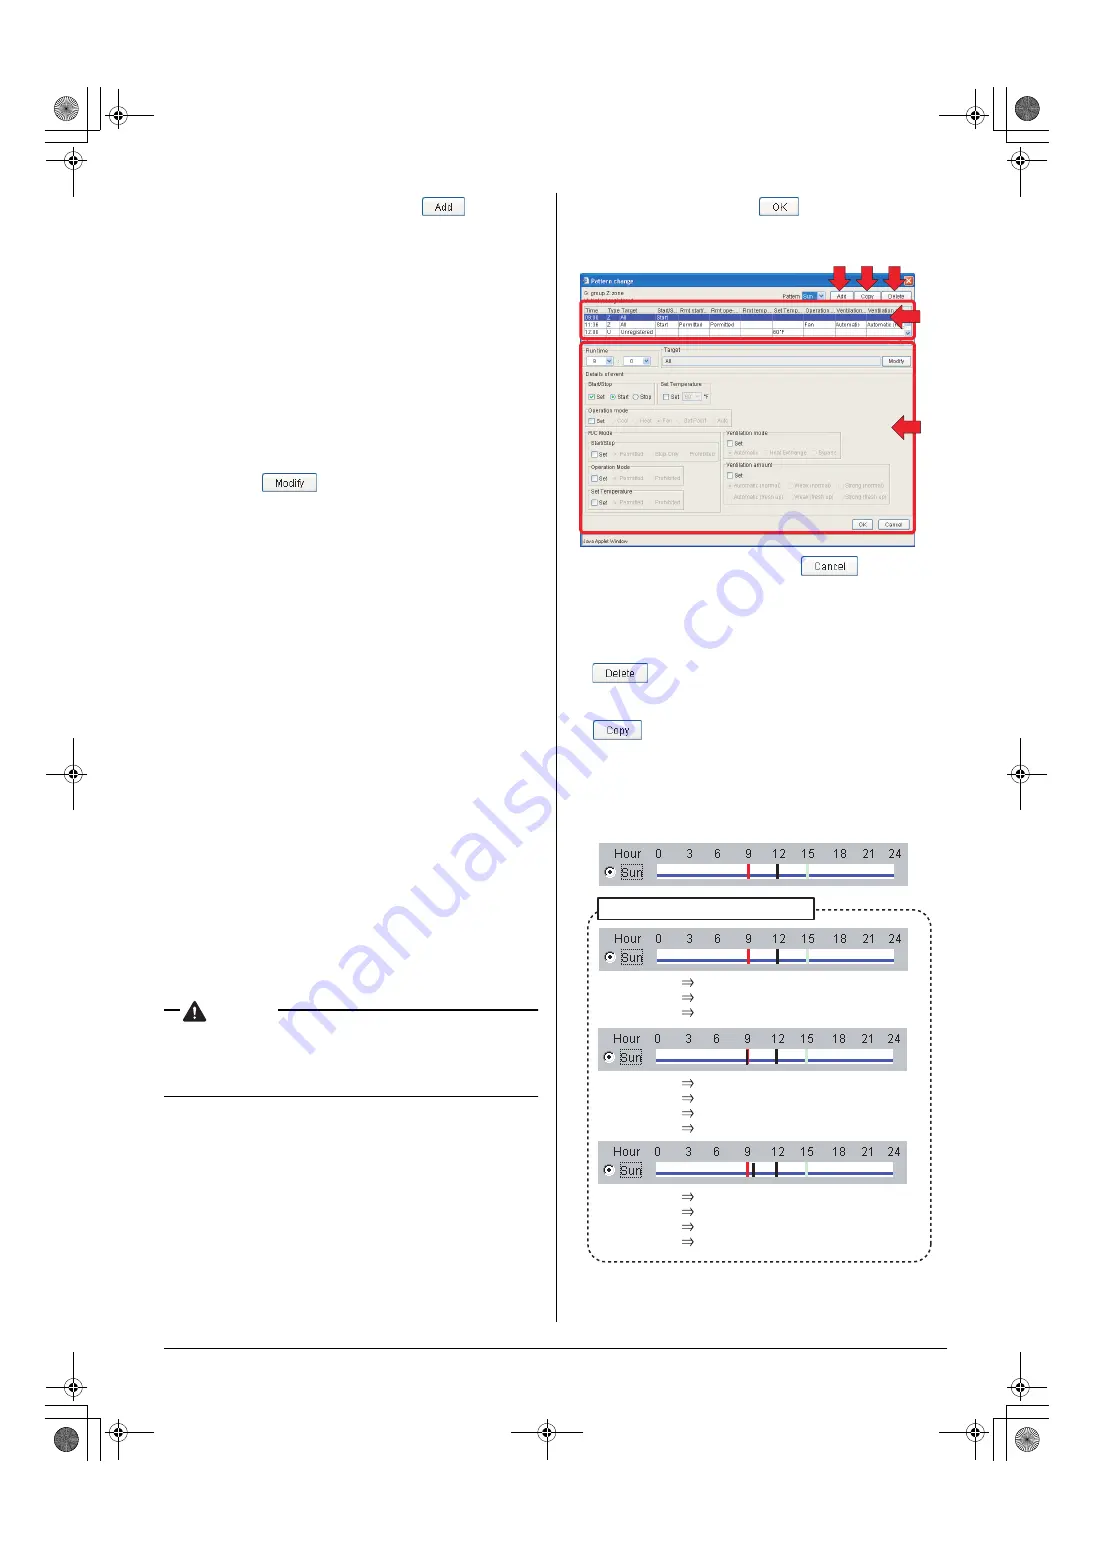
To add a new schedule event, click the “
” button (3).
A new event item appears in the top row of the schedule
event list (6). You can set up or change a new or existing
event item in this list.
4.
Select the new event added in the step 3 or an existing event,
and set or change various variables of the event using
options in the schedule event setup area (7).
To set or change these variables, select the Set checkbox in
each frame and click a desired radio button. In each frame
below you can:
• Run time:
Set a time value that indicates when the event should
occur using the pull-down menus.
• Target:
Set/change a target zone or group.
Click the “
” button to display the Target dialog
box (Screen 3), where you can select a target group or
zone.
• Start/Stop:
Select an action (Start or Stop) that the event triggers
using the radio buttons.
• Set Temperature:
Set the temperature setting value for the selected zone or
group using the radio buttons.
• Operation mode:
Set the operation mode for the selected zone or group
using the radio buttons.
• R/C Mode:
Permit or prohibit the remote controller operation using
the radio buttons. In each of the following three frames,
you can:
• Start/Stop:
Permit or prohibit the start/stop operation through
remote controllers.
• Operation Mode:
Permit or prohibit the modification of the operation
mode through remote controllers.
• Set Temperature:
Permit or prohibit the modification of the temperature
setting through remote controllers.
• Ventilation mode:
Set the HRV’s ventilation mode using the radio buttons.
• Ventilation amount:
Set the HRV’s ventilation amount.
CAUTION
• When the devices in the target group or zone are not
HRVs or HRVs that do not support these settings, your
selection will be ignored even if the Set checkbox is
selected.
5.
Upon completion, click the “
” button on the Pattern
change dialog box (Screen 2).
To cancel your selection, click the “
” button.
Return to the Schedule Setup screen (Screen 1 of the previ-
ous page). You will confirm your settings on this screen.
[Other Buttons]
(4)
Deletes the event item selected in the schedule event list (6).
(5)
Duplicates a selected event item in the schedule event list (6).
6.
In the Schedule Setup screen the schedule pattern bar in the
figure (Screen 4) appears. Each mark represents:
Screen 2: Pattern change dialog box
(3) (5) (4)
(6)
(7)
Screen 5: Example of pattern bars
Screen 4: Pattern bar
9 : 00
Starts
12 : 00
Changes temperature setting
15 : 00
Stops
9 : 00
Starts
9 : 15
Changes temperature setting
12 : 00
Changes temperature setting
15 : 00
Stops
9 : 00
Starts
9 : 30
Changes operation mode
12 : 00
Changes temperature setting
15 : 00
Stops
01_EN_EM05A059.fm Page 43 Wednesday, October 19, 2005 7:13 PM


