


44
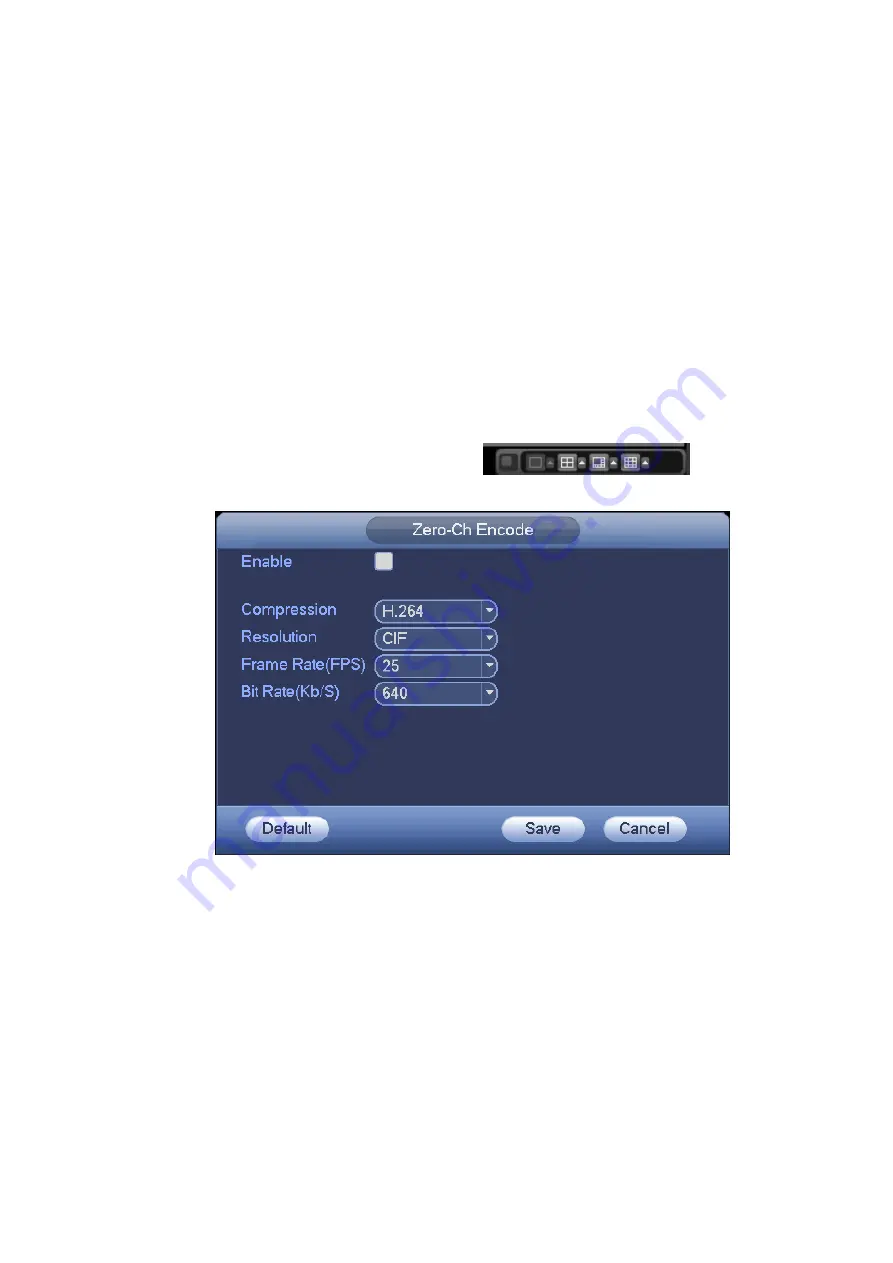
On the preview interface, right click mouse and then select zero-channel encode, you can go to the
following interface. See Figure 4-36. Here you can enable and set zero-channel encoding function so
that you can view several video sources at one channel.
Enable: This function is disabled by default. Check the box here to enable this function so that you
can control the zero-channel encoding function at the WEB.
Compression: System default setup is H.264. You can set according to device capability.
Resolution: System supports D1/HD1/CIF/2CIF/QCIF. The resolution value may vary due to
different device capabilities. Please select from the dropdown list.
Frame rate: System supports 1-25(30). The frame rate value may vary due to different device
capabilities. Please select from the dropdown list.
Bit Rate: System supports 640/768/896/1024. The bit rate value may vary due to different device
capabilities and frame rate setups. Please select from the dropdown list.
Save: Click the Save button to save current setup. If this function is disabled, you can not operate
zero-channel encoding function at the WEB, the video is black or null even you operate when the
function is disabled. After you enabled this function, login the Web and you can select zero-channel
encoding mode at the right corner of the interface
. Select a mode; you
can view the local preview video.
Figure 4-36
4.10
Schedule
After system booted up, it is in default 24-hour regular mode. You can set record type and time in
schedule interface.
4.10.1 Schedule Menu
In the main menu, from setting to schedule, you can go to schedule menu. See Figure 4-37.
Channel: Please select the channel number first. You can select
“
all
”
if you want to set for the
whole channels.
Week day: There are eight options: ranges from Saturday to Sunday and all.
Summary of Contents for DVR0X04AH-VD-E
Page 1: ...ATM DVR Series User s Manual Version 1 1 0 ...
Page 24: ...15 Drag mouse Select motion detection zone Select privacy mask zone ...
Page 60: ...51 Figure 4 44 Figure 4 45 Figure 4 46 ...
Page 61: ...52 Figure 4 47 Figure 4 48 Figure 4 49 ...
Page 79: ...70 Figure 5 13 Figure 5 14 Figure 5 15 ...
Page 101: ...92 Figure 5 44 Figure 5 45 ...
Page 103: ...94 Figure 5 47 Figure 5 48 ...
Page 123: ...114 Switch user you can use another account to log in Figure 5 78 ...
Page 156: ...147 Figure 6 51 Figure 6 52 Figure 6 53 Figure 6 54 ...
Page 175: ...166 Figure 6 85 Figure 6 86 ...
Page 200: ...191 Maxtor DiamondMax 20 STM3250820AS 250G SATA ...


