background image

Web Operation    15 

Web Operation 

The access controller can be configured and operated on the web. Through the web you can 

set  parameters  including  network  parameters,  video  parameters,  and  access  controller 

parameters; and you can also maintain and update the system. 

Login 


You need to set a password and an email address before logging in to the web for the first time. 

Password you set is used to log in to the web, and the email is used to retrieve passwords. 

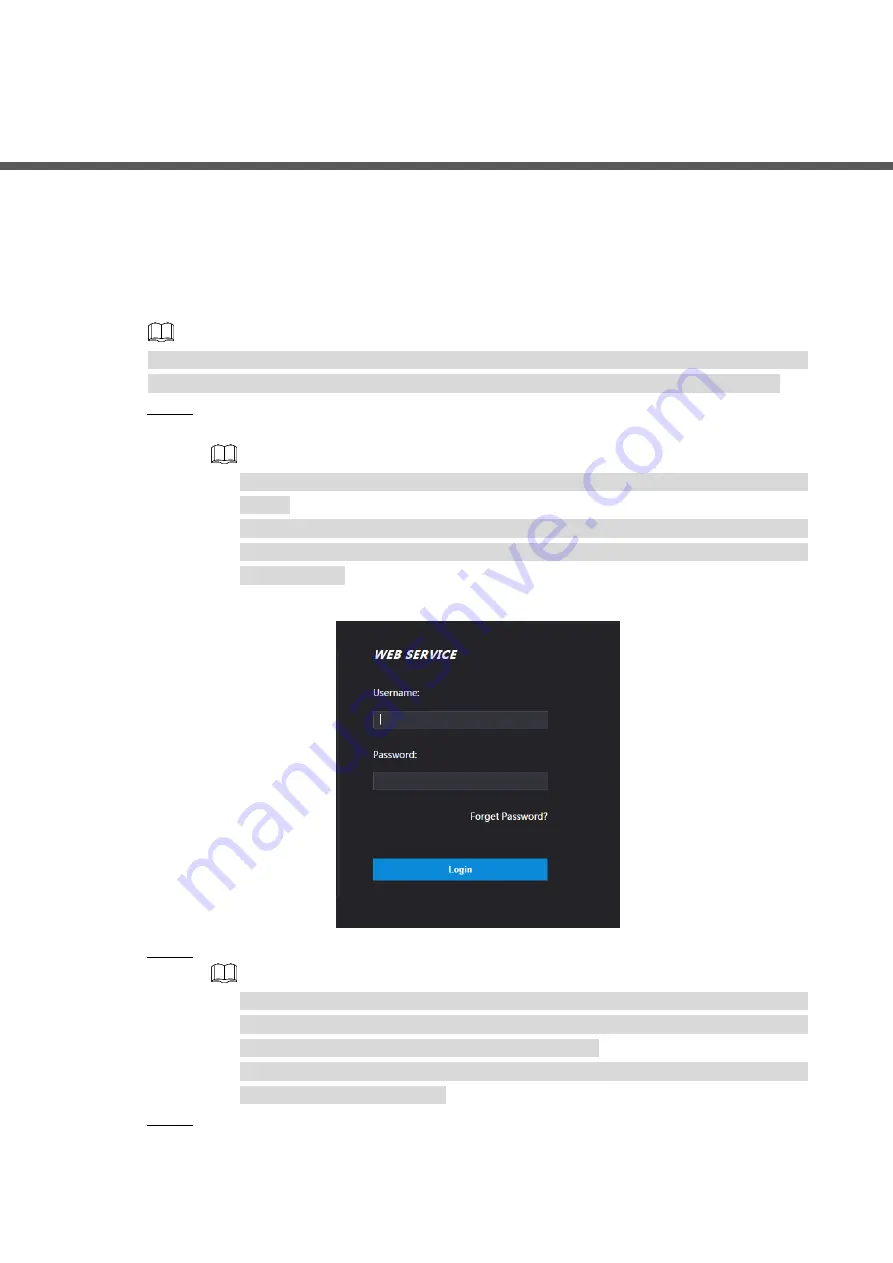
  Open IE web browser, enter the IP address (192.168.1.108 by default) of the access 

Step 1

controller in the address bar, and then press Enter. 


Make sure that the computer used to log in to the web is in the same LAN with the 

device. 


7-inch  model  B  access  controllers  of  have  dual  NICs.  The  default  management 

address for 1000M Ethernet port is 192.168.1.108, and for 100M Ethernet port is 

192.168.2.108. 

 Login 

Figure 4-1


  Enter the username and password. 

Step 2


The  default  username  of  administrator  is  admin,  and  the  password  is  the  login 

password  after  initializing  the  access  controller.  Modify  the  administrator 

password regularly and keep it properly for security. 


If you forget the administrator login password, you can click 

Forget Password?

 to 

reset it. See the user manual. 

  Click

 Login

Step 3

The homepage of the web is displayed. 

Summary of Contents for DHI-ASI7213X-T

Page 1: ...Face Recognition Access Controller Quick Start Guide V1 0 0...

Page 2: ...he paper manual CD ROM QR code or our official website If there is inconsistency between paper manual and the electronic version the electronic version shall prevail All the designs and software are s...

Page 3: ...the ventilation of the access controller Operate the access controller within the rated range of power input and output Do not dissemble the access controller Transport use and store the access contr...

Page 4: ...s 1 2 Installation 6 Installation Notes 6 2 1 Cable Connections 7 2 2 Installation 8 2 3 3 System Operation 12 Initialization 12 3 1 Adding New Users 12 3 2 4 Web Operation 15 Notes of Face Recording...

Page 5: ...1 6 The 7 inch access controller has two models model A and model B See Figure 1 1 to Figure 1 4 7 Inch Access Controller Dimensions and components of model A 1 mm inch Figure 1 1 Table 1 1 Component...

Page 6: ...inch Figure 1 2 Table 1 2 Component description 2 No Name No Name 1 USB port 6 IR light 2 MIC 7 Dual camera 3 White fill light 8 Phototransistor 4 Display 9 Cable entry 5 Card swiping area 10 Fingerp...

Page 7: ...a 6 Display 3 White fill light 7 Card swiping area 4 IR light Dimensions and components of model B 2 mm inch Figure 1 4 Table 1 4 Component description 4 No Name No Name 1 MIC 5 Phototransistor 2 Dual...

Page 8: ...ponents 4 Dimensions and components 1 mm inch Figure 1 5 Table 1 5 Component description 1 No Name No Name 1 IR light 6 Phototransistor 2 MIC 7 Dual camera 3 White fill light 8 Cable entry 4 Display 5...

Page 9: ...imensions and components 2 mm inch Figure 1 6 Table 1 6 Component description 2 No Name No Name 1 IR light 6 Phototransistor 2 MIC 7 Dual camera 3 White fill light 8 Cable entry 4 Display 9 Fingerprin...

Page 10: ...ation should be no less than 100Lux It is recommended that the device is installed indoors at least 3 meters away from windows and doors and 2 meters away from lights Avoid back light and direct sunli...

Page 11: ...security module is enabled in Function Security Module If the security module is enabled you need to purchase access control security module separately The security module needs separate power supply...

Page 12: ...3 Ethernet port 4 Ethernet port only supported by 7 inch model B access controllers 5 USB port only supported by 7 inch model B access controllers Installation 2 3 Installation method of model A and...

Page 13: ...Installation 9 Installation height Figure 2 5 Installation diagram 1 Figure 2 6...

Page 14: ...in the bracket Fix the bracket on the wall by installing the expansion screws into the six bracket Step 2 installation holes Connect cables for access controller Step 3 See 2 2 Cable Connections Hang...

Page 15: ...Installation 11 Applying silicon sealant Figure 2 8...

Page 16: ...onsist of 8 to 32 non blank characters and contain at least two types of characters among upper case lower case number and special character excluding For access controller without touch screen initia...

Page 17: ...ecorded and one fingerprint needs to be verified three times You can enable the Duress FP function under each fingerprint and only one of the three fingerprints can be the duress fingerprint Alarms wi...

Page 18: ...set a period in which the user can unlock the door For detailed period settings see the user manual Holiday Plan You can set a holiday plan in which the user can unlock the door For detailed holiday p...

Page 19: ...p 1 controller in the address bar and then press Enter Make sure that the computer used to log in to the web is in the same LAN with the device 7 inch model B access controllers of have dual NICs The...

Page 20: ...ep your face clean Keep the device at least two meters away from light source and at least three meters away from windows or doors otherwise backlight direct sunlight might influence face recognition...

Page 21: ...might be influenced Appendix figure 1 2 Appropriate face position Requirements of Faces Make sure that the face is clean and forehead is not covered by hair Do not wear glasses hats heavy beards or ot...

Page 22: ...n importing face images through the management platform make sure that image resolution is within the range 150 300 600 1200 image pixels are more than 500 500 image size is less than 75KB and image n...

Page 23: ...print is centered on the recording area Do not put the fingerprint sensor at places with intense light high temperature and high humidity If your fingerprints are worn or are unclear try other unlock...

Page 24: ...Fingerprint Record Instruction 20 Appendix figure 2 2 Correct finger pressing Incorrect method Appendix figure 2 3 Wrong finger pressing...

Page 25: ...ed to enable the auto check for updates function to obtain timely information of firmware updates released by the manufacturer We suggest that you download and use the latest version of client softwar...

Page 26: ...llowing services SNMP Choose SNMP v3 and set up strong encryption passwords and authentication passwords SMTP Choose TLS to access mailbox server FTP Choose SFTP and set up strong passwords AP hotspot...

Page 27: ...s If there are no communication requirements between two sub networks it is suggested to use VLAN network GAP and other technologies to partition the network so as to achieve the network isolation eff...

Reviews: