background image

Quick-start guide

Please follow the guide from the beginning to the end. Before you connect the video
equipment make sure all equipment is switched off at the plug.

Stage 1. 

Connecting the video to your TV

Fit the batteries into the remote control. Make sure that

the (+) and (-) marks on the batteries agree with the (+) and
(-) marks inside the battery compartment.

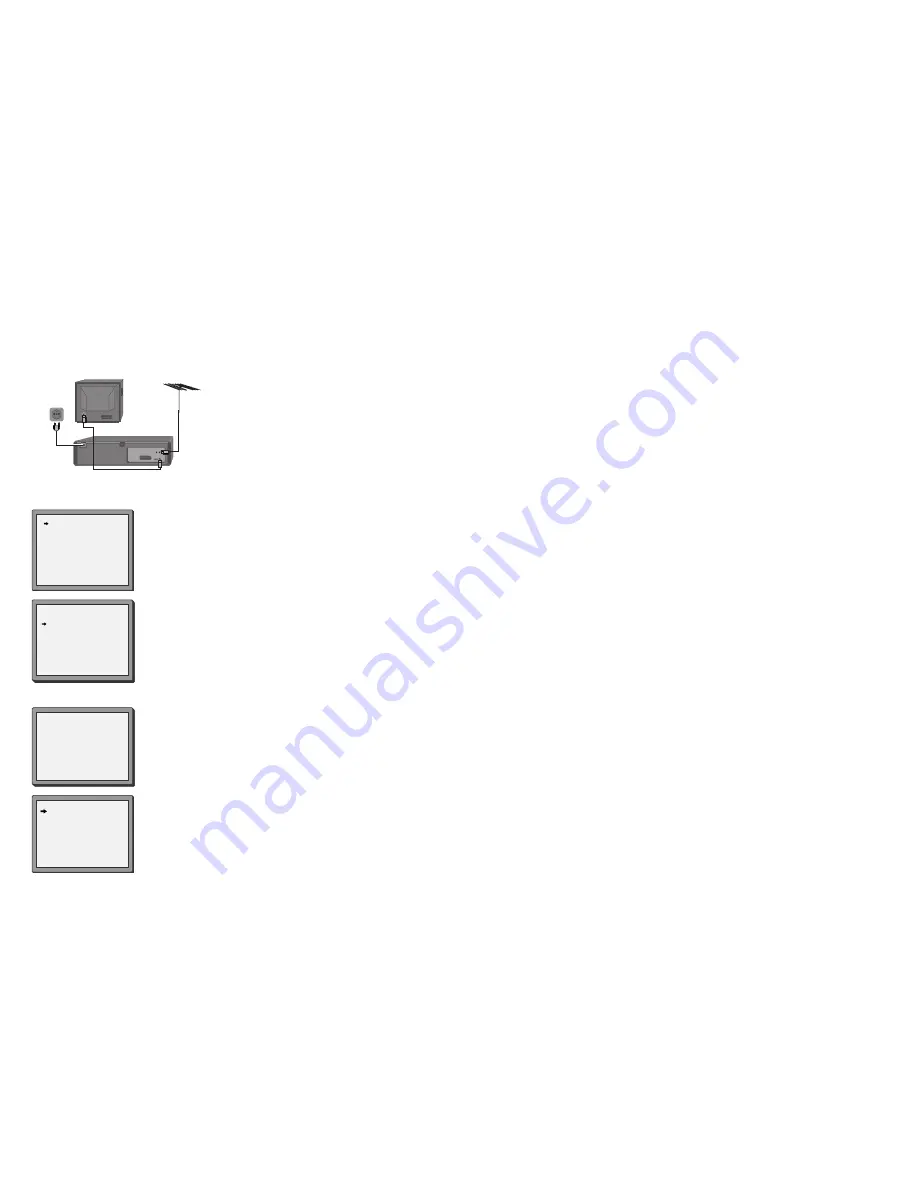
Plug your aerial into the ANT IN socket of the video.

Connect the black aerial lead provided from the ANT

OUT socket of the video to your TV aerial socket.

Plug the video into the mains and turn it on by pressing

the POWER button. RF 52 will now be displayed on the
front of your video.

200V-240V~,

50/60 Hz

Back view of your video

There are more details, including how to connect extra equipment, on pages 2 to 5.

Stage 2. 

Tuning in your TV

Tune a spare channel of your TV until you see the blue ‘Language

Set’ screen. 

Select the wanted language and country with 

PR+

or 

PR-

button. Press 

OK

to confirm. 

Store this setting on your TV.

If there is any distortion (lines, flickering and so on), the video

usually recommends a new ‘RF’ number during the next stage (auto
set or auto search). Press OK to confirm the new number. Should the
video not recommend a new number, see option 2 or 3 on page 7.

LANGUAGE SET

ENGLISH
DEUTSCH
ITALIANO
ESPAÑOL
FRANÇAIS
NEDERLANDS
SVENSKA
SUOMI

PR+/-:SELECT
OK:CONFIRM         MENU:END

COUNTRY SET

B

N

D

NL

DK

S

E

SF

GR

CH

I

TR

LUX

OTHERS

PR+/-:SELECT
OK:CONFIRM         MENU:END

*For selecting the country, refer to the followings.

B: Belgium
D: Germany 
DK: Denmark
E: Spain
GR: Greece

I: Italy
LUX: Luxembourg
N: Norway
NL: Netherlands
S: Sweden

SF: Finland
CH: Switzerland
TR: Turkey

Stage 3. 

If you already set the language and country set, you can see the followings.

MENU:END

PLEASE WAIT...

CH 25

Point the remote control at the video and press 

OK

.

The video is now tuning all the television stations available in your area.

If ‘Clock Set’ appears on the TV screen, please enter the time and date.

Use the number buttons 

0

to 

9

on the remote control. Press 

OK

to confirm. 

When ‘Manual Set’ appears on the TV screen, press 

MENU

to end.

Your video is now set up. If you want to change station names or

the programmes they are stored on see pages 12 and 13.

MANUAL SET

PR01 P-01

PR08 P-08

PR02 P-02

PR09 P-09

PR03 P-03

PR10 P-10

PR04 P-04

PR11 P-11

PR05 P-05

PR12 P-12

PR06 P-06

PR13 P-13

PR07 P-07

PR14 ----

PR+/-:SELECT
OK:CONFIRM      MENU:END

Important

: If you switch your video off at the mains overnight you

do not have to retune the settings. You will lose the time and date,
these will have to be reset (see page 9). If you have had any
problems setting up your video , please read the problem-solving
guide on page 28.

Summary of Contents for SV-871

Page 1: ...cting your video to the satellite system or DVB receiver Connecting your video to the hi fi system Option 1 Connecting your video to the hi fi system Option 2 3 How to connect your video to another vi...

Page 2: ...art lead not supplied You will get better pictures and sound quality if you connect your video with a scart lead 200V 240V 50 60 Hz 2 If you have connected your video as shown in option 2 turn to page...

Page 3: ...ideo Press the play button on the second video 3 Press the record button on the first video The video will start recording If your video has two scart sockets you can use the other socket AV2 to conne...

Page 4: ...tting of your TV Refer to operation manual When you find the test picture memorise it on the program place Press OK on the remote control more than 5 seconds to exit the test picture What to do if you...

Page 5: ...tore all the program settings See page 9 to set the time and date CLOCK SET 0 9 SETUP HOUR CORRECT OK CONFIRM MENU END TIME DATE 2 If the CLOCK SET display is not already on the screen press MENU Choo...

Page 6: ...age 5 Manual tuning Manual tuning allows you to tune in new stations or equipment such as a satellite receiver and so on 1 Press MENU Choose PR Preset by pressing PR then OK Choose Manual Set by press...

Page 7: ...OK CONFIRM MENU END Should you wish to tune in all the channels available in your region please refer to page 6 Sorting programme locations Sorting programme locations allows you to put the video prog...

Page 8: ...rd timer using ShowView numbers optional TV or video viewing selection with the SCART connection page 2 a button for selecting input sources for recording TV stations input sockets You can select the...

Page 9: ...e beginning of a recording play it for about 6 seconds then wind on to the next one When you see the recording you want to watch press PLAY FF SP INDEX 01 0 11 09 16 9 Wide screen format 16 9 Wide scr...

Page 10: ...while Press to continue recording Press to stop your recording Press PR or PR to choose the station you want to record Press SP LP if you wish to double the length of the cassette s recording time Fo...

Page 11: ...et the timer to start recording a second programme before the first recording has finished To stop the recording after it has already started press and hold the STOP button for about five seconds unti...

Page 12: ...review changing and erasing record settings Press MENU Choose Timer Program then press OK 1 2 Select the program you want to change or erase by pressing PR or PR Press OK to confirm Changing a setting...

Page 13: ...pe remain time During fast forward or backward the tape remain time can be displayed only in VCR mode To change between VCR and TV mode press TV VCR button Resetting the counter to zero Press MENU and...

Page 14: ...ound please connect your VCR via SCART cable to your TV unit 1 4X STOP SP PR10 P 10 BIL BIL I II BIL I II BIL OFF Technical information Dimensions Width x height x depth 360 x 91 x 280 mm Weight 3 3 k...

Page 15: ...find out about an audio video button The video has a number other than 52 when RF appears A number other than 52 might be displayed on the video when RF is flashing in the display This means that the...

Page 16: ...or 3 on page 7 LANGUAGE SET ENGLISH DEUTSCH ITALIANO ESPA OL FRAN AIS NEDERLANDS SVENSKA SUOMI PR SELECT OK CONFIRM MENU END COUNTRY SET B N D NL DK S E SF GR CH I TR LUX OTHERS PR SELECT OK CONFIRM...

Page 17: ...g standard functions are available on this set See back cover for quick start guide NTSC playback See page 15 MESECAM tape playback See page 15 Index scan See page 16 Wide screen format See page 17 Co...

Reviews: