background image

6

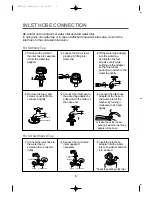
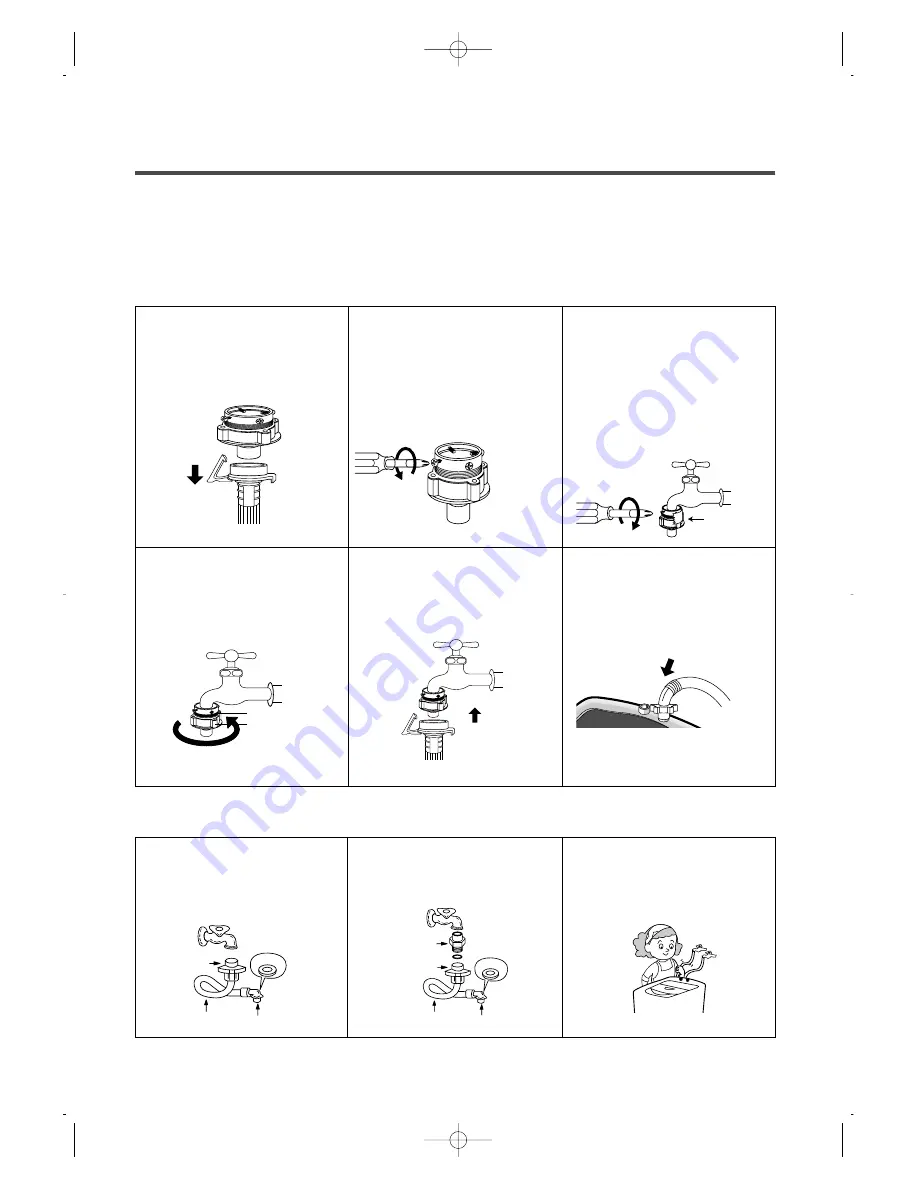
Be careful not to confuse hot water inlet and cold water inlet.
In using only one water tap or in case of attached one water inlet valve, connect the
inlet hose to the cold water inlet valve.

For Screw-Shaped Tap

For Ordinary Tap

INLET HOSE CONNECTION

1

Pull down the collar of
the inlet hose to separate
it from the water tap
adapter.

2

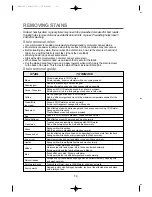
Loosen the four screws
properly in fitting into
water tap.

3

Fit the water tap adapter
into the water tap 
and tighten the four
screws evenly while
pushing up the adapter
so that the rubber
packing can attach to the
water tap tightly.

4

Remove the tape, and
screw connector B into
connect A tightly.

5

Connect the inlet hose to
the water tap adapter by
pulling down the collar of
the hose end.

6

Connect the inlet hose
adapter of the hose to
the water inlet of the
washer by turning it
clockwise to be fixed
tightly.

 Please check the rubber

packing inside the inlet hose
adapter of the hose.

1

Connect the inlet hose to
the water tap by
screwing the connector
tightly.

2

Connect the connector-
inlet supplied if
necessary.

3

Insert the inlet hose
adapter into the water
inlet of a washer and turn
it to be fixed.

*Cheek the packing in the inlet

TAPE

.

Connector

Connector

Rubber

Packing

Hose

Connector

Connector

Rubber

Packing

Hose

Connector

inlet

Connector B

Connector A

DWF-200/240M(101) 


97.1.19 

4:21 

PM 


˘

`

6

Summary of Contents for DWF-200M

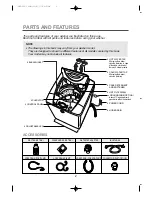
Page 1: ...s during wash and they push up the heavy dirt to remove it during rinse Because the double washing method using both air bubble water current is applied to this washer wash efficiency is excellent in comparison with the original washer system The First Radical Technology and Air Bubble Washing System in the World CONTENTS Page PARTS AND FEATURES 2 WASHER SAFETY 3 INSTALLATION INSTRUCTIONS 4 ELECTR...

Page 2: ... the different features of all models covered by this book Your model may not include all features ACCESSORIES HOSE DRAIN POWER CORD LINT FILTER 2EA HOT WATER TAP COLD WATER TAP After using the washer close the water tap In case of the single valve model there is no hot water valve After using the washer close the water tap In case of 3 wire power cord ground wire will not be provided CASE DETERGE...

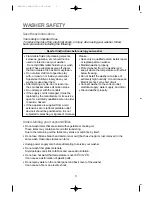
Page 3: ...ould not be used or stored in near your washer Do not add flammable fluids to your wash water These substances give off vapors that can create a fire hazard or explosion Do not allow children to operate play with or crawl on or inside your washer Supervise children closely when your washer is used near them After starting a cycle do not reach into the spin basket unless all motion stops Do not tam...

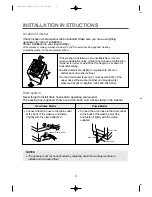
Page 4: ...drain hose to the drain outlet at the back of the washing machine and fasten it tightly with the clamp supplied Hose clamp Drain hose Hose Clamp Drain Outlet Drain hose If the washer is installed on an unsuitable floor it could make considerable noise vibration and cause a malfunction If washer is not level adjust the front leg A up or down for horizontal setting Earthed electrical outlet B is req...

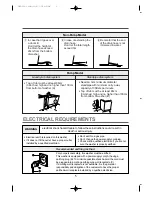
Page 5: ...CAL REQUIREMENTS For your personal safety this washer must be earthed This washer is equipped with a power supply cord A having a earthing plug B To minimize possible shock hazard the cord must be plugged into a mating earthing type wall receptacle C If a mating wall receptacle is not available it is the personal responsibility and obligation of the customer to have the proper earthed wall recepta...

Page 6: ...tightly 4Remove the tape and screw connector B into connect A tightly 5Connect the inlet hose to the water tap adapter by pulling down the collar of the hose end 6Connect the inlet hose adapter of the hose to the water inlet of the washer by turning it clockwise to be fixed tightly Please check the rubber packing inside the inlet hose adapter of the hose 1Connect the inlet hose to the water tap by...

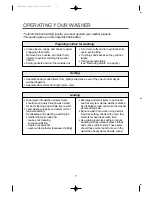
Page 7: ...esults Load washer properly and select correct load size setting Overloading and selecting a setting too small for the wash load can cause poor cleaning increase wrinkling create excessive lint wear out items faster because of pilling Mix large and small items in each load Load evenly to maintain washer balance An off balance load can make the washer vibrate during spin Reduce wash time when using...

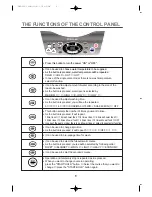
Page 8: ...wer feed 2 times rinse 2 times shower feed 3 times rinse 3 times shower feed 4 times rinse 4 times shower feed OFF In case of the pump model there is no shower rinse or spray rinse selector function Operation and temporary stop is repeated as it is pressed When you want to change course in operating press the START HOLD button Select the course that you want to change press the START HOLD button a...

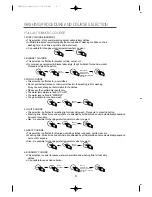
Page 9: ...ng tub for washing It may cause shrinkage or deformation to the clothes Please use the neutral deter gents only The water temperature is fixed to COLD The water level is fixed to MEDIUM 1 5kg s limitation for one time wash WASHING PROCEDURE AND COURSE SELECTION POWER START HOLD COURSE POWER START HOLD adjust to WOOL POWER START HOLD COURSE adjust to water level and water temperature and washing ti...

Page 10: ...mes what you want 2 Select the washing time spining time what you want 2 Select the spining time what you want 2 Select the rinsing times spining time what you want 2 Press the Spin button Partial process POWER WASH RINSE RINSE WASH WASH SPIN RINSE RINSE SPIN SPIN 3 Select the water level and water temperature what you want WATER LEVEL WASH TEMP 4 Press the Start Hold button with closing Lid Door ...

Page 11: ...mount recommended on the package Avoid dripping or spilling any fabric softener on the load Dilute fabric softener with warm water Fill dispenser with warm water until liquid reaches the base line in the case The dispenser is for liquid fabric softener use only See page 2 The liquid fabric softener will be put into the TUB automatically when final Rinse process 7 Press the START HOLD button NOTE D...

Page 12: ...ter supply to the washer This helps avoid accidental flooding due to a water pressure surge while you are away Wipe up detergent bleach and other spills with a soft damp cloth or sponge as they occur Occasionally wipe the outside of the washer to keep it looking like new one Clean interior with 250ml of chlorine bleach mixed with 500ml of detergent Run washer through a complete cycle Repeat proces...

Page 13: ...off the water supply to the washer and sperate the inlet hose 3Pull the inlet filter out 4Remove the dirt from the inlet filter with a brush 1Put down the remained water in the hose And put a container under the 2Turn the cap counter 3Pull out the filter assembly 4Clean the drain filter 5Put in the filter along the guiding prominence of the case Please note the left position of the filter adjustin...

Page 14: ...water and soak in an enzyme prewash If stains persist rub in a little detergent and rinse in cold water Blot up quickly and rinse out in COLD water Rub in a little detergent and wash in the maximum temperature allowed for the fabric type Rinse in COLD water and wash normally If stain is still apparent sponge with white spirits Rub affected area with white vinegar and then rinse under running COLD ...

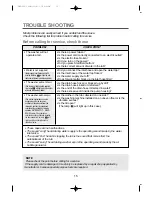
Page 15: ...hed within 20 minutes the lamp will light up and the buzzer will sound to indicate a problem The washer will not drain If the drain is not finished within selected time lamp will light up and the buzzer will sound to indicate a problem Is there a power failure Is the power cord correctly connected to an electric outlet Is the electric fuse broken Did you turn on the power Did you press Start Hold ...

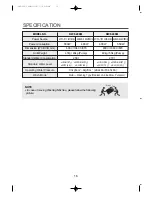
Page 16: ...ht 47kg 48kg Pump 49kg 50kg Pump Standard Water Consumption 250 270 Standard Water Level HIGH 97 MEDIUM 77 LOW 66 E LOW 42 HIGH 103 MEDIUM 87 LOW 70 E LOW 43 Operating Water Pressure 0 3kgf cm2 8kgf cm 2 29 4kPa 784 5kPa Wash Mode Multi Washing Type Radical Air Bubble Pulsator SPECIFICATION NOTE In case of moving Washing Machine please follow the following picture Front Top DWF 200 240M 101 97 1 1...

Reviews: