14
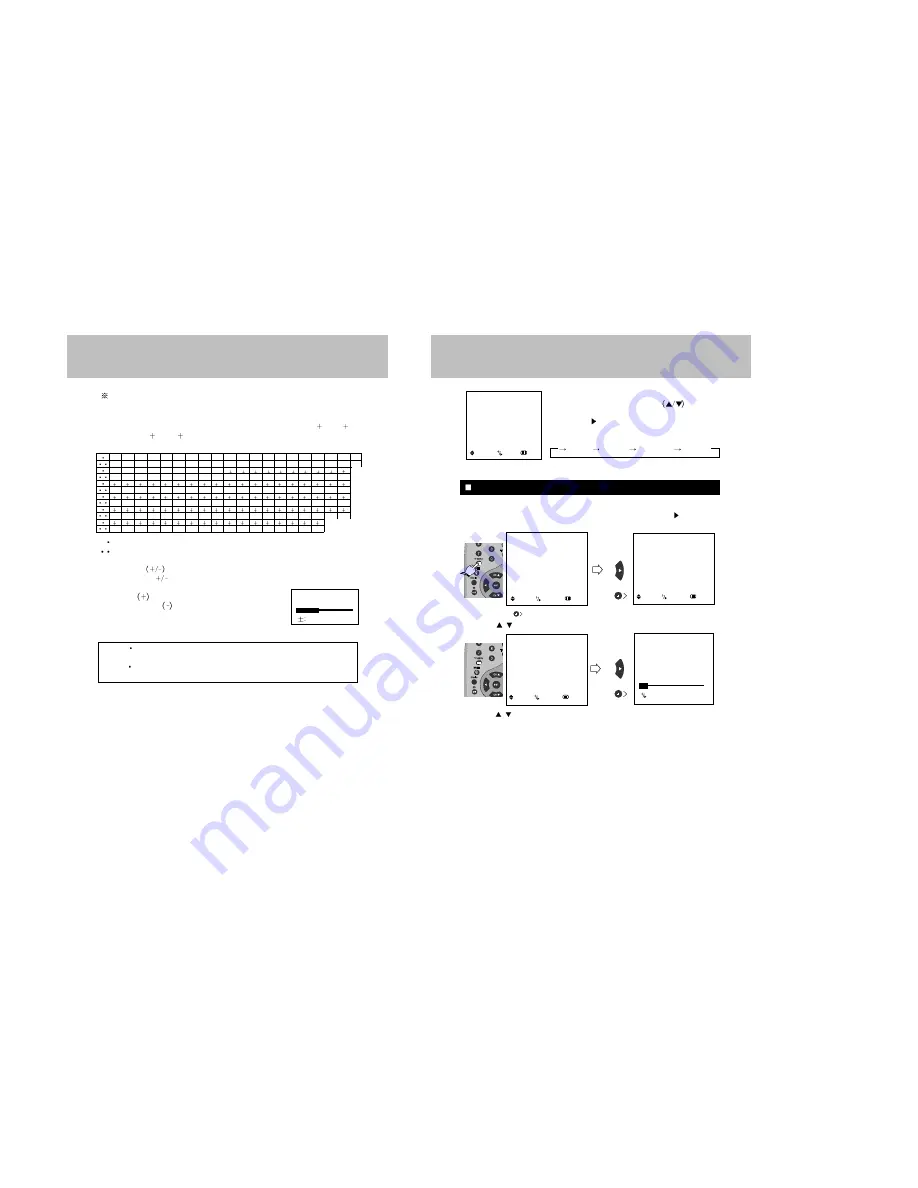
ON SCREEN LANGUAGE SELECTION
1. Press POWER button to turn the TV on.
2. Press TV MENU button and move the cursor to "SET UP" option and press
or
button, then the "SET UP" menu is displayed.
3. Press VOLUME
button to Select ANTENNA option.(TV or CATV)
4. Press CH
/
buttons to place cursor on the "AUTO PROGRAM " option and press VOL
+ button.
5. Press CH /
buttons to Select the channel you want.
6. Press VOL + or VOL - buttons to adjust volume to your desired listening level.
BASIC OPERATION
AUTO PROGRAMMING 2
: STOP
SET UP
ANTENNA
CATV 2
AUTO PROGRAM
FINE TUNE
0
: MOVE
:SELECT
: PREV.
1) Press the TV MENU button.
2) Press the CHANNEL UP/DOWN
button to
reach LANGUAGE mode.
3) Press the
or button to select the desired
language.
4) It will appear on the screen like below;
5) Press the TV MENU button to exit.
PICTURE
SOUND
TIME
SETUP
FUNCTION
LANGUAGE ENGLISH
: MOVE
: ADJ.
: EXIT
MENU
ENGLISH
ESPAÑOL
PORTUGUÊS
FRANÇAIS
MENU
PICTURE
SOUND
TIME
SETUP
FUNCTION
LANGUAGE ENGLISH
: MOVE
:SELECT
: EXIT
SET UP
ANTENNA
CATV 2
AUTO PROGRAM
FINE TUNE
0
: MOVE
:SELECT
: PREV.
or
or
13
CABLE TV CHANNEL CONVERSION CHART
In addition to the normal TV reception from an antenna for VHF (Channels 2-13) and UHF
(Channel 14-69), your TV set is equipped to receive non-scrambled cable TV channels.
SubMid band (A-8, A-5-A-1), Mid band (A-I) Super band (J-W) Hyper band (W 1 - W 28)
and Ultra band (W 29 - W 84) can be received by using the channel selections as shown in
the following chart.
Regular cable channel designations.
Your TV set's corresponding on-screen CABLE channel numbers.
Press VOLUME
buttons
on either the
Remote Control or(
) front panel to adjust volume to your
desired listening level.
Pressing the
button will increase
sound volume, the
button will
decrease sound volume.
The volume level is indicated on the
screen by reference number (0-100)and by bar scale as shown.
NOTE TO CATV SYSTEM INSTALLER
This reminder is provided to call the CATV system installer’s attention to article 820-40 of the
NEC that provides guidelines for proper grounding and, in particular, specifies that cable ground
shall be connected to the grounding system of the building, as close to the point of cable entry as
practical.
NOTES
The volume level can be muted instantly by pressing MUTE button on the Remote
Control. See "MUTE Button" on page 34.
Your TV set can receive the normal TV channel(2-13) including the CABLE TV
channel
A-8
A-4
01
28
47
48
49
50
51
52
53
54
55
56
57
58
59
60
61
62
63
64
65
66
67
68
69
70
71
72
73
74
75
76
77
78
79
80
81
82
83
84
29
30
31
32
33
34
35
36
37
38
39
40
41
42
43
44
45
46
96
97
98
99
14
15
16
17
18
19
20
21
22
23
24
25
26
27
A-3 A-2
A-1
A
B
C
O
P
Q
R
S
T
U
V
W
W 1 W 2
W 11 W 12 W 13 W 14 W 15 W 16 W 17 W 18 W 19 W 20 W 21 W 22 W 23 W 24 W 25 W 26 W 27 W 28 W 29
W 30 W 31 W 32 W 33 W 34 W 35 W 36 W 37 W 38 W 39 W 40 W 41 W 42 W 43 W 44 W 45 W 46 W 47 W 48
85
86
87
88
89
90
91
92
93
94
100 101 102 103 104 105 106 107
108
W 49 W 50 W 51 W 52 W 53 W 54 W 55 W 56 W 57 W 58 W 59 W 60 W 61 W 62 W 63 W 64 W 65 W 66 W 67
109 110 111 112 113 114 115 116 117 118 119 120 121 122 123 124 125
W 68 W 69 W 70 W 71 W 72 W 73 W 74 W 75 W 76 W 77 W 78 W 79 W 80 W 81 W 82 W 83 W 84
W 3 W 4 W 5 W 6 W 7 W 8 W 9 W 10
D
E
F
G
H
I
J
K
L
M
N
A-5
95
VOLUME 25
ADJ.
Summary of Contents for DDQ-9H1SC
Page 22: ...44 43 Changing the audio subtitle language Setting a custom view...
Page 23: ...46 45 Selecting a menu and 3D Changing the size and angle of the screen...
Page 24: ...48 47 Setting the Language Using the Setup Menu...
Page 25: ...50 49 Setting the VIDEO Setting the Language...
Page 26: ...52 51 Setting the Audio Setting the SPEAKERS...
Page 27: ...54 53 Setting rating level and password CUSTOM settings...
Page 28: ...56 55 Operation with an MP3 disc C 001 T 008 Operation with an MP3 disc...
Page 29: ...58 57 Use of JPEG DISC Use of JPEG DISC...
Page 32: ...64 63 MEMO...
Page 33: ...65 MEMO...


