


12
TV FUNCTION & OPERATION
Connect either Antenna or Cable TV according to "ANTENNA CONNECTION"
instruction on page 8.
Insert batteries into the Remote Control unit according to "REMOTE CONTROL USE"
instruction on page 11.
Connect the power cord to AC outlet.
– Voltage is between 120 Volts.
– Frequency is compatible (50/60Hz)
POWER ON
1) Press the MAIN POWER switch on the control panel of the set to turn on and stand-by
RED LED will illuminate.
2) The TV set is now in stand-by mode, to turn it on press CH
key located front panel
of the set or press power or CH
key on the remote control hand unit.
The NO LED will illuminate.
POWER OFF
1) Press the POWER key on the remote control hand unit.
The RED LED will illuminate.
2) If you want to turn off for a long time, Press the MAIN POWER switch on the control panel.
3) When there is no broadcasting signal, the TV set goes off automatically after 15 minutes.
In this case, the TV set goes to stand-by mode, there for The RED LED will illuminate.
This function is the same as in the AV mode.
CHANNEL SELECTION
Use CHANNEL (
) buttons on the Remote Control (or CHANNEL (
) buttons on the
front panel).
Pressing the ( ) button to advances for the higher channels, and press the ( ) button to go
down for the lower channels.
Channels can be selected directly by using 10-Digit Keypad on the Remote Control.
For example, if you select channel 5, press "0" first, then press "5". (Be sure to press "0" first,
before pressing "5" for channel 5.)
For channel 120, press the 100 button first, then press "2", "0". Also refer to the CABLE
CHANNEL CONVERSION CHART below.
(Front panel)
NOTE :
Certain channels have been preset at the factory. It may be necessary to add or
erase some channels in your areas. See "AUTO PROGRAM" on page 17 for
presetting channels.
11
REMOTE CONTROL USE
Correct
Point at the Remote Control Sensor of the TV set.
The maximum operable distance is approximately 6m from the Remote Control Sensor, and
not more than 30 to either side of center.
The operation of the Remote Control is most effective when there is nothing between it and
the Remote Control Sensor.
The duration of the batteries is approximately 6 months to 1 year.
Replace the batteries when the remote control operation becomes unstable.
Battery Installation/Notes
Press the indentation and lift up the cover in the direction of the arrow.
Correctly install the batteries, observing
polarities as shown
Do not use a combination of old and new batteries or batteries of different types.
If batteries become exhausted, remove and replace them soon.
When battery leakage occurs, clean the battery compartment with a soft cloth and replace the
batteries.
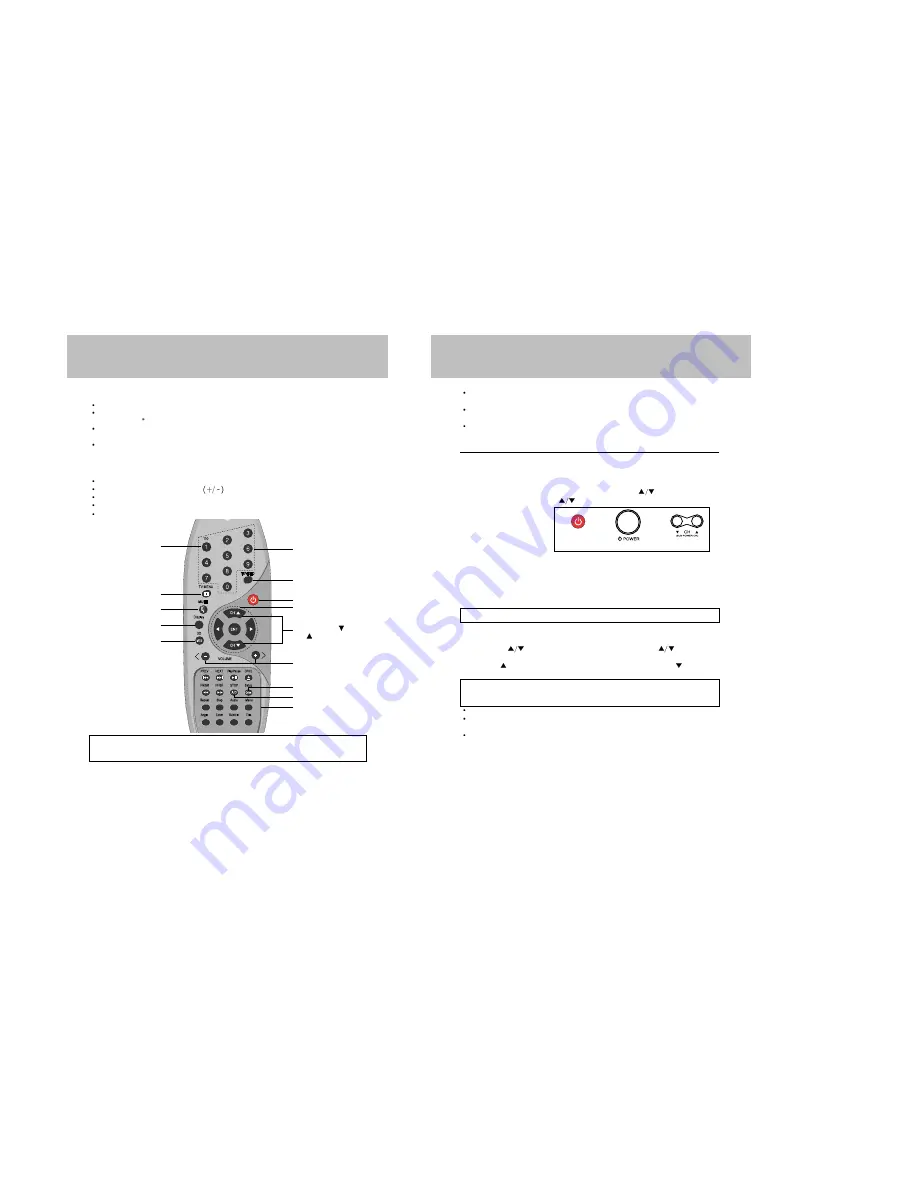
Direct channel
selection Buttons
TV/Video Button
Power Button
DVD Control Button
Channel Down( )/
Up( ) Buttons
Volume Down(-)/
Up(+) Buttons
Add/Delete Buttons
TV Menu Button
Mute Button
Display Button
MTS Button
DVD 3D Button
Remote control
or
or
NOTE :
Power button of front panel is not active when you use the DC battery cord.
100 Button
DVD Function Buttons
Quick View Buttons
NOTICE
: To select channels (to jump directly to a desired channel)100 through 125, press the
"1" button for 2 second and then the last two digits within a few seconds after
pressing the " 1" button.
Summary of Contents for DDQ-9H1SC
Page 22: ...44 43 Changing the audio subtitle language Setting a custom view...
Page 23: ...46 45 Selecting a menu and 3D Changing the size and angle of the screen...
Page 24: ...48 47 Setting the Language Using the Setup Menu...
Page 25: ...50 49 Setting the VIDEO Setting the Language...
Page 26: ...52 51 Setting the Audio Setting the SPEAKERS...
Page 27: ...54 53 Setting rating level and password CUSTOM settings...
Page 28: ...56 55 Operation with an MP3 disc C 001 T 008 Operation with an MP3 disc...
Page 29: ...58 57 Use of JPEG DISC Use of JPEG DISC...
Page 32: ...64 63 MEMO...
Page 33: ...65 MEMO...


