background image

38

D-Link EBR-2310 User Manual

Section 3 - Configuration

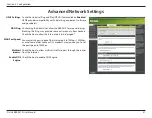
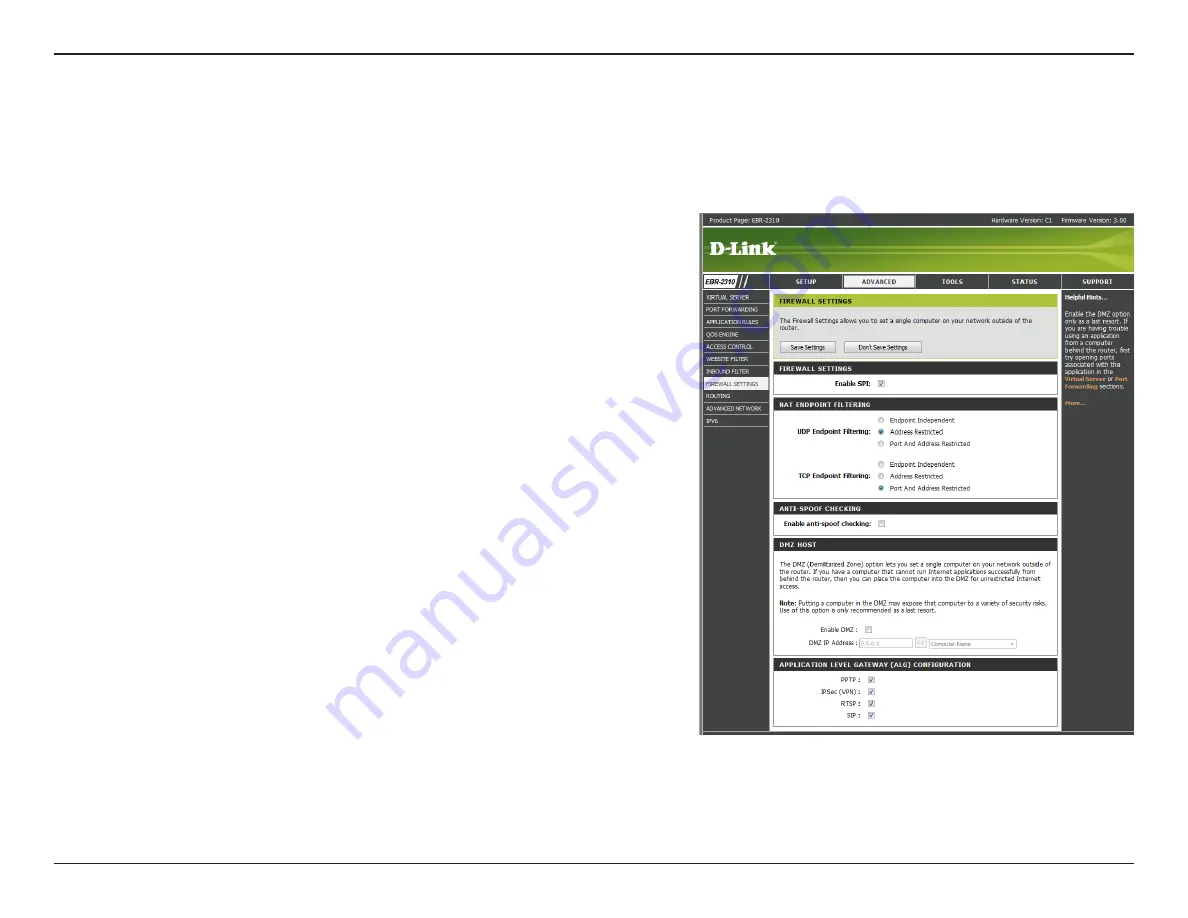
SPI (Stateful Packet Inspection, also known as dynamic packet filtering) 

helps to prevent cyber attacks by tracking more state per session. It 

validates that the traffic passing through the session conforms to the 

protocol.

If an application has trouble working from behind the router, you can 

expose one computer to the Internet and run the application on that 

computer.

Note: 

Placing a computer in the DMZ may expose that computer to a 

variety of security risks. Use of this option is only recommended as a last 

resort.

Specify the IP address of the computer on the LAN that you want to 

have unrestricted Internet communication.

Enable SPI:

Enable DMZ 

Host:

DMZ IP Address:

Firewall Settings

A firewall protects your network from the outside world. The D-Link EBR-2310 offers a firewall type functionality. The SPI feature helps prevent cyber 
attacks. Sometimes you may want a computer exposed to the outside world for certain types of applications. If you choose to expose a computer, 
you cam enable DMZ. DMZ is short for Demilitarized Zone. This option will expose the chosen computer completely to the outside world.

Summary of Contents for EBR-2310 - EN Broadband Router

Page 1: ......

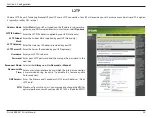
Page 2: ...ing Started 12 Configuration 13 Log in 13 Setup Wizard 14 Internet Setup 19 Static assigned by ISP 19 Manual Configuration 20 Dynamic Cable 20 Internet Setup 21 PPPoE DSL 21 PPTP 22 L2TP 24 Network Settings 26 DHCP Server Settings 27 Virtual Server 28 Port Forwarding 30 Application Rules 31 QoS Engine 32 Access Control 33 Access Control Wizard 33 Website Filters 36 Inbound Filter 37 Firewall Setti...

Page 3: ... 59 Update Firmware 60 DDNS 61 System Check 62 Schedules 63 Device Information 64 Log 65 Stats 66 Internet Sessions 66 Routing Table 67 IPv6 Network Information 68 Support 69 Troubleshooting 70 Assigning a Static IP Address 74 Adding and Sharing Printers in Windows XP 77 Adding a local printer 77 Sharing a Network Printer 83 Sharing an LPR Printer 87 Networking Basics 92 Check your IP address 92 S...

Page 4: ...xplorer Version 6 0 and above for configuration Product Overview Package Contents Note Using a power supply with a different voltage rating will damage and void the warranty for this product If any of the above items are missing please contact your reseller EBR 2310 Ethernet Broadband Router Power Adapter CAT5 Ethernet Cable CD with drivers and software If any of the above items are missing please...

Page 5: ...in more expensive routers The EBR 2310 is compatible with most popular operating systems including Macintosh Linux andWindows and can be integrated into an existing network This Manual is designed to help you connect the D Link Express EtherNetwork EBR 2310 to a high speed Internet connection and 4 Ethernet PC connections This manual provides a quick introduction to Broadband Router Technology Fir...

Page 6: ...ed on Mac Address URL and or Domain Name NetworkAddressTranslation NAT allows you to share a single IP Address and protects you from outside intruders gaining access to your private network DHCP Server Supported All of the networked computers can retrieve TCP IP settings automatically from the EBR 2310 Web Based Management EBR 2310 is configurable through any network computer s web browser using N...

Page 7: ... Panel 1 2 3 1 Power Power indicator will light Green 2 Internet The Internet status indicator will light Green when there is a good physical Internet connection 3 LAN Link Act Link status indicators light Green The LED flickers whenthecorrespondingportis sending or receiving data ...

Page 8: ...hernet RJ 45 cable The LED glows steadily when a port is connected to a hub switch or network adapter equipped computer in your local area network LAN 2 Internet The Internet port socket CAT5 Ethernet RJ 45 cable This is where you will connect your Cable or DSL 3 Power Connect one end of your included power adapter to the power port and the other end into your power outlet 4 Reset Used to restore ...

Page 9: ... forwarded to and sends it If the information is not intended for any computer on your network the data is discarded This keeps any unwanted or harmful information from accessing or damaging your network Introduction to Firewalls A firewall is a device that sits between your computer and the Internet that prevents unauthorized access to or from your network A firewall can be a computer using firew...

Page 10: ...twork card or a wireless network card Most networks use hardware devices such as hubs or switches that each cable can be connected to in order to continue the connection between computers A hub simply takes any data arriving through each port and forwards the data to all other ports A switch is more sophisticated in that a switch can determine the destination port for a specific piece of data A sw...

Page 11: ...yconfigurethenetworksettingsofyourcomputers ThedefaultIPaddressoftheEBR 2310is192 168 0 1 and the default subnet mask is 255 255 255 0 These addresses can be changed as needed but the default values are used in this manual If the TCP IP environment of your computer has not yet been configured you can refer to ConfiguringYour PCs to Connect to the EBR 2310 to configure it For example 1 Configure yo...

Page 12: ...ep by step instructions that follow are shown in Windows XP The steps and screens are similar for the other Windows operating systems If the CD Autorun function does not automatically start on your computer go to Start Run In the run box type D autorun exe where D represents the drive letter of your CD ROM drive When the autorun screen appears click the orange Install Router button Getting Started...

Page 13: ...r or Netscape Navigator with Java Script enabled Log in Open your web browser and type in the IP address of the EBR 2310 into the Location for Netscape or Address for IE field and press Enter The default IP address of the EBR 2310 is 192 168 0 1 You may also use http dlinkrouter For example http 192 168 0 1 After the connection is established the logon screen will pop up To log in as an administra...

Page 14: ...D Link EBR 2310 User Manual Section 3 Configuration Setup Wizard You may run the setup wizard to quickly setup your router Click Internet Connection Setup Wizard to launch the wizard Click Next to continue ...

Page 15: ...ection 3 Configuration Create a new password and then click Next to continue Select your time zone from the drop down menu and then click Next to continue Select the type of Internet connection you use and then click Next to continue ...

Page 16: ...t to continue The Host Name is optional but may be required by some ISPs The default host name is the device name of the Router and may be changed If you selected PPPoE enter your PPPoE username and password Click Next to continue Select Static if your ISP assigned you the IP address subnet mask gateway and DNS server addresses Note Make sure to remove your PPPoE software from your computer The so...

Page 17: ...k EBR 2310 User Manual Section 3 Configuration If you selected PPTP enter your PPTP username and password Click Next to continue If you selected L2TP enter your L2TP username and password Click Next to continue ...

Page 18: ...lied by your Internet provider Click Next to continue Click Connect to save your settings Once the router is finished rebooting click Continue Please allow 1 2 minutes to connect Close your browser window and reopen it to test your Internet connection It may take a few tries to initially connect to the Internet ...

Page 19: ...ed that you change the default MAC address unless required by your ISP You can use the Clone Your PC s MAC Address button to replace the Internet port s MAC address with the MAC address of your Ethernet card IP Address Subnet Mask Default Gateway DNS Servers MTU MAC Address Select Static IP Address if all the Internet port s IP information is provided to you by your ISP You will need to enter in t...

Page 20: ...y DNS server IP address assigned by your ISP MaximumTransmission Unit you may need to change the MTU for optimal performance with your specific ISP 1500 is the default MTU The default MAC Address is set to the Internet port s physical interface MAC address on the Broadband Router It is not recommended that you change the default MAC address unless required by your ISP You can use the Clone Your PC...

Page 21: ...d to change the MTU for optimal performance with your specific ISP 1492 is the default MTU ThedefaultMACAddressissettotheInternetport sphysicalinterfaceMACaddressontheBroadbandRouter Itisnotrecommended that you change the default MAC address unless required by your ISP You can use the Clone Your PC s MAC Address button to replace the Internet port s MAC address with the MAC address of your Etherne...

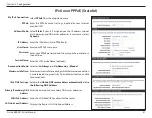
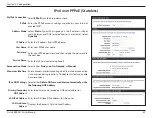
Page 22: ... and then retype the password in the next box Select either Always on On Demand or Manual Enter a maximum idle time during which the Internet connection is maintained during inactivity To disable this feature enable Auto reconnect The DNS server information will be supplied by your ISP Internet Service Provider Address Mode PPTP IP Address PPTP Subnet Mask PPTP Gateway PPTP Server IP Choose PPTP P...

Page 23: ...P 1400 is the default MTU ThedefaultMACAddressissettotheInternetport sphysicalinterfaceMACaddressontheBroadbandRouter Itisnotrecommended that you change the default MAC address unless required by your ISP You can use the Clone Your PC s MAC Address button to replace the Internet port s MAC address with the MAC address of your Ethernet card MTU MAC Address ...

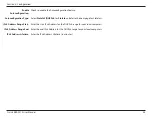
Page 24: ... Select either Always on On Demand or Manual Enter a maximum idle time during which the Internet connection is maintained during inactivity To disable this feature enable Auto reconnect Enter the Primary and Secondary DNS Server Addresses Static L2TP only MaximumTransmissionUnit youmayneedtochangetheMTUfor optimalperformancewithyourspecificISP 1400isthedefaultMTU Address Mode L2TP IP Address L2TP ...

Page 25: ...issettotheInternetport sphysicalinterfaceMACaddressontheBroadbandRouter Itisnotrecommended that you change the default MAC address unless required by your ISP You can use the Clone Your PC s MAC Address button to replace the Internet port s MAC address with the MAC address of your Ethernet card ...

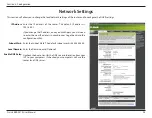
Page 26: ...68 0 1 If you change the IP address once you click Apply you will need to enter the new IP address in your browser to get back into the configuration utility Enter the Subnet Mask The default subnet mask is 255 255 255 0 Enter the Domain name Optional Uncheck the box to transfer the DNS server information from your ISP to your computers If checked your computers will use the router for a DNS serve...

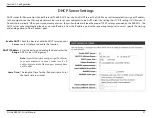
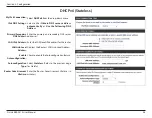
Page 27: ...CP Server DHCP IP Address Range Lease Time DHCP Server Settings DHCP stands for Dynamic Host Control Protocol The EBR 2310 has a built in DHCP server The DHCP Server will automatically assign an IP address to the computers on the LAN private network Be sure to set your computers to be DHCP clients by setting their TCP IP settings to Obtain an IP Address Automatically When you turn your computers o...

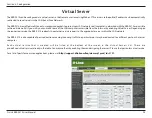
Page 28: ...ing Virtual Server Depending on the requested service the EBR 2310 redirects the external service request to the appropriate server within the LAN network The EBR 2310 is also capable of port redirection meaning incoming traffic to a particular port may be redirected to a different port on the server computer Each virtual service that is created will be listed at the bottom of the screen in the Vi...

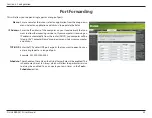
Page 29: ...e listed in the Computer Name drop down menu Select your computer and click Enter the port that you want to open next to Private Port and Public Port The private and public ports are usually the same The public port is the port seen from the Internet side and the private port is the port being used by the application on the computer within your local network Select TCP UDP or Both from the drop do...

Page 30: ... to If your computer is receiving an IP address automatically from the router DHCP you computer will be listed in the Computer Name drop down menu Select your computer and click Enter theTCP and or UDP port or ports that you want to open You can enter a single port or a range of ports Example 24 1009 3000 4000 The schedule of time when the Virtual Server Rule will be enabled The schedule may be se...

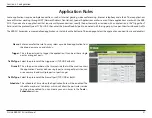
Page 31: ...ow the particular service to always be enabled You can create your own times in the Tools Schedules section Name Trigger Traffic Type Firewall Traffic Type Schedule Application Rules Some applications require multiple connections such as Internet gaming video conferencing Internet telephony and others These applications have difficulties working through NAT Network Address Translation Special Appl...

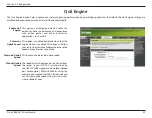
Page 32: ...the detected uplink speed The speed at which data can be transferred from the router to your ISP This is determined by your ISP ISP s offer speed as a download upload pair For example 1 5Mbits 284Kbits Using this example you would enter 284 Alternatively you can test your uplink speed with a service such as www dslreports com Enable QoS Engine Automatic Uplink Speed Measured Uplink Speed Manual Up...

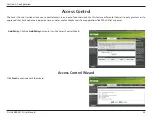
Page 33: ...dd Policy The Access Control section allows you to control access in and out of your network Use this feature as Parental Controls to only grant access to approved sites limit web access based on time or dates and or block access from applications like P2P utilities or games Click Next to continue with the wizard Access Control Wizard ...

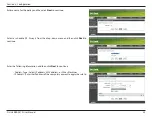
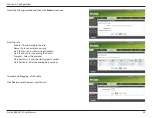
Page 34: ...lick Next to continue Select a schedule I E Always from the drop down menu and then click Next to continue Enter the following information and then click Next to continue Address Type Select IP address MAC address or Other Machines IPAddress EntertheIPaddressofthecomputeryouwanttoapplytheruleto ...

Page 35: ... Check to enable the rule Name Enter a name for your rule Dest IP Start Enter the starting IP address Dest IP End Enter the ending IP address Protocol Select the protocol Dest Port Start Enter the starting port number Dest Port End Enter the ending port number To enable web logging click Enable Click Save to save the access control rule ...

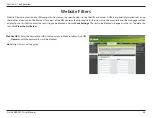
Page 36: ...web sites by the URL or domain A URL is a specially formatted text string that defines a location on the Internet If any part of the URL contains the blocked word the site will not be accessible and the web page will not display To use this feature enter the text string to be blocked and click Save Settings The text to be blocked will appear in the list To delete the text click Clear the List Belo...

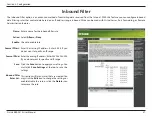
Page 37: ...ttings at the top to save the settings This section will list any rules that are created You may click the Edit icon to change the settings or enable disable the rule or click the Delete icon to remove the rule Name Action Enable Source IP Start Source IP End Save Inbound Filter Rules List The Inbound Filter option is an advanced method of controlling data received from the Internet With this feat...

Page 38: ...ter to a variety of security risks Use of this option is only recommended as a last resort Specify the IP address of the computer on the LAN that you want to have unrestricted Internet communication Enable SPI Enable DMZ Host DMZ IP Address Firewall Settings A firewall protects your network from the outside world The D Link EBR 2310 offers a firewall type functionality The SPI feature helps preven...

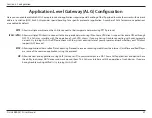
Page 39: ...sal of IPSec through NAT This ALG may interfere with the operation of such VPN clients If you are having trouble connecting with your corporate network try turning this ALG off Please check with the system administrator of your corporate network whether your VPN client supports NAT traversal Allows applications that use RealTime Streaming Protocol to receive streaming media from the internet Quick...

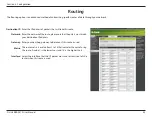
Page 40: ...teway to be taken if this route is used The route metric is a value from 1 to 16 that indicates the cost of using this route A value 1 is the lowest cost and 15 is the highest cost Select the interface that the IP packet must use to transit out of the router when this route is used Destination IP Netmask Gateway Metric Interface The Routing option is an advanced method of customizing specific rout...

Page 41: ...ng the Ping may provide some extra security from hackers Check the box to allow the Internet port to be pinged YoumaysettheportspeedoftheInternetportto10Mbps 100Mbps or auto Some older cable or DSL modems may require you to set the port speed to 10Mbps Check the box to allow multicast traffic to pass through the router from the Internet Check the box to enable QOS Engine UPnP Settings WAN Ping WAN...

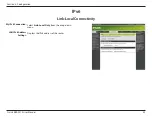
Page 42: ...nk EBR 2310 User Manual Section 3 Configuration IPv6 Select Link Local Only from the drop down menu Displays the IPv6 address of the router My IPv6 Connection LAN IPv6 Address Settings Link Local Connectivity ...

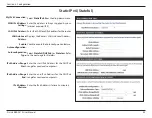
Page 43: ...utoconfigurationfeature Select Stateful DHCPv6 or Stateless Refer to the next page for Stateless Enter the start IPv6 Address for the DHCPv6 range for your local computers Enter the end IPv6 Address for the DHCPv6 range for your local computers Enter the IPv6 Address Lifetime in minutes My IPv6 Connection WAN IPv6 Address Settings LAN IPv6 Address LAN Link Local Address Enable Autoconfiguration Au...

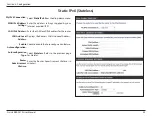
Page 44: ...theLAN local IPv6addressfortherouter Displays the Router s LAN Link Local Address ChecktoenabletheAutoconfigurationfeature Select Stateless Refer to the previous page for Stateful Enter the Router Advertisement Lifetime in minutes My IPv6 Connection WAN IPv6 Address Settings LAN IPv6 Address LAN Link Local Address Enable Autoconfiguration Autoconfiguration Type Router Advertisement Lifetime ...

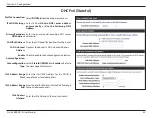
Page 45: ... Address Check to enable the Autoconfiguration feature Select Stateful DHCPv6 or Stateless Refer to the next page for Stateless Enter the start IPv6 Address for the DHCPv6 range for your local computers EntertheendIPv6AddressfortheDHCPv6range for your local computers Enter the IPv6 Address Lifetime in minutes My IPv6 Connection IPv6 DNS Settings Primary Secondary DNS Address LAN IPv6 Address LAN L...

Page 46: ...erver addresses EntertheLAN local IPv6addressfortherouter Displays the Router s LAN Link Local Address ChecktoenabletheAutoconfigurationfeature Select Stateless Refer to the previous page for Stateful Enter the Router Advertisement Lifetime in minutes My IPv6 Connection IPv6 DNS Settings Primary Secondary DNS Address LAN IPv6 Address LAN Link Local Address Enable Autoconfiguration Autoconfiguratio...

Page 47: ...xt box Enter the ISP Service Name optional Select either Always on On Demand or Manual EnteramaximumidletimeduringwhichtheInternetconnection is maintained during inactivity To disable this feature enable Auto reconnect SelecteitherObtainDNSserveraddressautomaticallyorUse the following DNS Address Enter the primary and secondary DNS server addresses Enter the LAN local IPv6 address for the router D...

Page 48: ... Range End IPv6 Address Lifetime Check to enable the Autoconfiguration feature Select Stateful DHCPv6 or Stateless Refer to the next page for Stateless Enter the start IPv6 Address for the DHCPv6 range for your local computers Enter the end IPv6 Address for the DHCPv6 range for your local computers Enter the IPv6 Address Lifetime in minutes ...

Page 49: ...ext box Enter the ISP Service Name optional Select either Always on On Demand or Manual EnteramaximumidletimeduringwhichtheInternetconnection is maintained during inactivity To disable this feature enable Auto reconnect SelecteitherObtainDNSserveraddressautomaticallyorUse the following DNS Address Enter the primary and secondary DNS server addresses Enter the LAN local IPv6 address for the router ...

Page 50: ...ection 3 Configuration Enable Autoconfiguration Autoconfiguration Type Router Advertisement Lifetime Check to enable the Autoconfiguration feature Select Stateful DHCPv6 or Stateless Enter the Router Advertisement Lifetime in minutes ...

Page 51: ...ss Check to enable the Autoconfiguration feature Select Stateful DHCPv6 or Stateless Refer to the next page for Stateless Enter the start IPv6 Address for the DHCPv6 range for your local computers EntertheendIPv6AddressfortheDHCPv6range for your local computers Enter the IPv6 Address Lifetime in minutes My IPv6 Connection 6 to 4 Settings Primary Secondary DNS Address LAN IPv6 Address LAN Link Loca...

Page 52: ...ses Enter the LAN local IPv6 address for the router Displays the Router s LAN Link Local Address Check to enable the Autoconfiguration feature Select Stateless Refer to the previous page for Stateful Enter the Router Advertisement Lifetime in minutes My IPv6 Connection 6 to 4 Settings Primary Secondary DNS Address LAN IPv6 Address LAN Link Local Address Enable Autoconfiguration Autoconfiguration T...

Page 53: ...he LAN local IPv6 address for the router Displays the Router s LAN Link Local Address Check to enable the Autoconfiguration feature Select Stateless Refer to the previous page for Stateful Enter the Router Advertisement Lifetime in minutes My IPv6 Connection IPv6 in IPv4 Tunnel Settings LAN IPv6 Address LAN Link Local Address Enable Autoconfiguration Autoconfiguration Type Router Advertisement Lif...

Page 54: ...ble the Autoconfiguration feature Select Stateful DHCPv6 or Stateless Refer to the next page for Stateless Enter the start IPv6 Address for the DHCPv6 range for your local computers Enter the end IPv6 Address for the DHCPv6 range for your local computers Enter the IPv6 Address Lifetime in minutes My IPv6 Connection IPv6 in IPv4 Tunnel Settings LAN IPv6 Address LAN Link Local Address Enable Autocon...

Page 55: ... enables you to perform Administrator tasks from the remote Internet host The port number used to access the EBR 2310 Example http x x x x 8080whereasx x x xistheInternetIPaddressofthe EBR 2310 and 8080 is the port used for the Web Management interface Admin Password User Password Gateway Name Remote Management Remote Admin Port Administrator Settings This page will allow you to change the Adminis...

Page 56: ...NTP server or select one from the drop down menu To manually input the time enter the values in these fields for theYear Month Day Hour Minute and Second and then click Set Time You can also click Copy Your Computer s Time Settings Apply your computer s date and time settings Time Zone Daylight Saving Enable NTP Server NTP Server Used Manual Copy Your Computer s Time Settings The Time Configuratio...

Page 57: ...ver that will be used to send the logs Youmayalsoselectyourcomputerfromthedrop downmenu only if receiving an IP address from the router via DHCP Enable Logging to SysLog Server SysLog Server IP Address The Broadband Router keeps a running log of events and activities occurring on the Router You may send these logs to a SysLog server on your network ...

Page 58: ...eceive a log file or firmware upgrade notification via e mail Enter the e mail address where you want the e mail sent Enter the SMTP server address for sending e mail If your SMTP server requires authentication select this option Check this box if your SMTP server requires authentication Enter your account for sending e mail Enter the password associated with the account Re type the password assoc...

Page 59: ...ndapreviouslysavefileofconfiguration settings Then click the Load button to transfer those settings to the router This option will restore all configuration settings back to the settings that were in effect at the time the router was shipped from the factory Any settings that have not been saved will be lost including any rules that you have created If you want to save the current router configura...

Page 60: ...utomatically Check Online for Latest Firmware Version to have the router check automatically to see if there is a new firmware upgrade Firmware Upgrade Browse Notifications Options Update Firmware You can upgrade the firmware of the Router here Make sure the firmware you want to use is on the local hard drive of the computer Click on Browse to locate the firmware file to be used for the update Ple...

Page 61: ... account Enter the Password for your DDNS account Enter a time in hours DDNS Server Address Host Name Username or Key Password or Key Timeout DDNS TheDDNSfeatureallowsyoutohostaserver Web FTP GameServer etc usingadomainnamethatyouhavepurchased www whateveryournameis com with your dynamically assigned IP address Most broadband Internet Service Providers assign dynamic changing IP addresses Using a ...

Page 62: ... 3 Configuration The Ping Test is used to send Ping packets to test if a computer is on theInternet EntertheIPAddressthatyouwishtoPing andclickPing The results of your ping attempts will be displayed here System Check Ping Test Ping Results ...

Page 63: ... Check AllDay 24hrs or enter a start and end time for your schedule Click Save to save your schedule You must click Save Settings at the top for your schedules to go into effect The list of schedules will be listed here Click the Edit icon to make changes or click the Delete icon to remove the schedule Name Days Time Save Schedule Rules List Schedules ...

Page 64: ...E a Connect button and a Disconnect button will be displayed Use Disconnect to drop the PPPoE connection and use Connect to establish the PPPoE connection Displays the router s time and firmware version Displays the MAC address and the public IP settings for the router Displays the MAC address and the private local IP settings for the router Displays computers and devices that are connected to the...

Page 65: ... Updates the log details on the screen so it displays any recent activity Clears all of the log contents This option will save the router to a log file on your computer The router automatically logs records events of possible interest in it s internal memory If there isn t enough internal memory for all events logs of older events are deleted but logs of the latest events are retained The Logs opt...

Page 66: ...isplays theTraffic Statistics Here you can view the amount of packets that pass through the EBR 2310 on both the Internet and the LAN ports The traffic counter will reset if the device is rebooted Internet Sessions The screen below displays sessions currently active in the router ...

Page 67: ...67 D Link EBR 2310 User Manual Section 3 Configuration Routing Table This page displays the routing details configured for your router ...

Page 68: ...68 D Link EBR 2310 User Manual Section 3 Configuration IPv6 Network Information All of your IPv6 Internet and network connection details are displayed on this page ...

Page 69: ...69 D Link EBR 2310 User Manual Section 3 Configuration Support ...

Page 70: ...r computer must be on the same IP subnet to connect to the web based utility Make sure you have an updated Java enabled web browser We recommend the following Internet Explorer 6 0 or higher Netscape 8 or higher Mozilla 1 7 12 5 0 or higher Opera 8 5 or higher Safari 1 2 or higher with Java 1 3 1 or higher Camino 0 8 4 or higher Firefox 1 5 or higher Verify physical connectivity by checking for so...

Page 71: ... bar This should open the login page for your the web If you still cannot access the configuration unplug the power to the router for 10 seconds and plug back in Wait about 30 seconds and try accessing the configuration If you have multiple computers try connecting using a different computer 2 What can I do if I forgot my password If you forgot your password you must reset your router Unfortunatel...

Page 72: ... increments of ten Ex 1492 1482 1472 etc Note AOL DSL users must use MTU of 1400 To find the proper MTU Size you ll have to do a special ping of the destination you re trying to go to A destination could be another computer or a URL Click on Start and then click Run Windows 95 98 and ME users type in command Windows NT 2000 and XP users type in cmd and press Enter or click OK Once the window opens...

Page 73: ...h 1452 28 1480 Once you find your MTU you can now configure your router with the proper MTU size To change the MTU rate on your router follow the steps below Open your browser enter the IP address of your router 192 168 0 1 and click OK Enter your username admin and password blank by default Click OK to enter the web configuration page for the device Click on Setup and then click Manual Configure ...

Page 74: ...to the computers on the network using DHCP Dynamic Host Configuration Protocol technology If you are using a DHCP capable Gateway Router you will not need to assign Static IP Addresses If you are not using a DHCP capable Gateway Router or you need to assign a Static IP Address please follow these instructions Go to Start Click on Control Panel Double click on Network Connections ...

Page 75: ...A Assigning a Static IP Address Right click on Local Area Connections Left click Properties Highlight Internet Protocol TCP IP Click Properties Select Use the following IP address in the Internet Protocol TCP IP Properties window shown below ...

Page 76: ...as an IP Address of 192 168 0 2 the other computers should have IP Addresses that are sequential like 192 168 0 3 and 192 168 0 4 The subnet mask must be the same for all the computers on the network Input your DNS server addresses Note If you are entering a DNS server you must enter the IP Address of the Default Gateway The DNS server information will be provided by your ISP Internet Service Prov...

Page 77: ...re a network printer a printer connected to your network through a Gateway Router use the Add Printer Wizard you can find the directions below First make sure that you have run the Network Setup Wizard on all of the computers on your network We will show you 3 ways to use the Add Printer Wizard 1 Adding a local printer 2 Sharing an network printer 3 Sharing an LPR printer Adding a local printer A ...

Page 78: ...78 D Link EBR 2310 User Manual Appendix B Adding and Sharing Printers in Windows XP Click on Add a printer Click Next ...

Page 79: ...cal printer attached to this computer DeselectAutomaticallydetectandinstallmyPlugandPlayprinterifithasbeen selected Click Next Select Use the following port From the pull down menu select the correct port for your printer Most computers use the LPT1 port as shown in the illustration Click Next ...

Page 80: ...er for your printer Click Next Ifthecorrectdriverisnotdisplayed inserttheCDorfloppydiskthatcamewithyour printer and click Have Disk At this screen you can change the name of the printer optional Click Next SelectYes to print a test page A successful printing will confirm that you have chosen the correct driver Click Next ...

Page 81: ...10 User Manual Appendix B Adding and Sharing Printers in Windows XP This screen gives you information about your printer The printer will begin to print a test page Click Finish When the test page has printed Click OK ...

Page 82: ...310 User Manual Appendix B Adding and Sharing Printers in Windows XP Go to Start Printers and Faxes A successful installation will display the printer icon as shown at right You have successfully added a local printer ...

Page 83: ...ter you have run the Network Setup Wizard on all the computers on your network youcanrunthe AddPrinterWizardonallthecomputersonyournetwork Pleasefollow these directions to use the Add Printer Wizard to share a printer on your network Go to Start Printer and Faxes Click on Add a Printer Click Next ...

Page 84: ...84 D Link EBR 2310 User Manual Appendix C Sharing a Network Printer Select Network Printer Click Next Select Browse for a printer Click Next Select the printer you would like to share Click Next ...

Page 85: ...85 D Link EBR 2310 User Manual Appendix C Sharing a Network Printer Click Finish To check for proper installation Go to Start Printers and Faxes ...

Page 86: ...ave completed adding the printer To share this printer on your network Remember the printer name Run the Add Printer Wizard on all the computers on your network Make sure you have already run the Network SetupWizard on all the network computers After you run the Add Printer Wizard on all the computers in the network you can share the printer ...

Page 87: ...you will need a Print Server such as the DP 101P Please make sure that you have run the Network Setup Wizard on all the computers on your network To share an LPR printer please follow these directions Go to Start Printers and Faxes Click on Add a Printer The screen to the right will display Click Next Select Local printer Click Next ...

Page 88: ...ix D Sharing an LPR Printer Select Create a new port Fromthepull downmenu selectStandardTCP IPPort asshown Click Next Please read the instructions on this screen Click Next Enter the Printer IP Address and the Port Name as shown Click Next ...

Page 89: ...D Sharing an LPR Printer In this screen select Custom Click Settings Enter the Port Name and the Printer Name or IP Address Select LPR Enter a Queue Name if your Print Server Gateway has more than one port you will need a Queue name Click OK ...

Page 90: ...n will show you information about your printer Click Finish Select the printer you are adding from the list of Printers Insert the printer driver disk that came with your printer Click Have Disk If the printer driver is already installed Select Keep existing driver Click Next ...

Page 91: ...on the other computers on your network Click Next Select Yes to print a test page Click Next This screen will display information about your printer Click Finish to complete the addition of the printer Please run the Add Printer Wizard on all the computers on your network in order to share the printer Note You must run the Network Setup Wizard on all the computers on your network before you run th...

Page 92: ...n Start Run In the run box type cmd and click OK At the prompt type ipconfig and press Enter This will display the IP address subnet mask and the default gateway of your adapter Iftheaddressis0 0 0 0 checkyouradapterinstallation security settings andthesettingsonyourrouter Somefirewallsoftware programs may block a DHCP request on newly installed adapters If you are connecting to a wireless network...

Page 93: ...presents your D Link network adapter and select Properties Step 3 Highlight Internet Protocol TCP IP and click Properties Step 4 Click Use the following IP address and enter an IP address that is on the same subnet as your network or the LAN IP address on your router Example If the router s LAN IP address is 192 168 0 1 make your IP address 192 168 0 X where X is a number between 2 and 99 Make sur...

Page 94: ...Negotiation VPN Pass Through Multi Sessions PPTP L2TP IPSec LEDS Power Internet Local Network 10 100 Operating Temperature 32 F to 131 F 0 C to 55 C Humidity 95 maximum non condensing Power Input External power Supply DC 5V 1 0A Safety Emissions FCC CE Dimensions L 5 6in 142mm W 4 3in 109mm H 1 2in 31mm Weight 0 44 lbs 200g Warranty 1 Year Technical Specifications ...

Page 95: ... 2310 Hardware Revision located on the label on the bottom of the router e g rev C1 Serial Number s n number located on the label on the bottom of the router You can find software updates and user documentation on the D Link website as well as frequently asked questions and answers to technical issues For customers within the United States Phone Support 877 453 5465 Internet Support http support d...

Page 96: ...er this Limited Warranty will be at D Link s option to repair or replace the defective Hardware during the Warranty Period at no charge to the original owner or to refund the actual purchase price paid Any repair or replacement will be rendered by D Link at an Authorized D Link Service Office The replacement hardware need not be new or have an identical make model or part D Link may at its option ...

Page 97: ...licensee for the non conforming Software will be refunded by D Link provided that the non conforming Software and all copies thereof is first returned to D Link The license granted respecting any Software for which a refund is given automatically terminates Non Applicability of Warranty The Limited Warranty provided hereunder for Hardware and Software portions of D Link s products will not be appl...

Page 98: ...y product that is not packaged and shipped in accordance with the foregoing requirements or that is determined by D Link not to be defective or non conforming Submitting A Claim Canada The customer shall return the product to the original purchase point based on its return policy In case the return policy period has expired and the product is within warranty the customer shall submit a claim to D ...

Page 99: ...0AM 9 00PM EST What Is Not Covered The Limited Warranty provided herein by D Link does not cover Productsthat inD Link sjudgment havebeensubjectedtoabuse accident alteration modification tampering negligence misuse faultyinstallation lack of reasonable care repair or service in any way that is not contemplated in the documentation for the product or if the model or serial number has been altered t...

Page 100: ... REMEDY FOR A BREACH OF THE FOREGOING LIMITED WARRANTY IS REPAIR REPLACEMENT OR REFUND OF THE DEFECTIVE OR NONCONFORMING PRODUCT THE MAXIMUM LIABILITY OF D LINK UNDERTHISWARRANTY IS LIMITEDTOTHE PURCHASE PRICE OFTHE PRODUCT COVERED BYTHEWARRANTY THE FOREGOING EXPRESS WRITTEN WARRANTIES AND REMEDIES ARE EXCLUSIVE AND ARE IN LIEU OF ANY OTHER WARRANTIES OR REMEDIES EXPRESS IMPLIED OR STATUTORY Gover...

Page 101: ...r Connect the equipment into an outlet on a circuit different from that to which the receiver is connected Consult the dealer or an experienced radio TV technician for help FCC Caution Any changes or modifications not expressly approved by the party responsible for compliance could void the user s authority to operate this equipment This device complies with Part 15 of the FCC Rules Operation is s...

Page 102: ...e and 2 this device must accept any interference received including interference that may cause undesired operation IMPORTANT NOTE Radiation Exposure Statement This equipment complies with Canada radiation exposure limits set forth for an uncontrolled environment This equipment should be installed and operated with minimum distance 20cm between the radiator and your body This device has been desig...

Page 103: ...k EBR 2310 User Manual Appendix I Registration Product registration is entirely voluntary and failure to complete or return this form will not diminish your warranty rights Version 3 0 June 17 2010 Registration ...

Reviews: