68
Chapter 5 Configuring the xStack Storage Array
2.
Perform one of the following steps:
–
On the
Storage
menu, click
Media Scan
.
–
Right-click and click
Media Scan
.
Either step starts the scan operation and displays a message informing you that the scan
started successfully.
3.
Click
OK
to remove the message.
After you start a media scan task, you can use the Tasks Info screen to view the progress of the
scan operation (see Section 6.9).
5.4.2
Adding iSCSI Initiators
Use the following procedure to tell the xStack Storage Array about the iSCSI initiators with which
it will communicate.
1.
Perform one of the following steps in the
Logical Resources
tab:
–
Click
Initiator Resources
. Then, on the
iSCSI
menu, click
Add
Initiator
.
–
Right-click
Initiator Resources
and click
Add Initiator
.
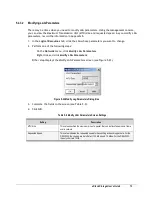
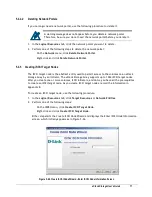
Either step displays the Create Initiator screen (see Figure 5-19).
Figure 5-19 Add Initiator Wizard – Create Initiator Screen
2.
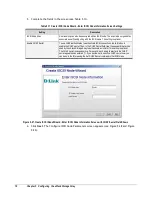
Complete the fields in the screen (see Table 5-7).
3.
Click the
OK
button. The main screen reappears and the iSCSI initiator you created appears
under
Initiator Resources
in the
Logical Resources
tab.
After you add one or more iSCSI initiators, you can monitor their status from the Initiator Access
Info screen (Section 6.13), Initiator Information screen (Section 6.17), and LUN Map Information
screen (Section 6.18).
Summary of Contents for DSN-3400-10 - xStack Storage Area Network Array Hard...
Page 10: ...x Contents...
Page 20: ...20 Chapter 2 Identifying Hardware Components Figure 2 6 Press Lever Inwards Until it Locks...
Page 36: ......
Page 44: ...44 Chapter 4 Starting the xStack Storage Array for the First Time...
Page 103: ...xStack Storage User s Guide 103...
Page 117: ...xStack Storage User s Guide 117 Figure 6 12 Viewing SMART Attributes...
Page 160: ...160 Appendix D Replacing and Upgrading FRUs...
Page 164: ...164 Appendix F Hardware Enclosures...


