Version 1.0 | 04/04/2015
DUAL BAND WIRELESS AC1600 GIGABIT VDSL2
MODEM ROUTER
DSL-G256DG
User Manual
Page 1: ...Version 1 0 04 04 2015 DUAL BAND WIRELESS AC1600 GIGABIT VDSL2 MODEM ROUTER DSL G256DG User Manual ...
Page 2: ...gory 15 WAN Service 16 Wireless 2 4G 33 Wireless 5G 35 Local Network 37 IPv6 Autoconfig 39 Time and Date 41 Advanced Category 43 Advanced Wireless 2 4G 45 Advanced Wireless 5G 63 Port Forwarding 81 Port Triggering 84 DMZ 87 Parental Control 88 Filtering Options 93 DNS 100 Dynamic DNS 102 Network Tools 104 Routing 121 IPSec 127 Power Management 131 DLNA 133 Storage Service 134 IP Tunnel 135 Certifi...
Page 3: ...s are missing please contact your reseller Note Using a power supply with a different voltage rating than the one included with the router will cause damage to this product and void the warranty for this product System Requirements Network Requirements 10 100 1000Mbps Ethernet Adapter IEEE 802 11a b g n ac Wireless Adapter Web User Interface Requirements Windows Macintosh or Linux based Operating ...
Page 4: ...wo IP domains via a LAN to LAN connection Precise ATM Traffic Shaping Traffic shaping is a method of controlling the flow rate of ATM data cells This function helps to establish the Quality of Service for ATM data transfer High Performance Very high rates of data transfer are possible with the router Up to 24Mbps downstream bit rate using the G dmt standard For VDSL2 Full Network Management The ro...
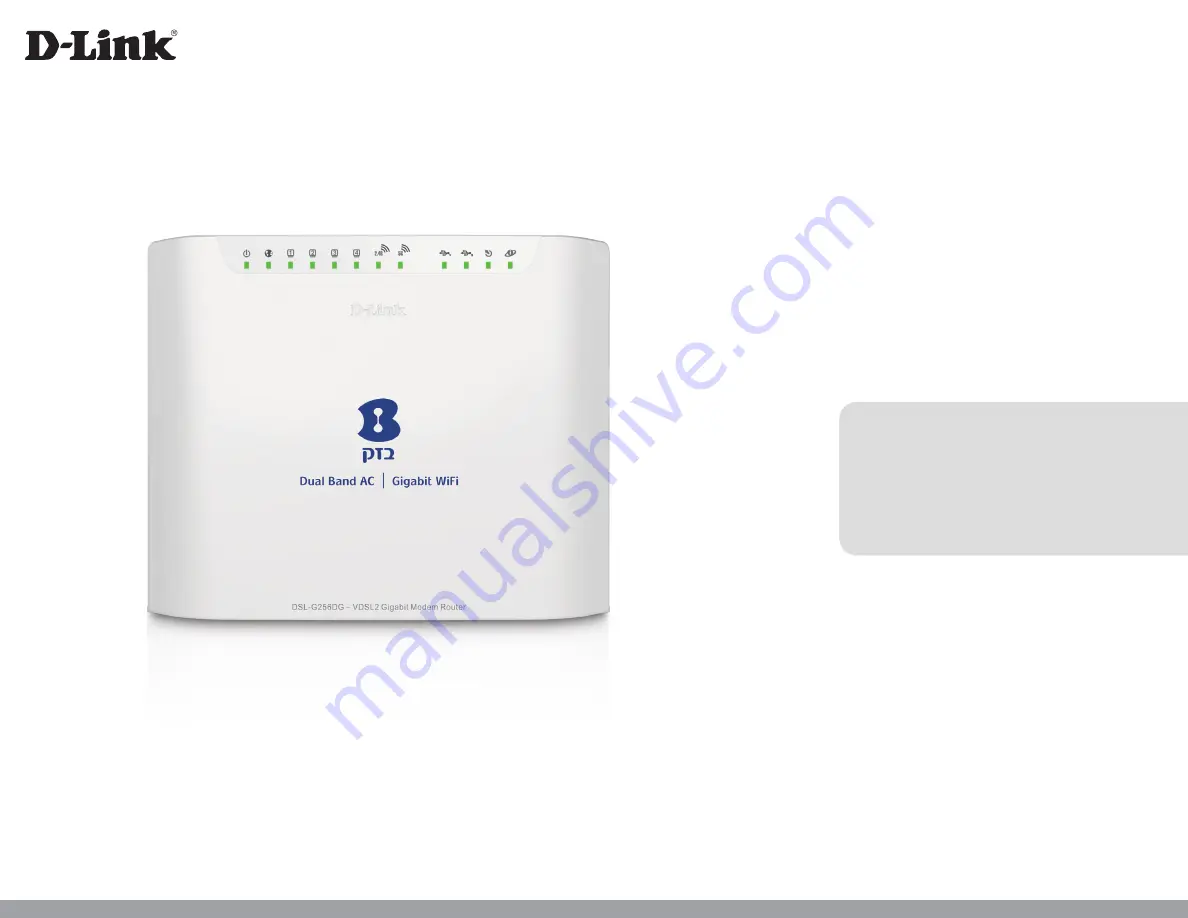
Page 5: ...hen there is activity currently passing through the Ethernet port A green light will be illuminated for a 10 100Mbps connection and an amber light will be illuminated for a 1000Mbps connection 4 2 4GHz WLAN Steady green light indicates a wireless connection A blinking green light indicates activity on the WLAN 5 5GHz WLAN Steady green light indicates a wireless connection A blinking green light in...
Page 6: ...rts Use the WAN ports to connect the router to your Ethernet LAN or Ethernet devices 5 5GHz Wireless On Off Switch Button Please press and hold on for 3 seconds to turn on turn off 6 2 4GHz Wireless On Off Switch Button Please press and hold on for 3 seconds to turn on turn off 7 Reset Button Press and hold the button for 10 15 seconds to restore the device to its original factory default settings...
Page 7: ... low pass filters with your installation Operating Systems The router uses an HTML based web interface for setup and management The Web configuration manager may be accessed using any operating system capable of running web browser software including Windows Macintosh and Linux based Operating Systems Web Browser Any common Web browser can be used to configure the router using the Web configuratio...
Page 8: ...stablish and maintain the Internet connection can be stored in the router In this case it is not necessary to install software on your computer It may however be necessary to change some settings in the device including account information used to identify and verify the connection All connections to the Internet require a unique global IP address For bridged connections the global IP settings mus...
Page 9: ...f modulation used for their service The default DSL modulation Autosense used for the router automatically detects all types of VDSL VDSL2 and VDSL2 modulation Security Protocol This is the method your VDSL service provider will use to verify your Username and Password when you log on to their network Your router supports the PAP and CHAP protocols VPI Most users will not be required to change thi...
Page 10: ...sires This address will be the base IP address used for DHCP service on the LAN when DHCP is enabled LAN Subnet Mask for the Router This is the subnet mask used by the Router and will be used throughout your LAN The default subnet mask is 255 255 255 0 This can be changed later Information you will need about your LAN or computer Ethernet NIC If your computer has an Ethernet NIC you can connect th...
Page 11: ...r source 2 Press the Power button into the on position You should see the Power LED indicator light up and remain lit 3 If the Ethernet port is connected to a working device check the Ethernet LED indicators to make sure the connection is valid The router will attempt to establish the VDSL connection if the VDSL line is connected and the router is properly configured this should light up after sev...
Page 12: ...eeds higher than 10Mbps be sure that the device has auto negotiation NWay enabled for the connecting port Use standard twisted pair cable with RJ 45 connectors The RJ 45 ports on the router are a crossed port MDI X Follow standard Ethernet guidelines when deciding what type of cable to use to make this connection When connecting the router directly to a PC or server use a normal straight through c...
Page 13: ...siest way to make sure your computer has the correct IP settings is to configure it to use the DHCP server in the router To access the web user interface open a web browser such as Internet Explorer and enter the IP address of the router 10 0 0 138 into the address bar and press the Enter key on your keyboard Type Admin in the User Name field and Admin in the Password field and enter the validatio...
Page 14: ...d more understandable The top menu lists out the Categories available for configuration The categories available to configure on this device are Setup Advanced Maintenance Status and Help The left menu lists out the Pages available for each individual category for configuration In this example we observe the pages available in the Setup category Every category will have a Logout option at the bott...
Page 15: ...o the Wireless 2 4GHz connectivity of this product Wireless 5G On this page the user can configure services related to the Wireless 5GHz connectivity of this product Local Network On this page the user can configure services related to the Local Area Network connectivity of this product Services available for configuration are LAN Interface configuration and DHCP configuration IPv6 Autoconfig On t...
Page 16: ...erface Configuration Page 16 WAN Service To access the WAN Service page click the Setup menu link at the top and then click the WAN Services menu link on the left On this page the user can configure services related to the WAN connectivity of this product ...
Page 17: ...ion page After clicking the ATM Interface button the DSL ATM Interface Configuration page will be available In the ATM Interface Configuration section here we can view a list of existing interfaces configured Click the Add button to add a new interface Click the Edit button to modify the entry Select the Remove option and click the Remove button to remove the specific interface ...
Page 18: ...lation Mode Options to choose from are LLC SNAP BRIDGING and VC MUX After selecting the PPPoA option the Connection Mode option will be disabled Select the Encapsulation Mode Options to choose from are VC MUX and LLC ENCAPSULATION After select the IPoA option the Connection Mode option will be disabled Select the Encapsulation Mode Options to choose from are LLC SNAP ROUTING and VC MUX Here we can...
Page 19: ...urst Size fields will be available Enter the Peak Cell Rate Sustainable Cell Rate and Maximum Burst Size values used here Select the Scheduler for Queues of Equal Precedence as the Default Queue option here Options to choose from are Weighted Round Robin and Weighted Fair Queuing Also enter the Default Queue Weight Default Queue Precedence VC WRR Weight and VC Precedence value used here Click the ...
Page 20: ...ge After clicking the PTM Interface button the DSL PTM Interface Configuration page will be available Here you can view the Interface DSL Latency PTM Priority Connection Mode and IP QoS You can remove the configuration option by clicking the Remove checkbox Click the Add button to add a new interface Select the Remove option and click the Remove button to remove the specific interface ...
Page 21: ... Queues of Equal Precedence as the Default Queue option here Options to choose from are Weighted Round Robin and Weighted Fair Queuing Also enter the Default Queue Weight Default Queue Precedence Default Queue Minimum Rate Default Queue Shaping Rate and Default Queue Shaping Burst Size value used here Click the Back button to return to the previous page Click the Apply Save button to accept the ch...
Page 22: ...H WAN Interface Configuration page After clicking the ETH Interface button the following page will be available In the ETH WAN Interface Configuration section a list of configured ETH WAN interfaces will be displayed Click the Add button to add a new interface Select the Remove option and click the Remove button to remove the specific interface ...
Page 23: ...rt that will be used from the Select a ETH port drop down menu Select the Connection Mode Options to choose from are Default Mode Single service over one connection VLAN MUX Mode Multiple VLAN service over one connection and MSC Mode Multiple service over one connection Click the Back button to return to the previous page Click the Apply Save button to accept the changes ...
Page 24: ...page After clicking the PPPoE WAN button the following page will be available In the Wide Area Network WAN Service Setup section a list of configured PPPoE WAN interfaces will be displayed Click the Add button to add a new interface Click the Edit button to reconfigure an interface Select the Remove option and click the Remove button to remove the specific interface ...
Page 25: ...ollowing page will be displayed Here we can configure the WAN service Parameters that can be configured are the following Enter Service Description Enter the description for this service Enter 802 1P Priority Enter the 802 1P priority for the service Enter 802 1Q VLAN ID Enter the 802 1Q VLAN ID for the service Select the VLAN TPID Options to choose from are 0x8100 0x88A8 and 0x9100 Select the Int...
Page 26: ...need this function Enable PPP Debug Mode Click the checkbox if you need this function Bridge PPPoE Frames Between WAN and Local Ports Click the checkbox if you need this function IGMP Multicast Proxy Click the checkbox if you need this function Enable IGMP Multicast Source Click the checkbox if you need this function Click the Back button to return to the previous page Click the Next button to con...
Page 27: ...elect an interface under Selected DNS Server Interfaces and click to remove the interface from the DNS server list Alternatively select Use the following Static DNS IP address to add the static DNS server IP address manually Enter the IP addresses in the Primary DNS server and Secondary DNS server Click the Back button to return to the previous page Click the Next button to continue to the next pa...
Page 28: ...uration page After clicking the Other WAN button the following page will be available In the Wide Area Network WAN Service Setup section a list of configured WAN interfaces will be displayed Click the Add button to add a new interface Click the Edit button to reconfigure an interface Select the Remove option and click the Remove button to remove the specific interface ...
Page 29: ...the WAN service Parameters that can be configured are the following Select the WAN service type Options to choose from are IP over Ethernet and Bridge Enter Service Description Enter the description for this service Enter 802 1P Priority Enter the 802 1P priority for the service Enter 802 1Q VLAN ID Enter the 802 1Q VLAN ID for the service Select the VLAN TPID Options to choose from are 0x8100 0x8...
Page 30: ...61 DHCP Unique Identifier Option 125 Click to enable or disable Option 125 When Use the following Static IP address is selected parameters that can be configured are the following WAN IP Address Enter a static IP address for WAN service WAN Subnet Mask Enter the subnet mask of the IP address WAN gateway IP Address Enter the gateway IP address Click the Back button to return to the previous page Cl...
Page 31: ... the default gateway Select an interface under Available Routed WAN Interfaces and click to add the interface to the Default Gateway Interfaces Select an interface under Selected Default Gateway Interfaces and click to remove the interface from the default gateway list Click the Back button to return to the previous page Click the Next button to continue to the next page ...
Page 32: ...elect an interface under Selected DNS Server Interfaces and click to remove the interface from the DNS server list Alternatively select Use the following Static DNS IP address to add the static DNS server IP address manually Enter the IP addresses in the Primary DNS server and Secondary DNS server Click the Back button to return to the previous page Click the Next button to continue to the next pa...
Page 33: ...onfiguration Page 33 Wireless 2 4G To access the Wireless 2 4G page click the Setup menu link at the top and then click the Wireless 2 4G menu link on the left On this page the user can configure services related to the Wireless 2 4GHz connectivity of this product ...
Page 34: ...ver when the Hide Access Point option is enabled this name will not be visible to wireless clients BBSID The ID is automatically set Country This parameter will display the country information Country RegRev This parameter will display the country regrev Max Clients Set the number of users that can access the device Wireless Guest Virtual Access Points Click the checkbox to enable one of the guest...
Page 35: ...ce Configuration Page 35 Wireless 5G To access the Wireless 5G page click the Setup menu link at the top and then click the Wireless 5G menu link on the left On this page the user can configure services related to the Wireless 5GHz connectivity of this product ...
Page 36: ...However when the Hide Access Point option is enabled this name will not be visible to wireless clients BSSID This is automatically generated Country This parameter will display the country information Country RegRev This parameter will display the country regrev Max Clients Set the number of users that can access the device Wireless Guest Virtual Access Points Click the checkbox to enable one of t...
Page 37: ... Local Network page click the Setup menu link at the top and then click the Local Network menu link on the left On this page the user can configure services related to the Local Area Network connectivity of this product Services available for configuration are LAN Interface configuration and DHCP configuration ...
Page 38: ...rface Please note that after changing this IP address you ll be forced to log into the Web User Interface again using the new IP address Subnet Mask Enter the subnet mask used here Enable IGMP Snooping Select this option to enable the IGMP snooping option Standard Mode Select this option to enable the IGMP Snooping standard mode Blocking Mode Select this option to enable the IGMP Snooping blocking...
Page 39: ...toconfig To access the IPv6 Autoconfig page click the Setup menu link at the top and then click the IPv6 Autoconfig menu link on the left On this page the user can configure services related to the IPv6 connectivity of this product In this section we can enter the Interface Address used here ...
Page 40: ...ents Leased Time Enter the time limit assigned to clients When Enable RADVD is selected you can also Enable ULA Prefix Advertisement When Enable ULA Prefix Advertisement is selected you can choose to Randomly Generate an IPv6 prefix or Statically Configure the following IPv6 prefix information Prefix Enter the static IPv6 prefix to use Preferred Life Time Enter the preferred life time in hour Vali...
Page 41: ...nfigure services related to the time and date feature of this product Time Servers and a Time Zone can be specified here In this section we can configure the Time Settings for this router Select the Automatically synchronize with Internet time server option and then select the First NTP time server and Second NTP time server form the list here When the option Other is selected manually enter the t...
Page 42: ...ection we can select and configure the appropriate Time Zone Offset In this section we can configure the following parameters Time zone offset Select the appropriate time zone offset here Click the Apply Save button to accept the changes made Click the Cancel button to discard the changes made ...
Page 43: ...ted to the DMZ feature of this product Parental Control On this page the user can configure services related to the parental control feature of this product Services available for configuration are Time Restriction and URL Filtering Filtering Options On this page the user can configure services related to the port triggering feature of this product Services available for configuration are Inbound ...
Page 44: ...is page the user can configure services related to IP Tunneling used on this product Services available for configuration are IPv6inIPv4 and IPv4inIPv6 Certificates On this page the user can configure services related to the Certificates of this product Services available for configuration are Local Cert and Trusted CA Print Server On this page the user can configure services related to the print ...
Page 45: ... Advanced Wireless 2 4G To access the Advanced Wireless 2 4G page click the Advanced menu link at the top and then click the Advanced Wireless 2 4G menu link on the left On this page the user can configure advanced services related to the Wireless 2 4Ghz connectivity of this product ...
Page 46: ...Manual Web User Interface Configuration Page 46 Advanced Settings Click the Advanced Settings button to access the Advanced Wireless Settings configuration page After clicking the Advanced Settings button the following page is available ...
Page 47: ...rom are Auto and Off Support 802 11n Client Only Select the support for 802 11n clients only option used here Options to choose from are On and Off RIFS Advertisement Select the RIFS advertisement option used here Options to choose from are Auto and Off OBSS Coexistence Select the OBSS co existence state here Options to choose from are Enable and Disable RX Chain Power Save Select the RX chain pow...
Page 48: ...ption becomes available after the 802 11n EWC option was disabled 54g Protection Select to enable or disable 54g protection here Options to choose from are Auto and Off This option becomes available after the 802 11n EWC option was disabled This option becomes available after the 802 11n EWC option was disabled Afterburner Technology Select the Afterburner technology state here Options to choose f...
Page 49: ...e URE Mode here Options to choose from are Enabled and Disabled STA Retry Time Select the WMM APSD state here Options to choose from are Enabled and Disabled Beamforming Transmission BFR Select the WMM APSD state here Options to choose from are Enabled and Disabled Beamforming Reception BFE Select the WMM APSD state here Options to choose from are Enabled and Disabled Click the Apply Save button t...
Page 50: ...e Wireless MAC Filter configuration page After clicking the MAC Filtering button the following page is available In this section we can configure the Wireless MAC Filtering parameters Select SSID Select the appropriate SSID used here MAC Restrict Mode Select the MAC restrict mode used here Options to choose from are Disabled Allow and Deny ...
Page 51: ...ve option and click the Remove button to remove the specific entry After clicking the Add button the following page is available In this section we can enter a MAC Address used in the MAC filtering rule here The MAC address must use the 00 11 22 33 44 55 format Click the Apply Save button to accept the changes made Click the Cancel button to discard the changes made and return to the main page ...
Page 52: ...User Manual Web User Interface Configuration Page 52 Security Settings Click the Security Settings button to access the Security Settings configuration page After clicking the Security Settings button the following page is available ...
Page 53: ...ess Security Mode Open Wired Equivalent Privacy WEP is any entry level wireless security method that we can use to prevent unauthorized wireless access to this router WEP is not a very secure option but it is better than no wireless security After selecting to use Open network authentication and enabling the WEP encryption option as your wireless security mode the following parameters will be avai...
Page 54: ...uthentication and enabling the WEP encryption option as your wireless security mode the following parameters will be available to configure Encryption Strength Select the WEP key length value used here Options to choose from are 128 bit 26 hex digits and 64 bit 10 hex digits Current Network Key Select one of the 4 key options available and enter a wireless security key in the appropriate space pro...
Page 55: ...r port number used here RADIUS Key Enter the RADIUS server Shared Secret here This key must be configured on all the wireless clients for them to be able to connect to your wireless network Encryption Strength Select the WEP key length value used here Options to choose from are 128 bit 26 hex digits and 64 bit 10 hex digits Current Network Key Select one of the 4 key options available and enter a ...
Page 56: ...o enable or disable the WPA2 pre authentication option here Network Re auth Interval Enter the network re authentication interval value here WPA Group Rekey Interval Enter the group key update interval value here RADIUS Server IP Address Enter the IP address of the external RADIUS server used here RADIUS Port Enter the external RADIUS server port number used here RADIUS Key Enter the RADIUS server...
Page 57: ...s your wireless security mode the following parameters will be available to configure WPA WAPI passphrase Enter the WPA2 PSK wireless Pre Shared Key here This key must be configured on all the wireless clients for them to be able to connect to your wireless network Click the Click here to display option to display the pass phrase entered WPA Group Rekey Interval Enter the group key update interval...
Page 58: ...the following parameters will be available to configure WPA2 Preauthentication Select to enable or disable the WPA2 WPA pre authentication option here Network Re auth Interval Enter the network re authentication interval value here WPA Group Rekey Interval Enter the group key update interval value here RADIUS Server IP Address Enter the IP address of the external RADIUS server used here RADIUS Por...
Page 59: ...ble for client connectivity After selecting to use Mixed WPA2 WPA PSK network authentication as your wireless security mode the following parameters will be available to configure WPA WAPI passphrase Enter the WPA2 WPA PSK wireless Pre Shared Key here This key must be configured on all the wireless clients for them to be able to connect to your wireless network Click the Click here to display opti...
Page 60: ... Info Click the Station Info button to access the Authenticated Stations configuration page After clicking the Station Info button the following page is available In this section a list of Authenticated Stations are displayed Click the Refresh button to refresh the information in this table ...
Page 61: ...SL G256DG VDSL Router User Manual Web User Interface Configuration Page 61 Bridge Click the Bridge button to access the Bridge configuration page After clicking the Bridge button the following page is available ...
Page 62: ...m are Enabled Enabled Scan and Disabled Remote Bridges MAC Address When Enabled is selected in Bridge Restrict enter the available remote bridge MAC address When Enabled Scan is selected the device will automatically scan the available remote bridge MAC address Select the MAC address to use Click the Refresh button to refresh the information in this table Click the Apply Save button to accept the ...
Page 63: ...s 5G page click the Advanced menu link at the top and then click the Advanced Wireless 5G menu link on the left On this page the user can configure advanced services related to the Wireless 5Ghz connectivity of this product Advanced Settings Click the Advanced Settings button to access the Advanced Wireless Settings configuration page ...
Page 64: ...D Link DSL G256DG VDSL Router User Manual Web User Interface Configuration Page 64 After clicking the Advanced Settings button the following page is available ...
Page 65: ...Auto and Off Support 802 11n Client Only Select the support for 802 11n clients only option used here Options to choose from are On and Off RIFS Advertisement Select the RIFS advertisement option used here Options to choose from are Auto and Off OBSS Coexistence Select the OBSS co existence state here Options to choose from are Enable and Disable RX Chain Power Save Select the RX chain power save ...
Page 66: ...ork Radar Check Enter the pre network radar check value used here This option is only available after the 802 11h regulatory mode was selected In Network Radar Check Enter the in network radar check value used here This option is only available after the 802 11h regulatory mode was selected TPC Mitigation db Select the TPC mitigation value used here Options to choose from are 0 off 2 3 and 4 This ...
Page 67: ...e URE Mode here Options to choose from are Enabled and Disabled STA Retry Time Select the WMM APSD state here Options to choose from are Enabled and Disabled Beamforming Transmission BFR Select the WMM APSD state here Options to choose from are Enabled and Disabled Beamforming Reception BFE Select the WMM APSD state here Options to choose from are Enabled and Disabled Click the Apply Save button t...
Page 68: ...e Wireless MAC Filter configuration page After clicking the MAC Filtering button the following page is available In this section we can configure the Wireless MAC Filtering parameters Select SSID Select the appropriate SSID used here MAC Restrict Mode Select the MAC restrict mode used here Options to choose from are Disabled Allow and Deny ...
Page 69: ...ve option and click the Remove button to remove the specific entry After clicking the Add button the following page is available In this section we can enter a MAC Address used in the MAC filtering rule here The MAC address must use the 00 11 22 33 44 55 format Click the Apply Save button to accept the changes made Click the Cancel button to discard the changes made and return to the main page ...
Page 70: ...User Manual Web User Interface Configuration Page 70 Security Settings Click the Security Settings button to access the Security Settings configuration page After clicking the Security Settings button the following page is available ...
Page 71: ...t Privacy WEP is any entry level wireless security method that we can use to prevent unauthorized wireless access to this router WEP is not a very secure option but it is better than no wireless security After selecting to use Open network authentication and enabling the WEP encryption option as your wireless security mode the following parameters will be available to configure Encryption Strength...
Page 72: ...uthentication and enabling the WEP encryption option as your wireless security mode the following parameters will be available to configure Encryption Strength Select the WEP key length value used here Options to choose from are 128 bit 26 hex digits and 64 bit 10 hex digits Current Network Key Select one of the 4 key options available and enter a wireless security key in the appropriate space pro...
Page 73: ... the RADIUS server Shared Secret here This key must be configured on all the wireless clients for them to be able to connect to your wireless network Encryption Strength Select the WEP key length value used here Options to choose from are 128 bit 26 hex digits and 64 bit 10 hex digits Current Network Key Select one of the 4 key options available and enter a wireless security key in the appropriate...
Page 74: ...o enable or disable the WPA2 pre authentication option here Network Re auth Interval Enter the network re authentication interval value here WPA Group Rekey Interval Enter the group key update interval value here RADIUS Server IP Address Enter the IP address of the external RADIUS server used here RADIUS Port Enter the external RADIUS server port number used here RADIUS Key Enter the RADIUS server...
Page 75: ...s your wireless security mode the following parameters will be available to configure WPA WAPI passphrase Enter the WPA2 PSK wireless Pre Shared Key here This key must be configured on all the wireless clients for them to be able to connect to your wireless network Click the Click here to display option to display the pass phrase entered WPA Group Rekey Interval Enter the group key update interval...
Page 76: ...the following parameters will be available to configure WPA2 Preauthentication Select to enable or disable the WPA2 WPA pre authentication option here Network Re auth Interval Enter the network re authentication interval value here WPA Group Rekey Interval Enter the group key update interval value here RADIUS Server IP Address Enter the IP address of the external RADIUS server used here RADIUS Por...
Page 77: ...ing to use Mixed WPA2 WPA PSK network authentication as your wireless security mode the following parameters will be available to configure WPA WAPI passphrase Enter the WPA2 WPA PSK wireless Pre Shared Key here This key must be configured on all the wireless clients for them to be able to connect to your wireless network Click the Click here to display option to display the pass phrase entered WP...
Page 78: ...nfo Click the Station Info button to access the Wireless Authenticated Stations configuration page After clicking the Station Info button the following page is available In this section a list of Wireless Stations are displayed Click the Refresh button to refresh the information in this table ...
Page 79: ...SL G256DG VDSL Router User Manual Web User Interface Configuration Page 79 Bridge Click the Bridge button to access the Bridge configuration page After clicking the Bridge button the following page is available ...
Page 80: ...m are Enabled Enabled Scan and Disabled Remote Bridges MAC Address When Enabled is selected in Bridge Restrict enter the available remote bridge MAC address When Enabled Scan is selected the device will automatically scan the available remote bridge MAC address Select the MAC address to use Click the Refresh button to refresh the information in this table Click the Apply Save button to accept the ...
Page 81: ... click the Port Forwarding menu link on the left On this page the user can configure services related to the port forwarding feature of this product Click the Add button to add a new entry Click the Remove button to remove an entry In this section a list of port forwarding rules will be displayed Select the Remove option and click the Remove button to remove the specific interface ...
Page 82: ...D Link DSL G256DG VDSL Router User Manual Web User Interface Configuration Page 82 After clicking the Add button the following page is available ...
Page 83: ...d in the list we can create our own service Enter the service name for the rule here Server IP Address Enter the server IP address here External Port Start Enter the external starting port number here External Port End Enter the external ending port number here Protocol Select the appropriate protocol used here Options to choose from are TCP UDP TCP and UDP Internal Port Start Enter the internal s...
Page 84: ...lick the Port Triggering menu link on the left On this page the user can configure services related to the port triggering feature of this product Click the Add button to add a new interface Click the Remove button to remove an entry In this section a list of port triggering rules will be displayed Select the Remove option and click the Remove button to remove the specific interface ...
Page 85: ...D Link DSL G256DG VDSL Router User Manual Web User Interface Configuration Page 85 After clicking the Add button the following page is available ...
Page 86: ... can create our own application Enter the custom application name for the rule here Trigger Port Start Enter the starting trigger port number here Trigger Port End Enter the ending trigger port number here Trigger Protocol Select the trigger protocol used here Options to choose from are TCP UDP TCP and UDP Open Port Start Enter the starting open port number here Open Port End Enter the ending open...
Page 87: ...nd then click the DMZ menu link on the left On this page the user can configure services related to the DMZ feature of this product In this section we can configure the DMZ Host by entering the DMZ Host IP Address here Click the Apply Save button to accept the changes made Click the Cancel button to discard the changes made and return to the main page ...
Page 88: ...guration Page 88 Parental Control To access the Parental Control page click the Advanced menu link at the top and then click the Parental Control menu link on the left On this page the user can configure services related to the parental control feature of this product ...
Page 89: ...button to access the Access Time Restriction configuration page After clicking the Time Restriction button the following page is available In this section a list of Time Restriction entries will be displayed Click the Add button to add a new entry Select the Remove option and click the Remove button to remove the specific entry ...
Page 90: ...ere Browser s MAC Address Enter the browser s MAC address here Other MAC Address Enter the other MAC address here Days of the Week Select which days of the week to include in this rule Start Blocking Time Enter the time value that will be used to start blocking End Blocking Time Enter the time value that will be used to end blocking Click the Apply Save button to accept the changes made Click the ...
Page 91: ...uter User Manual Web User Interface Configuration Page 91 URL Filter Click the URL Filter button to access the Parental Control URL Filter configuration page After clicking the URL Filter button the following page is available ...
Page 92: ...lick the Add button to add a new entry Select the Remove option and click the Remove button to remove the specific entry After clicking the Add button the following page is available In this section we can create a new URL Filter rule by entering the URL Address and Port Number Click the Apply Save button to accept the changes made Click the Cancel button to discard the changes made and return to ...
Page 93: ...uration Page 93 Filtering Options To access the Filtering Options page click the Advanced menu link at the top and then click the Filtering Options menu link on the left On this page the user can configure services related to the port triggering feature of this product ...
Page 94: ...nbound IP Filtering rule configuration page After clicking the Inbound IP Filtering button the following page is available In this section a list of Inbound IP filtering rules will be displayed Click the Add button to add a new rule Click the Edit button to reconfigure the rule Select the Remove option and click the Remove button to remove the specific rule ...
Page 95: ...IPv6 Protocol Select the protocol used from the list Options to choose from are TCP UDP TCP UDP and ICMP Source IP address Enter the source IP address here Source Port Enter the source port number here Destination IP address Enter the destination IP address here Destination Port Enter the destination port number here WAN Interfaces Select the WAN interface that will be used for this incoming IP fi...
Page 96: ...tbound IP Filtering rule configuration page After clicking the Outbound IP Filtering button the following page is available In this section a list of Outbound IP filtering rules will be displayed Click the Add button to add a new rule Click the Edit button to reconfigure the rule Select the Remove option and click the Remove button to remove the specific rule ...
Page 97: ... the list Options to choose from are IPv4 and IPv6 Protocol Select the protocol used from the list Options to choose from are TCP UDP TCP UDP and ICMP Source IP address Enter the source IP address here Source Port Enter the source port number here Destination IP address Enter the destination IP address here Destination Port Enter the destination port number here Click the Apply Save button to acce...
Page 98: ...ective in Bridge mode FORWARDED means that all MAC layer frames will be FORWARDED except those matching with any of the specified rules in the following table BLOCKED means that all MAC layer frames will be BLOCKED except those matching with any of the specified rules in the following table In this section we will find the current Policy status as well the option to change this option Select the C...
Page 99: ... a new rule Select the Remove option and click the Remove button to remove the specific rule After clicking the Add button the following page will be available In this section we can configure the MAC filtering rule Parameters available for configuration are Protocol Type Select the protocol type option that will be associated with this rule Options to choose from are PPPoE IPv4 IPv6 IPX and IGMP ...
Page 100: ... Web User Interface Configuration Page 100 DNS To access the DNS page click the Advanced menu link at the top and then click the DNS menu link on the left On this page the user can configure services related to the DNS feature of this product ...
Page 101: ...the following Static DNS IP address to add the static DNS server IP address manually Enter the IP addresses in the Primary DNS server and Secondary DNS server In this section we can configure the IPv6 DNS configuration Obtain IPv6 DNS info from a WAN interface Select this option to obtain IPv6 DNS information from the WAN interface WAN Interface selected Select the WAN interface used to obtain the...
Page 102: ...en click the Dynamic DNS menu link on the left On this page the user can configure services related to the Dynamic DNS feature of this product In this section a list of Dynamic DNS entries will be displayed Click the Add button to add a new entry Click the Edit button to reconfigure the entry Select the Remove option and click the Remove button to remove the specific entry ...
Page 103: ...rom the list here Options to choose from are DynDNS org and TZO Hostname Enter the hostname for this account here Interface Select the interface that will be used together with this Dynamic DNS entry Username Enter the Dynamic DNS account s username here Password Enter the Dynamic DNS account s password here Click the Apply Save button to accept the changes made Click the Cancel button to discard ...
Page 104: ...onfiguration Page 104 Network Tools To access the Network Tools page click the Advanced menu link at the top and then click the Network Tools menu link on the left On this page the user can configure services related to the Network Tools available on this product ...
Page 105: ...the Quality of Service button the following page is available In this section we can configure the Queue Management configuration Enable QoS Select this option to enable the QoS queue management feature Select Default DSCP Mark Select the default DSCP mark option here Click the Apply Save button to accept the changes made Click the Cancel button to discard the changes made and return to the main p...
Page 106: ...ss the Queue configuration page After clicking the Queue Config button the following page is available In this section a list of QoS queue configurations will be displayed Click the Add button to add a new entry Click the Enable button to enable an entry Select the Remove option and click the Remove button to remove the specific entry ...
Page 107: ...rface Select the interface that will be associated with this entry After selecting an ATM interface the following parameters will be available Queue Precedence Select the queue precedence option here Queue Schedule Select the queue schedule method used here Option to choose from is Weighted Round Robin Queue Weight Enter the queue weight value used here DSK Latency Select the DSL latency option he...
Page 108: ...rs will be available Queue Precedence Select the queue precedence option here Minimum Rate Enter the minimum data rate Shaping Rate Enter the shaping transmit rate Shaping Burst Size Enter the shaping burst size Click the Apply Save button to accept the changes made Click the Cancel button to discard the changes made and return to the main page ...
Page 109: ...ty of Service configuration page After clicking the Qos Classification button the following page is available In this section a list of QoS classification entries will be displayed Click the Add button to add a new entry Select the Enable option and click the Enable button to enable an entry Select the Remove option and click the Remove button to remove the specific entry ...
Page 110: ...D Link DSL G256DG VDSL Router User Manual Web User Interface Configuration Page 110 After clicking the Add button the following page is available ...
Page 111: ...rule order option here Options to choose from are 1 and Last Rule Status Select the rules state here Options to choose from are Enable and Disable In this section we can specify the classification criteria for the QoS classification entry here Make the appropriate modifications here Click the Apply Save button to accept the changes made Click the Cancel button to discard the changes made and retur...
Page 112: ...nP button to access the UPnP configuration page After clicking the UPnP button the following page is available In this section we can Enable the UPnP protocol option by selecting this option or Disable the UPnP protocol by leaving this option blank Click the Apply Save button to accept the changes made ...
Page 113: ...L Router User Manual Web User Interface Configuration Page 113 DSL Settings Click the DSL Settings button to access the DSL Settings configuration page After clicking the DSL Settings button the following page is available ...
Page 114: ...box next to it To disable the specific profile leave the checkbox next to it empty US0 To enable this option tick the checkbox next to it To disable this option leave the checkbox next to it empty Select the phone line pair below Select the phone line pair option here Options to choose from are Inner pair and Outer pair Capability Select the DSL capability option here Options to choose from are Bi...
Page 115: ...he VDSL tone settings Only one option can be selected Options to choose from are Normal Reverb Medley No retrain and L3 Click the Back button to return to the previous page Click the Apply Save button to accept the changes made Click the Cancel button to discard the changes made and return to the main page Click the Tone Selection button to open a new page where we can manually select the tone ...
Page 116: ...er User Manual Web User Interface Configuration Page 116 After clicking the Tone Selection button the following page is available Here we can select the tone manually Options to choose from are Upstream Tones and Downstream Tones ...
Page 117: ...L G256DG VDSL Router User Manual Web User Interface Configuration Page 117 TR 069 Click the TR 069 button to access the TR 069 configuration page After clicking the TR 069 button the following page is available ...
Page 118: ...onsole Click Enable to display SOAP messages on serial console Connection Request Authentication Select to enable connection request authentication When selected enter Connection Request User Name and Connection Request Password Connection Request User Name Enter the username for connection request authentication Connection Request Password Enter the password for connection request authentication ...
Page 119: ...k DSL G256DG VDSL Router User Manual Web User Interface Configuration Page 119 IGMP Click the IGMP button to access the IGMP configuration page After clicking the IGMP button the following page is available ...
Page 120: ...LAN to LAN Intra LAN Multicast Enable Select this option to enable LAN to LAN Intra LAN multicasting Membership Join Immediate IPTV Tick this option to enable the membership join immediate IPTV feature In this section we can modify the MLD Configuration Default Version Enter the default MLD version number here Query Interval Enter the query interval value here Query Response Interval Enter the que...
Page 121: ...r Interface Configuration Page 121 Routing To access the Routing page click the Advanced menu link at the top and then click the Routing menu link on the left On this page the user can configure services related to the Routing feature of this product ...
Page 122: ...Route button to access the Static Route configuration page After clicking the Static Route button the following page is available In this section a list of static route entries will be displayed Click the Add button to add a new entry Select the Remove option and click the Remove button to remove the specific entry ...
Page 123: ...rom are IPv4 and IPv6 Destination IP address prefix length Enter the destination IP address for this route entry here Interface Select the interface this will be associated with this rule here Gateway IP Address Enter the gateway IP address for this route entry here Metric Enter the metric value used by this route entry here Click the Apply Save button to accept the changes made Click the Cancel b...
Page 124: ...er User Manual Web User Interface Configuration Page 124 Default Gateway Click the Default Gateway button to access the Default Gateway configuration page After clicking the Default Gateway button the following page is available ...
Page 125: ... remove the interface from the default gateway list Click the Apply Save button to accept the changes made Click the Cancel button to discard the changes made and return to the main page In this section we can configure the default gateway parameters for this router Gateway Address Enter the primary gateway IP address used here Alternative Gateway Enter the secondary gateway IP address used here P...
Page 126: ... available In this section we can configure the default gateway parameters for this router Version Select the RIP version number here Options to choose from are 1 2 and Both Operation Select the operation mode here Options to choose from are Active and Passive Enable Tick this option to enable the RIP configuration on the specified interface Click the Apply Save button to accept the changes made ...
Page 127: ...nced menu link at the top and then click the IPSec menu link on the left On this page the user can configure IPSec tunnel connection In this section a list of IPSec connections will be displayed Click the Add New Connection button to add a new entry Select the Remove option and click the Remove button to remove the specific entry ...
Page 128: ...D Link DSL G256DG VDSL Router User Manual Web User Interface Configuration Page 128 After clicking the Add New Connection button the following page is available ...
Page 129: ... is available when Subnet is selected in Tunnel access from local IP addresses Tunnel access from remote IP addresses Select Subnet for a whole remote LAN or Single Address for a single remote host IP Address for VPN Enter the IP range of the remote site Mask or Prefix Length Enter the subnet mask or prefix of the remote IP This is available when Subnet is selected in Tunnel access from local IP a...
Page 130: ...iffie hellman Group for Key Exchange Select the bit option Key Life Time Enter the key life time in second Click the Apply Save button to accept the changes made After selecting Manual in Key Exchange Method the following fields are available Encryption Algorithm Select the encryption algorithm here Options to choose from are DES 3DES and AES aes cbc Encryption Key Enter the encryption key accordi...
Page 131: ...nterface Configuration Page 131 Power Management To access the Power Management page click the Advanced menu link at the top and then click the Power Management menu link on the left On this page the user can configure and view Power Management settings ...
Page 132: ...age 132 In these sections we can configure and view the power management settings Tick the Enable option to enable the functions for the power management Click the Apply Save button to accept the changes made Click the Refresh button to refresh the information in these sections ...
Page 133: ...LNA menu link on the left On this page the user can configure services related to the Digital Living Network Alliance DLNA feature of this product In this section we can configure the print server parameters for this router Enable on board digital media server Tick this option to enable the onboard digital media server Click the Apply Save button to accept the changes made ...
Page 134: ... Configuration Page 134 Storage Service To access the Storage page click the Advanced menu link at the top and then click the Storage Service menu link on the left On this page the user can view information related to the Storage Service feature of this product ...
Page 135: ...To access the IP Tunnel page click the Advanced menu link at the top and then click the IP Tunnel menu link on the left On this page the user can configure services related to IP Tunneling used on this product IPv6 in IPv4 Click the IPv6inIPv4 button to access the IPv6 in IPv4 configuration page ...
Page 136: ...iguration Page 136 After clicking the IPv6inIPv4 button the following page will be available In this section a list of entries will be displayed Click the Add button to add a new entry Select the Remove option and click the Remove button to remove the specific entry ...
Page 137: ...s entry here Associated LAN Interface Select the LAN interface that will be associated with this entry here Also select whether this interface will obtain the IPv4 mask length 6rd prefix and border relay IPv4 address information manually by selecting Manual or automatically by selecting Automatic IPv4 Mask Length After selecting Manual enter the IPv4 Mask length here 6rd Prefix with Prefix Length ...
Page 138: ...IPv4inIPv6 button to access the IPv4 in IPv6 configuration page After click the IPv4inIPv6 button the following page will be available In this section a list of entries will be displayed Click the Add button to add a new entry Select the Remove option and click the Remove button to remove the specific entry ...
Page 139: ...re Mechanism Select the mechanism option here DS Lite is the only option available Associated WAN Interface Select the WAN interface will be associated with this entry here Also select whether this interface will obtain the remote IPv6 address manually by selecting Manual or automatically by selecting Automatic Remote IPv6 Address After selecting Manual enter the remote IPv6 address here Click the...
Page 140: ...o access the Certificates page click the Advanced menu link at the top and then click the Certificates menu link on the left On this page the user can configure services related to IP Tunneling used on this product Local Certificates Click the Local Cert button to access the Local Certificates page ...
Page 141: ...ge 141 After clicking the Local Cert button the following page will be available In this section a list of local certificates will be displayed Click the Create Certificate Request button to generate a local certificate Click the Import Certificate button to import a certificate ...
Page 142: ...tion the user can create a new certificate Enter the Certificate Name Common Name Organization Name State Province Name and select a country in the Country Region Name list to generate a certificate Click the Back button to return to the previous page Click the Apply Save button to accept the changes made Click the Cancel button to discard the changes made and return to the main page ...
Page 143: ...D Link DSL G256DG VDSL Router User Manual Web User Interface Configuration Page 143 After clicking the Import Certificate button the following page will be available ...
Page 144: ...e user can create a new certificate Enter the Certificate Name and paste the certificate content and its private key Click the Back button to return to the previous page Click the Apply Save button to accept the changes made Click the Cancel button to discard the changes made and return to the main page ...
Page 145: ... Trusted CA Click the Trusted CA button to access the Trusted CA Certificates page After clicking the Trusted CA button the following page will be available In this section a list of trusted CA certificates will be displayed Click the Import Certificate button to import a certificate ...
Page 146: ... following page will be available In this section the user can import CA certificate Enter the Certificate Name and paste the certificate contents Click the Back button to return to the previous page Click the Apply Save button to accept the changes made Click the Cancel button to discard the changes made and return to the main page ...
Page 147: ... on the left On this page the user can configure services related to the print server on this product In this section the following parameters can be configured Enable on board print server Tick this option to enable the onboard print server feature Printer name Enter the printer name here Make and model Enter the printer s make and model description here Click the Apply Save button to accept the ...
Page 148: ...he Samba connectivity of this product In this section the following parameters can be configured USB Storage This parameter will display the USB storage device s status Enable Samba Tick this option to enable the Samba feature NetBios Name Enter the NetBIOS name here Directory Name Enter the directory name here Charset Select the character set option here The only option available for selection is...
Page 149: ...vailable for configuration are Backup Settings Update Settings Restore to Default Settings and System Reboot Firmware Update On this page the user can update the running firmware for this product Access Control On this page the user can configure the login username and password for the web user interface of this product Diagnostics On this page the user can run a diagnostics test that includes tes...
Page 150: ...guration are Backup Settings Update Settings Restore to Default Settings and System Reboot In this section we can initiate the configuration backup feature Once you have configured the router to your satisfaction it is a good idea to back up the configuration file to your computer To save the current configuration settings to your computer click the Backup Settings button You will be prompted to s...
Page 151: ...d drive Confirm that you want to load the file when prompted The router will reboot and begin operating with the configuration settings that have just been loaded In this section we can perform a factory reset on this router To reset the router to its factory default settings click the Restore Default Settings button You will be prompted to confirm your decision to reset the router The router will...
Page 152: ...ill be available for this product Keep an eye on the D Link website for possible software updates that might be available in the future In this section we can load the latest firmware for the device Note that the device configuration settings may return to the factory default settings To upgrade the firmware type in the name and path of the file in the Software File Name field or click the Browse ...
Page 153: ...the Access Control page click the Maintenance menu link at the top and then click the Access Control menu link on the left On this page the user can configure the login username and password for the web user interface of this product Passwords Click the Password button to access the Password configuration page ...
Page 154: ... the new login username for this router here The default username is Admin Old Password Enter the old login password for this router here The default password is Admin New Password Enter the new login password for this router here Confirm Password Enter the new login password for this router here again Click the Apply Save button to accept the changes made Click the Cancel button to discard the ch...
Page 155: ...ser Manual Web User Interface Configuration Page 155 Remote Management Click the Remote management button to access the Remote Management configuration page After clicking the Remote management button the following page is available ...
Page 156: ...llowing information Service In this column a list of service is be displayed that can be enabled or remote access LAN Tick the Enable option to enable the related service on the LAN interface WAN Tick the Enable option to enable the related service on the WAN interface Click the Save Apply button to accept the changes made ...
Page 157: ...gnostics page click the Maintenance menu link at the top and then click the Diagnostics menu link on the left On this page the user can run a diagnostics test that includes overall device connection Ethernet OAM and speed service Diagnostics Click the Diagnostics button to access the Diagnostics configuration page ...
Page 158: ...ion diagnostic tests are performed to test the connection to the Local Network interface This test will include testing the Ethernet USB and Wireless connections of this router If a connection does not pass the test a Help link is available for a more detailed description about the connection test and the possible solutions that can be performed to solve the problem ...
Page 159: ...ction to the DSL Service Provider This test will include testing the xDSL Synchronization If a connection does not pass the test a Help link is available for a more detailed description about the connection test and the possible solutions that can be performed to solve the problem Click the Rerun Diagnostic Tests button to diagnose the device again ...
Page 160: ...thernet OAM button to access the Ethernet OAM configuration page After clicking the Ethernet OAM button the following page is available In this section we can enable 802 3ah protocol Select an Interface to enable to protocol enter the OAM ID for the configuration and select the options to enable the settings ...
Page 161: ...ce Domain MA ID Enter the Maintenance Association Identifier Local MEP ID Enter the local MEP ID Local MEP VLAN ID Enter the local MEP VLAN ID Remote MEP ID Enter the remote MEP ID When Enabled and 802 1ag is selected the following section is available Interface Select an interface for this configuration MEG Level Select the Maintenance Entity Group level MEG ID Enter the Maintenance Entity Group ...
Page 162: ...on you can perform loopback and linktrace test Target MAC Enter the target MAC address Linktrace TTL Enter the link trace TTL Click the Send Loopback button to start the loopback test Click the Send Linktrace button to start the linktrace test Click the Save Apply button to accept the changes made ...
Page 163: ...nterface Configuration Page 163 Speed Service Click the Speed Service button to access the Speed Service configuration page After clicking the Speed Service button the following page is available In this section speed diagnostics result will be displayed ...
Page 164: ...ink DSL G256DG VDSL Router User Manual Web User Interface Configuration Page 164 In this section we can configure the speed diagnostic parameters Click the Run Speed Diagnostics to initiate the diagnostic ...
Page 165: ...lick the Maintenance menu link at the top and then click the System Log menu link on the left On this page the user can view and configure the System Log used by this product Click the View System Log button to access the System Log Display page Click the Configure System Log button to access the System Log Configuration page ...
Page 166: ...ation Page 166 After clicking the View System Log button the following page is available In this section a list of system log entries will be displayed Click the Refresh button to refresh the information in this table Click the Back button to return to the previous page ...
Page 167: ...ble Log Level Select the log level option here Options to choose from are Emergency Alert Critical Error Warning Notice Information and Debugging Display Level Select the display level option here Options to choose from are Emergency Alert Critical Error Warning Notice Information and Debugging Mode Select the mode option here Options to choose from are Local Remote and Both Click the Apply Save b...
Page 168: ...ew information regarding the System and Internet Connectivity DHCP Clients On this page the user can view a list of DHCP clients that are currently connected to this product Statistics On this page the user can view statistical information about the LAN WAN xTM and xDSL interfaces Route Info On this page the user can view information about routes used by this product WAN Info On this page the user...
Page 169: ...nfiguration Page 169 Device Info To access the Device Info page click the Status menu link at the top and then click the Device Info menu link on the left On this page the user can view System and Internet information In this section we can view System Information ...
Page 170: ...D Link DSL G256DG VDSL Router User Manual Web User Interface Configuration Page 170 In this section we can view Internet Information ...
Page 171: ...DHCP Clients To access the DHCP Clients page click the Status menu link at the top and then click the DHCP Clients menu link on the left On the page the user can view a list of DHCP clients that are currently connected to this product In this section we can view a list of DHCP Clients ...
Page 172: ...ace Configuration Page 172 Statistics To access the Statistics page click the Status menu link at the top and then click the Statistics menu link on the left On this page the user can view statistical information about various interfaces used by this product ...
Page 173: ...56DG VDSL Router User Manual Web User Interface Configuration Page 173 LAN Click the LAN button to access the Local Network and Wireless Statistics page After clicking the LAN button the following page is available ...
Page 174: ...G256DG VDSL Router User Manual Web User Interface Configuration Page 174 In this section we can view Local Network and Wireless Statistics Click the Reset Statistics button to reset the information in this section ...
Page 175: ...on Page 175 WAN Service Click the WAN Service button to access the WAN Statistics page After clicking the WAN Service button the following page is available In this section we can view WAN Statistics Click the Reset Statistics button to reset the information in this section ...
Page 176: ...e Configuration Page 176 xTM Click the xTM button to access the xTM Statistics page After clicking the xTM button the following page is available In this section we can view xTM Inteface Statistics Click the Reset button to reset the information in this section ...
Page 177: ...ink DSL G256DG VDSL Router User Manual Web User Interface Configuration Page 177 xDSL Click the xDSL button to access the xDSL Statistics page After clicking the xDSL button the following page is available ...
Page 178: ...r Manual Web User Interface Configuration Page 178 In this section we can view xDSL Statistics Click the xDSL BER Test button to run for the bit error rate test Click the Reset Statistics button to reset the information in this section ...
Page 179: ...ick the Route Info menu link on the left On this page the user can view information about routes used by this product In this section we can view Route Information The information available in the Flag field can be translated to the following U means Up means Reject G means Gateway H means Host R means Reinstate D means Dynamic or Redirect M means Modified or also Redirect ...
Page 180: ...ration Page 180 WAN Info To access the WAN Info page click the Status menu link at the top and then click the WAN Info menu link on the left On this page the user can view information about WAN interfaces used by this product In this section we can view WAN Information ...
Page 181: ...nterface Configuration Page 181 ARP Info To access the ARP Info page click the Status menu link at the top and then click the ARP Info menu link on the left On this page the user can view information about ARP In this section we can view ARP Information ...
Page 182: ...gory Menu On this page the user can navigate easily to any page throughout the menu structure to access help information Setup On this page the user can read more about topics discussed in the Setup category Advanced On this page the user can read more about topics discussed in the Advanced category Maintenance On this page the user can read more about topics discussed in the Maintenance category ...
Page 183: ...ress please follow the steps below Click the Windows Start button and open the Run application In the Open box type cmd and click OK At the command prompt type in the command ipconfig and press Enter This will display the IP address Subnet Mask and the Default Gateway of your adapter If the address is 0 0 0 0 it means that your network adapter did not receive an IP address from the DHCP server Che...
Page 184: ...ter and select Properties Select the Internet Protocol Version 4 TCP IPv4 option and click the Properties button Select Use the following IP address and enter an IP address that is on the same subnet as your router For example If your router is running on the IP address of 10 0 0 138 use any IP address from 10 0 0 1 to 10 0 0 254 except 10 0 0 138 Use the Subnet Mask of 255 255 255 0 Set Default G...
Page 185: ...i Fi technology is another way of connecting your computer to the network without using wires Wi Fi uses radio frequency to connect wirelessly so you have the freedom to connect computers anywhere in your home or office network How does Wireless work Wireless works similar to how cordless phone work through radio signals to transmit data from one point A to point B But wireless technology has rest...
Page 186: ...ities now provide wireless access to attract people The wireless connection in public places is usually called hotspots Using a Wireless Cardbus Adapter with your laptop you can access the hotspot to connect to Internet from remote locations like Airports Hotels Coffee Shops Libraries Restaurants and Convention Centers Wireless network is easy to setup but if you re installing it for the first tim...
Page 187: ... must be in Ad Hoc mode to communicate Wireless Security This section will show you the different levels of security you can use to protect your data from intruders The router offers wireless security options like WPA WPA2 PSK EAP What is WPA WPA Wi Fi Protected Access is a Wi Fi standard that was designed to improve the security features of WEP Wired Equivalent Privacy The 2 major improvements ov...
Page 188: ...Knowledge Base Page 188 WPA WPA2 incorporates user authentication through the Extensible Authentication Protocol EAP EAP is built on a more secure public key encryption system to ensure that only authorized network users can access the network ...
Page 189: ...Internet connection For VDSL ISP users please contact your ISP to make sure the service has been enabled connected by your ISP and that your ISP username and password are correct What can I do if I forgot my web UI login password If you forgot your password you must reset your router Unfortunately this process will change all your settings back to the factory defaults To reset the router locate th...
Page 190: ...92 2 G lite Annex A C ITU T G 994 1 G hs ADSL2 Standards ITU T G 992 3 G dmt bis Annex A J K L M VDSL2 Standards ITU T G 992 5 Annex A L M VDSL Standards ITU T G 993 2 VDSL2 ITU T G 993 1 2004 VDSL VDSL2 Bandplan plan 997 plan 998 VDSL2 Profile 8a 8b 8c 8d 12a 12b 17a DSL Data Transfer Rate ADSL2 downstream up to 20M upstream up to 2M ADS2 downstream up to 100M upstream up to 50M Wireless Operatio...
Page 191: ...D Link DSL G256DG VDSL Router User Manual Technical Specifications Page 191 Certifications CE Dimensions Weight 213 x 173 x 52 mm 8 39 x 6 81 x 2 05 in 413 grams 0 91 lbs ...