background image


3

Contents of Package:

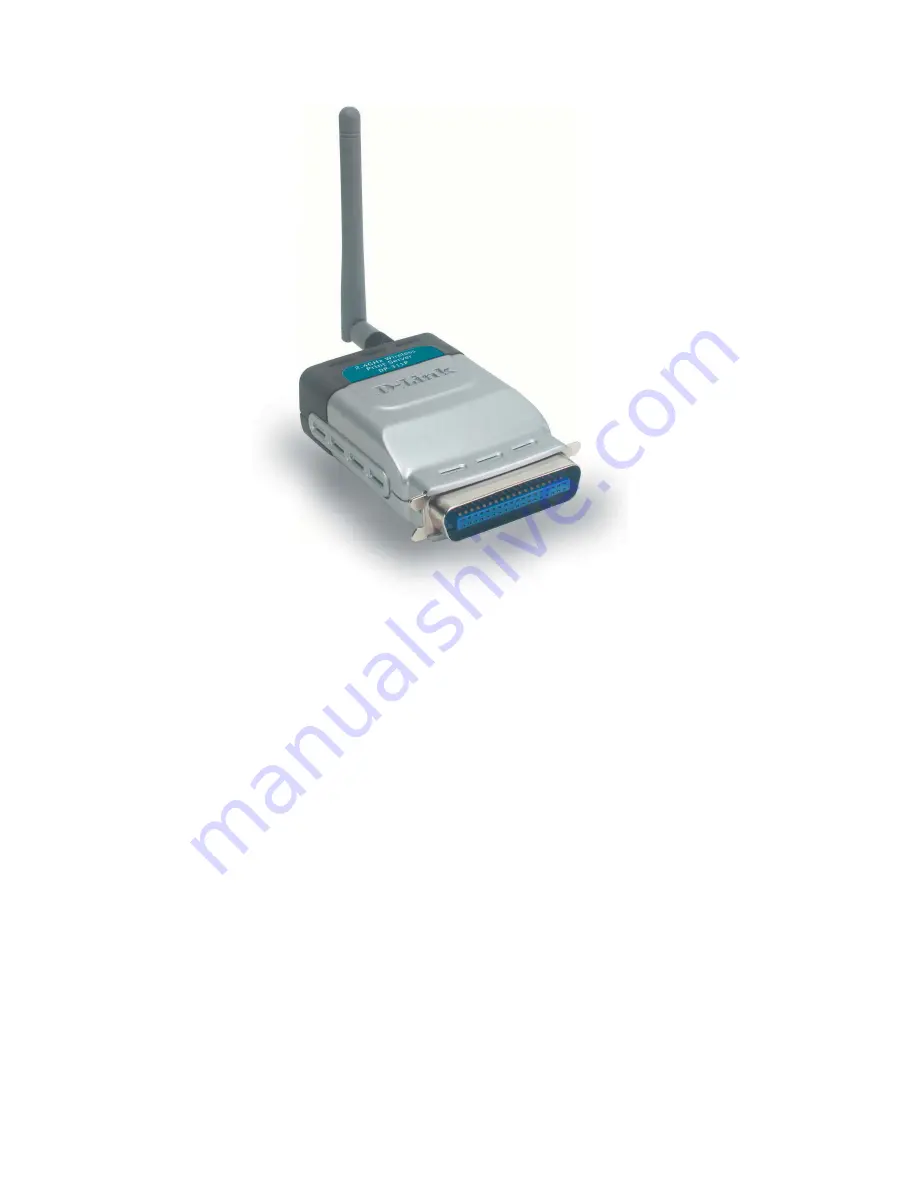
D-Link 

DP-311P

Wireless Print Server

Manual, PS Admin 

Utility

 and Warranty on CD

Printed 

Quick Installation Guide

Package Contents

If any of the above items are missing, please contact your reseller.

System Requirements:

!

!

!

Windows XP/2000/Me/98SE

!

Apple Mac OS with AppleTalk

!

NetWare 5.x (Native NDS)

!

Internet Explorer 6.0, or Netscape Navigator version 6.0 or above,
with JavaScript enabled

!

Printer must support required Operating System

!

Summary of Contents for DP-311P - Air Print Server

Page 1: ...Manual Building Networks for People Wireless Print Server D Link DP 311P ...

Page 2: ...AppleTalk or LPR Printing with MAC OS X 32 Setting up AppleTalk or LPR Printing with MAC OS 9 39 Printing from MAC OS Client Workstations 40 Networking Basics 42 Technical Specifications 59 Contacting Technical Support 61 Warranty and Registration 62 Appendix 1 DP 311P Printer Compatibility List 65 Appendix 2 Incompatible Printers List 66 Appendix 3 Upgrading the Firmware in Netware Windows Unix 6...

Page 3: ...tion Guide Package Contents If any of the above items are missing please contact your reseller System Requirements Windows XP 2000 Me 98SE Apple Mac OS withAppleTalk NetWare 5 x Native NDS Internet Explorer 6 0 or Netscape Navigator version 6 0 or above with JavaScript enabled Printer must support required Operating System ...

Page 4: ...otocols The DP 311Pis an 802 11b compliant wireless Print Server that supports both Infrastructure orAd Hocwirelessmodes WiththeDP 311Pyouhavetheabilityandconvenienceofsharing a printer beyond the wired network The DP 311P is also easily configurable using a Web Browser or Windows based setup wizard Using a web browser on a PC connected to the network configuration is simple and straightforward wi...

Page 5: ...de Switch Toggle UPto Configure ToggleDOWNfor Normal operation WLANLED A blinking Green light indicates a connection to apowersupply Parallel Port IEEE1284Bi Directional Parallel Port with a centronicsconnector Power LED A solid Green light indicatesaconnection to a power supply Frontview Rearview ...

Page 6: ...t feature that allows users to easily configure and manage multiple print queuesthroughTCP IP ForalistofprintersthatarecompatiblewiththeDP 311P pleaseseethe Appendixinthis manual The compatibility list is not comprehensive Even if it is not included in the list your printer may be compatible with the DP 311P ...

Page 7: ...dapter and make sure that your network adapter is set toAd Hoc mode in your configuration settings For D Link network adapters you can open the web based configuration utility and go to the Site Survey function and select the SSID named WLAN PS The Channel is 1 and WEP is set to Disable The network adapter will now be inAd Hocmode Change the wireless adapter IPAddress so that it is in the same IPA...

Page 8: ...inued Home Status This screen displays some basic informa tion about the DP 311P and the printer at tached to the DP 311P if available Home Wireless This screen displays the wireless settings andinformationabouttheprintserver After you have entered the default IP Ad dress of the Print Server into your web browser address field the configuration utility will be available as shown here ...

Page 9: ...figuration continued Home Network Home Management This screen displays the current TCP IP settings Netwaresettingsand AppleTalk settings of the printserver This screen displays the current SNMP settings of theprintserver ...

Page 10: ...al Input a location for the Print Server Password Enter anAdministrator password 3 8 characters Re typePassword Re type the password when accessing the DP 311Pwith password protection the user name is admin and the password willbewhateveryoudefinehere Printer Port Select one of the following Printer Bi directional settings Auto detect for bi directional port Disablebi directionalport ...

Page 11: ...provided You can use the Site Survey tool provided to obtainSSIDinformation Channel Select the channel from the pull down menu This is only used in Ad Hocmode Data Transmit Rates Choose the data transmit rate Auto is the default setting UseWEP From the pull down menu choose 64 bit 128 bit or Disable WEP Disabled is the default setting Key Format ChooseAlphanumericorHexadecimal WEP Key Enter the WE...

Page 12: ... Select this option to obtain settings automatically from your DHCPserver Obtain TCP IP settings automatically use DHCP BOOTP Use the following TCP IPsettings Select this option to enter a Static IPAddress Subnet Mask and Gateway IPAddress manually TCP IP Settings ...

Page 13: ...tings Name of the File Server Use NDS Mode Enable or Disable NDS mode Disable is the default setting Name of the NDS Tree Netware NDS Settings Name of the NDS Context Enter a name for the NDS context Enter the PrinterType Enter the Data Format EnterAppleTalkZoneName Enter the Port Name Select Enable or Disable Select the name of the File Server Select from the pull down menu if available NDS Novel...

Page 14: ...isable Send Traps to IPAddress 2 Send SNMP Traps UseAuthentication Traps Send Traps to IPAddress 1 Input an IPAddress for receivingTraps Select Enable or Disable Input an IPAddress for receivingTraps SNMP Trap Settings Select Enable or Disable SNMP Simple Network Management Protocol is a set of protocols formanaging complex networks AccessRight Select from the pull down menu Read OnlyorRead Write ...

Page 15: ...ctory Default Name Enter a name SMB Workgroup Printer Enter the printer name SMB Shared Name If you click Factory Reset you will lose all user defined settings and you will havetore configuretheDP 311P SMB Server Message Block is a message format to share files directories and devices ...

Page 16: ...se in this screen to locate the up grade When you have found the firm ware file on your hard drive click Upgrade in this screen to complete the process Tools Print Test Click Print in this window to print a test page Please refer to the Appen dix in this manual for a list of sup ported printers Help For more information click on any of the Help topics listed in this screen ...

Page 17: ...ased configuration utility and go to the Site Survey function and select the SSID named WLAN PS The Channel is 1 and WEP is set to Disable The network adapter will now be inAd Hocmode Change the wireless adapter IPAddress so that it is in the same IPAddress range as the DP 311P 192 168 0 x For instructions on changing the IP Address please refer to the Networking Basics section in this manual The ...

Page 18: ... Changethe mode to Infrastructure Input or select the SSID of your wireless router or AP Input WEP settings if applicable 1 1 1 1 1 After you have configured the DP 311P set the rear panel switch back to Normal mode 2 2 2 2 2 Change your wireless network adapter settings IP Address Infrastructure mode so that they match your network ...

Page 19: ...19 Printing with Windows XP 2000 continued For Windows XP Go to Start Printers and Faxes Add a Printer Click Next Double click on the Add Printer icon ...

Page 20: ...20 Printing with Windows XP 2000 continued Select Local Printer Select Create a new port At the pull down menu highlight Standard TCP IP Port Click Next Click Next Click Next ...

Page 21: ...2000 continued Type in the IP address of the print server i e 192 168 0 10 The port name will automatically be filled in Select Custom Then click Settings Click Next Click Settings Click OK Enter lp1 for the Queue Name Select LPR ...

Page 22: ...continued In this window scroll down to find your printer If it is not listed insert the driver CD or diskette that came with your printer Click on Have Disk Then scroll down and highlight the printer Click Next Click Finish Click Next ...

Page 23: ... printer is now ready for printing with Windows XP on your network Click Finish Select No Click Next At this screen you can input a name for this printer Click Next Printing with Windows XP 2000 continued Yes ...

Page 24: ...ased configuration utility and go to the Site Survey function and select the SSID named WLAN PS The Channel is 1 and WEP is set to Disable The network adapter will now be inAd Hocmode Change the wireless adapter IPAddress so that it is in the same IPAddress range as the DP 311P 192 168 0 x For instructions on changing the IP Address please refer to the Networking Basics section in this manual The ...

Page 25: ...conform to your network Changethe mode to Infrastructure Input or select the SSID of your wireless router or AP Input WEP settings if applicable 1 1 1 1 1 After you have configured the DP 311P set the rear panel switch back to Normal mode 2 2 2 2 2 Change your wireless network adapter settings IP Address Infrastructure mode so that they match your network ...

Page 26: ...26 Printing with Windows 98SE Me continued Please insert the DP 311PCD into yourCD ROM drive and click Install PS Admin This picture will appear Click Next Click Next ...

Page 27: ...gram you want to install DP 311P PSAdmin is a windows based management utility onlyAdministrators need to install this program D Link Print Monitor is the driver for print serversinWindows 95 98 Me Youwill need to install this program Click Next Click Finish ...

Page 28: ...28 Printing with Windows 98SE Me continued Go to Start Settings Printer Add printer or Go to Start Control Panel Printers Double click the Add Printer icon Click Next Select Local printer Click Next ...

Page 29: ...ght the printer as shown If the desired printer is not on the list click Have Disk and insert the printer driver disk that came with your printer to install the printer drivers Select No Click Finish Go to Start Settings Printers Check to see that your printer is installed ...

Page 30: ...ndows 98SE Me continued After the printer installation is completed right click on the Printer icon Select Properties Details Click Add Port Select Other D link Print Port Click OK HP LaserJet Series II HPLaserJetSeriesII ...

Page 31: ... Windows 98SE Me continued Select your DP 311P wirelessprintserver Click OK Click Apply OK Youhave completed setting up your printer in Win 98SE Me 192 168 0 10 192 168 0 10 HP LaserJet Series II HP LaserJet Series II ...

Page 32: ... the web based configuration utility and go to the Site Survey function and select the SSID named WLAN PS The Channel is 1 and WEP is set to Disable The network adapter will now be inAd Hocmode Change the wireless adapter IPAddress so that it is in the same IPAddress range as the DP 311P 192 168 0 x For instructions on changing the IP Address please refer to the Networking Basics section in this m...

Page 33: ...the SSID of your wireless router or AP Input WEP settings if applicable 1 1 1 1 1 After you have configured the DP 311P set the rear panel switch back to Normal mode 2 2 2 2 2 Change your wireless network adapter settings IP Address Infrastructure mode so that they match your network Setting up Apple Talk or LPR Printing in Mac OS X continued ...

Page 34: ...seAppleTalk or LPR printers using IPprotocols for printing through Print Servers Follow the instructions below for setting up the Print Server After attaching the Print Server to your network using the directions provided in the Quick InstallationGuide changetheIPAddressofyourMacintoshtoaccessthePrintServer sweb configuration Setting up Apple Talk or LPR Printing in Mac OS X continued ...

Page 35: ...to 102 168 0 x wherex is any number between1and254 except 10 which is the IPAddress of the PrintServer TheIP Addressesand SubnetMaskshown hereareexamples only Setting up Apple Talk or LPR Printing in Mac OS X continued Select the AppleTalk tab in this window and check Make AppleTalk Active ...

Page 36: ...36 Setting up Apple Talk or LPR Printing in Mac OS X continued Toprint openadocument and select File Print from themenu SelectEdit Printer List from thePrinter dialog box Click Add Printer ...

Page 37: ...rwillbedisplayed The Port Name shown here is an example only Click on the Port to which the post script printerisconnected In this example AppleTalkhasbeen selected PS 1123D6 U1 Laserwriter Then select the printer model from the dialog box displayed here Click Add Printer and the Printer Port configuration is complete Select the Printer Port just configured in the Print window Click Print to print...

Page 38: ...nnected to the Print Server The Port Name illustrated here is only an example Select the printer model from the dialog box In the Queue Name field type in thePort Name of the post script printer that is connected to the Print Server The Port Name illustrated here is only an example Select the printer model from the dialog box Click Add and the process is complete Close all Print Center windows sel...

Page 39: ...the network printers in your AppleTalk zone The Port Names shown in this manual are examples only Setting up the Print Server for AppleTalk Printing To set up your Print Server so that it can be used forAppleTalk printing Select the Network tab and scroll to the bottom to theAppleTalk protocol section ChangetheIPAddressononeofthecomputersonyournetworkto192 168 0 x where x is any number between 11 ...

Page 40: ... are using the LaserWriter 8 To choose a printer connected to your Print Server as your MacOS workstation s default printer Open the Chooser by selecting Chooser from theApple menu Select the LaserWriter 8 icon on the left Make sure that AppleTalk is set to Active A list of all networked PostScript printers will be displayed Double click the name of the Printer Port you wish to use The Printer Por...

Page 41: ...ect PPD If you wish to access this setting in the future you can use the Setup button in the Chooserwindow The selected printer will become your computer s default printer You may need to choose Page Setup in any applications you have open Selecttheappropriateprinter description file for your printer Click Open If your printer is not listed click Generic to use a genericprinterdescription ...

Page 42: ...sh a network at home or work using Microsoft Windows XP Note Please refer to websites such as http www homenethelp com and http www microsoft com windows2000 for information about networking computers using Windows 2000 ME or 98SE Go to Start Control Panel Network Connections When this screen appears Click Next ...

Page 43: ...inued Please follow all the instructions in this window Click Next In this window select the best description of your computer If your computer connects to the internet through a gateway router select the second option as shown ...

Page 44: ...44 Networking Basics Enter a Computer description and a Computer name optional Click Next Enter a Workgroup name All computers on your network should have the same Workgroup name Click Next continued ...

Page 45: ...Basics Please wait while the Network Setup Wizard applies the changes When the changes are complete Click Next Please wait while the Network Setup Wizard configures the computer This may take a few minutes continued ...

Page 46: ...tion In this example Create a Network Setup Disk has been selected You will run this disk on each of the computers on your network Insert a disk into the Floppy Disk Drive in this case drive A Format the disk if you wish and Click Next Click Next continued ...

Page 47: ...ies the files Please read the information under Here s how in the screen below After you complete the Network Setup Wizard you will use the Network Setup Disk to run the Network Setup Wizard once on each of the computers on your network To continue Click Next continued ...

Page 48: ...Click Yes to restart the computer You have completed configuring this computer Next you will need to run the Net work Setup Disk on all the other computers on your network After running the Network Setup Disk on all your computers your new wireless network will be ready to use continued ...

Page 49: ... these directions in Windows XP Click Start in the lower left corner of the screen Right click My Computer Select Properties and Click Select the Computer Name tab in the System Properties window You may enter a Computer Description optional To rename the computer and join a domain Click Change continued ...

Page 50: ...group All computers on your network must have the same Workgroup name Click OK How to find your IPAddress in Windows XP The adapter equipped computers in your network must be in the same IP Ad dress range To verify the IP Address of the adapter please do the following Right click on the Local Area Con nection icon in the task bar Click on Status continued ...

Page 51: ...and Routers will automatically assign IP Addresses to the computers on the network using DHCP Dynamic Host Con figuration Protocol technology If you are using a DHCP capable Gateway Broadband Router you will not need to assign Static IP Addresses If you are not using a DHCP capable Gateway Broadband Router or you need to assign a Static IP Address please follow these instructions Go to Start Doubl...

Page 52: ...52 Networking Basics continued Assigning a Static IPAddress in Windows XP 2000 continued Double click Network Connections Double click Properties Right click LocalArea Connections ...

Page 53: ... be the same for all the computers on the network Networking Basics continued Assigning a Static IPAddress in Windows XP 2000 continued Input your DNS server addresses Note If you are entering a DNS server you must enter the IP Address of the Default Gateway The DNS server information will be supplied by your ISP Internet Service Provider Click OK Click Internet Protocol TCP IP Click Properties Se...

Page 54: ...ed a Print Server such as the DP 311P Please make sure that you have run the Network Setup Wizard on all the computers on your network To share an LPR printer please follow these directions Go to Start Printers and Faxes Click on Add a Printer The screen to the right will appear Click Next Select Local Printer Click Next ...

Page 55: ...an LPR Printer continued Select Create a new port Fromthepull downmenu select Standard TCP IP Port as shown Click Next Please read the instruc tions on this screen Click Next Enter the Printer IP Address and the Port Name as shown Click Next ...

Page 56: ...LPR printer continued In this screen select Custom Click Settings Enter the Port Name and the Printer Name or IPAddress Select LPR Enter a Queue Name if your Print Server Gatewayhas morethanone port you will need a Queue name Click OK ...

Page 57: ...river If the printer driver is already installed do thefollowing Click Have Disk Insert the printer driver disk that came with your printer Select the printer you are adding from the list of Printers Click Finish This screen will show you informationaboutyour printer Click Next ...

Page 58: ...computers on your network in order to share the printer Click Finish to complete the addition of the printer This screen will display information about your printer Select Yes to print a test page Please remember the name of your printer You will need this informationwhenyouusethe Add Printer Wizard on the other computers on your network You can rename your printer if you choose It is optional Cli...

Page 59: ... Modes Ad Hoc and Infrastructure User definable via Web management interface Data Transmission Rate Up to 11Mbps with auto fallback feature to 5 5Mbps 2Mbps 1Mbps OutputPower 13 17dBm typical 15dBm Radio Sensitivity BER 8 Min 82 dBm for 11Mbps Min 86 dBm for 5 5Mbps Min 88 dBm for 1 2Mbps TypeofAntenna ExternalOmni directionalantennawithreverseSMA connector WEP Wired Equivalent Privacy Encryption ...

Page 60: ...ystem Memory 2Mbytes SDRAM Parallel Port 1 DB 36 pin male Centronics port supporting bi directional communication Size 55mm x 93mm 2 16 inches x 3 66 inches Weight 3 30 oz 0 20 lbs PowerSupply 5V 2A EMICertifications CE FCC Class B Temperature Operating 0 50 Storage 5 65 Humidity Operating 0 70 Storage 0 80 ...

Page 61: ...Link Technical Support over the Telephone 877 453 5465 24 hours a day seven days a week D Link Technical Support over the Internet http support dlink com email support dlink com Tech Support for customers within Canada D Link Technical Support over the Telephone 800 361 5265 Monday to Friday 8 30am to 9 00pm EST D Link Technical Support over the Internet http support dlink ca email support dlink c...

Page 62: ...tion of the product Software will substantially conform to D Link s then current functional specifications for the Software as set forth in the applicable documentation from the date of original retail purchase of the Software for a period of ninety 90 days Warranty Period provided that the Software is properly installed on approved hardware and operated as contemplated in its documentation D Link...

Page 63: ...en subjected to abuse accident alteration modification tampering negligence misuse faulty installation lack of reasonable care repair or service in any way that is not contemplated in the documentation for the product or if the model or serial number has been altered tampered with defaced or removed Initial installation installation and removal of the product for repair and shipping costs Operatio...

Page 64: ...ication However there is no guarantee that interference will not occur in a particular installation If this equipment does cause harmful interference to radio or television reception which can be determined by turning the equipment off and on the user is encouraged to try to correct the interference by one or more of the following measures Reorient or relocate the receiving antenna Increase the se...

Page 65: ...ON LQ 680 EPSON LQ 2170C EPSON LQ 100ESC P2 EPSON EPL 5800 FUJITSU DL700 FUJITSU DL6400Pro FUJITSU DL3400 HP LaserJet6P HP LaserJet1200series HP DeskJet810C HP DeskJet500 HP DeskJet400 HP DeskJet1220C HP DeskJet1125C Panasonic KX P1121 STAR NX 2420 Kyocera FS 1010 LEXMARK Z43 NEC PINWRITERP8000C NEC PINWRITERP5300 NEC PINWRITERP2200 OKI Microline 391 turbo Panasonic KX P1624 Panasonic KX P1121 STA...

Page 66: ...KII PN48 9 Epson Stylus Scan 2000 10 Epson Stylus Scan 2500 11 LexmarkColorJetPrint2050 12 OlivettiPG304 13 OKI Page 8W 14 HP Leaser Jet 1000 15 EPSON5900L 16 CanonLBP810 17 SamsungML 1210 18 Epson6100L 19 EpsonAcuLaser C900 20 EpsonAcuLaserC1000 Please note that the DP 311P Cannot support all GDI printers Supports only Postscript printers with Mac OS May not work with MFP Multi Function Printers ...

Page 67: ...t printing jobs You must wait till all print jobs are finished before you can proceed 1 2 Upgrading the print server from PSAdmin 1 Log into your NetWare file server as a Supervisor Admin or equivalent 2 Ensure binary file is located in the PSAdmin directory 3 Run PSAdmin from your Windows PC 4 Click the Upgrade icon in tool bar Upgrading the print server from Windows 2000 XP 1 Ensure that the bin...

Page 68: ...UNIX Through TCP IP 1 Log in as root 2 Ensure that the binary file is located in your current working directory 3 Type tftp print server s IPaddress 4 At tftp prompt type get upgrade 5 Change to binary mode 6 At tftp prompt type put mps23 bin 7 Wait for the file transfer to complete 8 Quit from tftp 9 Theupgradeiscomplete ...

Reviews: