123
Adding a Printer
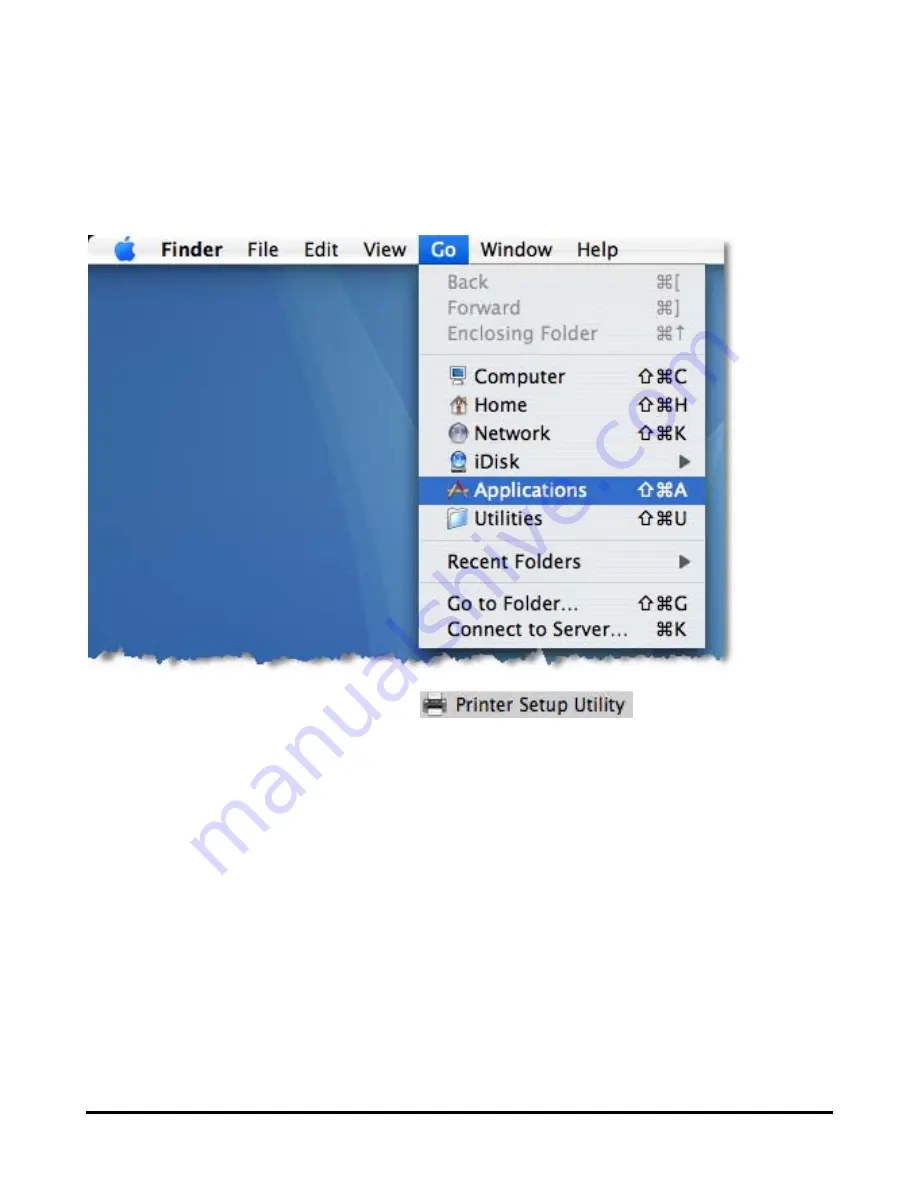
Use the
Go
menu at the top tool bar and select
Applications
option and find the
Utilities
folder or open the
Utilities
folder directly in
Go
menu.
In the
Utilities
folder, find and select
to open
Printer
List
window. If no printer has been set up on your Macintosh, you will be
prompted to add a printer. Click
Add
button on the pop-up dialogue box to open
Printer Browser
window.
Summary of Contents for DP 300 - Print Server - Parallel
Page 1: ...D Link DP 300U Fast Ethernet Print Server Manual Rev 01 November 2007 ...
Page 37: ...32 ...
Page 50: ...45 STATUS Network The Network screen displays the general Network status of your print server ...
Page 54: ...49 Reboot If you want to reset the print server you may just click Reboot for restarting ...
Page 55: ...50 Refresh Printer Status Click a port name to refresh the status of the connected printer ...
Page 56: ...51 TCP IP Printing for Windows Vista Go to Start Î Control Panel Î Printers ...
Page 57: ...52 Click Add a printer Select the first option Add a local printer and then click Next ...
Page 60: ...55 ...
Page 62: ...57 ...
Page 63: ...58 ...
Page 65: ...60 Click Next ...
Page 66: ...61 After clicked Print a test page a small dialogue box will show up as below Click Close ...
Page 67: ...62 Click Finish The printer is now ready for printing with Windows Vista on your network ...
Page 69: ...64 Select the first option Local printer attached to this computer and click Next ...
Page 72: ...67 ...
Page 73: ...68 Select Custom and click Settings ...
Page 75: ...70 ...
Page 76: ...71 Click Next ...
Page 77: ...72 Click Finish ...
Page 79: ...74 Select Yes to print a test page click Next ...
Page 80: ...75 Click Finish The printer is now ready for printing with Windows XP on your network ...
Page 82: ...77 When the following screen shows up click Next ...
Page 83: ...78 Select the first option Local printer attached to this computer and click Next ...
Page 84: ...79 Click Next ...
Page 86: ...81 Click Next ...
Page 88: ...83 ...
Page 89: ...84 Select Custom and click Settings ...
Page 91: ...86 ...
Page 92: ...87 Click Next ...
Page 93: ...88 Click Finish ...
Page 95: ...90 At this screen you can input a name for the printer and then click Next ...
Page 96: ...91 Select the first option Do not share this printer and click Next ...
Page 97: ...92 Select Yes to print a test page click Next ...
Page 98: ...93 Click Finish The printer is now ready for printing with Windows 2000 on your network ...
Page 100: ...95 Highlight Client and click Add At this window click Have Disk ...
Page 104: ...99 ...
Page 106: ...101 Click OK Windows will ask for a restart Click Yes ...
Page 121: ...116 5 The Add a new print queue menu appears click Forward to continue ...
Page 123: ...118 8 Select the printer model ...
Page 132: ...127 appears listed it is ready for use Quite the Printer Setup Utility and start printing ...
Page 141: ...136 Select Edit Printer List from the Printer dialog box Click Add Printer ...
Page 147: ...142 ...


