18
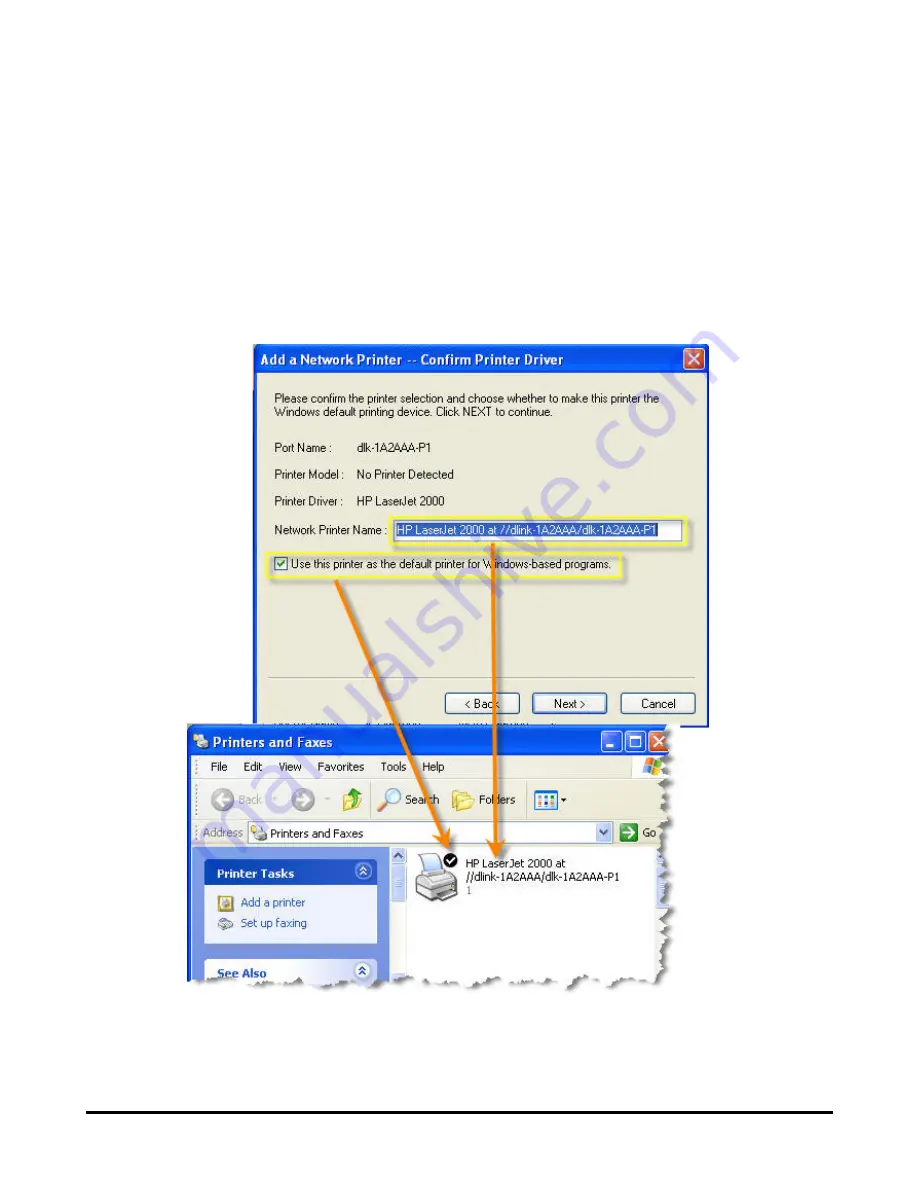
printer in the
Network Printer Name
box and enable this printer as the default
printer by checking the
Use this printer as the default printer for
Windows-based programs
box.
After you did the verification and configuration in the following window, click
Next>
to continue. Then the printer (e.g. HP Laser 2000 used in this manual) will be
auto-created in
Printers and Faxes
as the following illustration.
Summary of Contents for DP 300 - Print Server - Parallel
Page 1: ...D Link DP 300U Fast Ethernet Print Server Manual Rev 01 November 2007 ...
Page 37: ...32 ...
Page 50: ...45 STATUS Network The Network screen displays the general Network status of your print server ...
Page 54: ...49 Reboot If you want to reset the print server you may just click Reboot for restarting ...
Page 55: ...50 Refresh Printer Status Click a port name to refresh the status of the connected printer ...
Page 56: ...51 TCP IP Printing for Windows Vista Go to Start Î Control Panel Î Printers ...
Page 57: ...52 Click Add a printer Select the first option Add a local printer and then click Next ...
Page 60: ...55 ...
Page 62: ...57 ...
Page 63: ...58 ...
Page 65: ...60 Click Next ...
Page 66: ...61 After clicked Print a test page a small dialogue box will show up as below Click Close ...
Page 67: ...62 Click Finish The printer is now ready for printing with Windows Vista on your network ...
Page 69: ...64 Select the first option Local printer attached to this computer and click Next ...
Page 72: ...67 ...
Page 73: ...68 Select Custom and click Settings ...
Page 75: ...70 ...
Page 76: ...71 Click Next ...
Page 77: ...72 Click Finish ...
Page 79: ...74 Select Yes to print a test page click Next ...
Page 80: ...75 Click Finish The printer is now ready for printing with Windows XP on your network ...
Page 82: ...77 When the following screen shows up click Next ...
Page 83: ...78 Select the first option Local printer attached to this computer and click Next ...
Page 84: ...79 Click Next ...
Page 86: ...81 Click Next ...
Page 88: ...83 ...
Page 89: ...84 Select Custom and click Settings ...
Page 91: ...86 ...
Page 92: ...87 Click Next ...
Page 93: ...88 Click Finish ...
Page 95: ...90 At this screen you can input a name for the printer and then click Next ...
Page 96: ...91 Select the first option Do not share this printer and click Next ...
Page 97: ...92 Select Yes to print a test page click Next ...
Page 98: ...93 Click Finish The printer is now ready for printing with Windows 2000 on your network ...
Page 100: ...95 Highlight Client and click Add At this window click Have Disk ...
Page 104: ...99 ...
Page 106: ...101 Click OK Windows will ask for a restart Click Yes ...
Page 121: ...116 5 The Add a new print queue menu appears click Forward to continue ...
Page 123: ...118 8 Select the printer model ...
Page 132: ...127 appears listed it is ready for use Quite the Printer Setup Utility and start printing ...
Page 141: ...136 Select Edit Printer List from the Printer dialog box Click Add Printer ...
Page 147: ...142 ...


