User Manual
Pan & Tilt Day/Night Network Camera
DCS-5009L
Version 1.1 | October 15, 2014
Cloud Camera
Page 1: ...User Manual Pan Tilt Day Night Network Camera DCS 5009L Version 1 1 October 15 2014 Cloud Camera ...
Page 2: ...p and change Please refer to the www mydlink com website for the most current information Manual Revision Trademarks D Link and the D Link logo are trademarks or registered trademarks of D Link All other third party marks mentioned herein are trademarks or registered trademarks of their respective owners 2014 by D Link All Rights Reserved Revision Date Description 1 0 August 19 2014 Initial releas...
Page 3: ...wet environment If the product gets wet see the appropriate section in your troubleshooting guide Operate the product only from the type of external power source indicated on the electrical ratings label If you are not sure of the type of power source required consult your local power company Use only the power adapter that came with the product Using another adapter not recommended by the manufac...
Page 4: ... product is not a toy Do not allow children to play with it The product is designed for Indoor Use Only The product should not be used in a location where it could become wet Ensure the product is fixed securely otherwise it may fall and cause injury This product is NOT intended to replace proper supervision of children You must check your child s activity regularly as this product will not alert ...
Page 5: ... 18 Camera Setup Wizard 19 Manual Hardware Installation 20 Mounting Instructions 21 What is mydlink 22 mydlink Apps 22 Live Video 23 Camera Status 24 Configuration 25 Using the Web Configuration Utility 25 Live Video 26 Setup 27 Wizard 27 Internet Connection Setup Wizard 28 Network Setup 30 Wireless Setup 32 Dynamic DNS DDNS 33 Image Setup 34 Video 35 Audio 36 Motion Detection 37 Mail 38 FTP 40 Ti...
Page 6: ...6 D Link DCS 5009L User Manual Table of Contents Contacting Technical Support 55 Warranty 56 Registration 63 ...
Page 7: ...CS 5009L Pan Tilt Day Night Network Camera Mounting Kit Power Adapter Ethernet Cable Quick Install Guide If any of the above items are missing please contact your reseller Note Usingapowersupplywithadifferentvoltagethantheoneincludedwithyourproductwillcausedamageandvoidthewarrantyforthisproduct ...
Page 8: ... or above and at least 128MB RAM Windows 8 7 Vista or Mac OS X 10 6 or higher Web Browser Internet Explorer 7 or higher Firefox Chrome Safari 4 or higher Windows Users MakesureyouhavethelatestversionofJavainstalledandenabled Visit www java com to download the latest version Network Device and Service A router D Link Cloud Router is recommended An Internet connection An e mail account required to c...
Page 9: ...edremotely andcontrolledfromanyPC NotebookoveryourlocalnetworkorthroughtheInternet using a Web browser The simple installation and intuitive Web based interface offer easy integration with your Ethernet Fast Ethernet or 802 11g n wireless network And with Wireless N technology you have the freedom to place the DCS 5009L anywhere within range of your existing wireless network Your DCS 5009L is mydl...
Page 10: ...Efficient Video This camera supports use of the H 264 video codec which gives you high quality video with reduced bandwidth requirements This means that you can enjoy smoother more reliable video streaming over the Internet and less disk space is required to save recordings Motion Triggered Notifications and Recordings The DCS 5009L can send e mail notifications with snapshots or video clips whene...
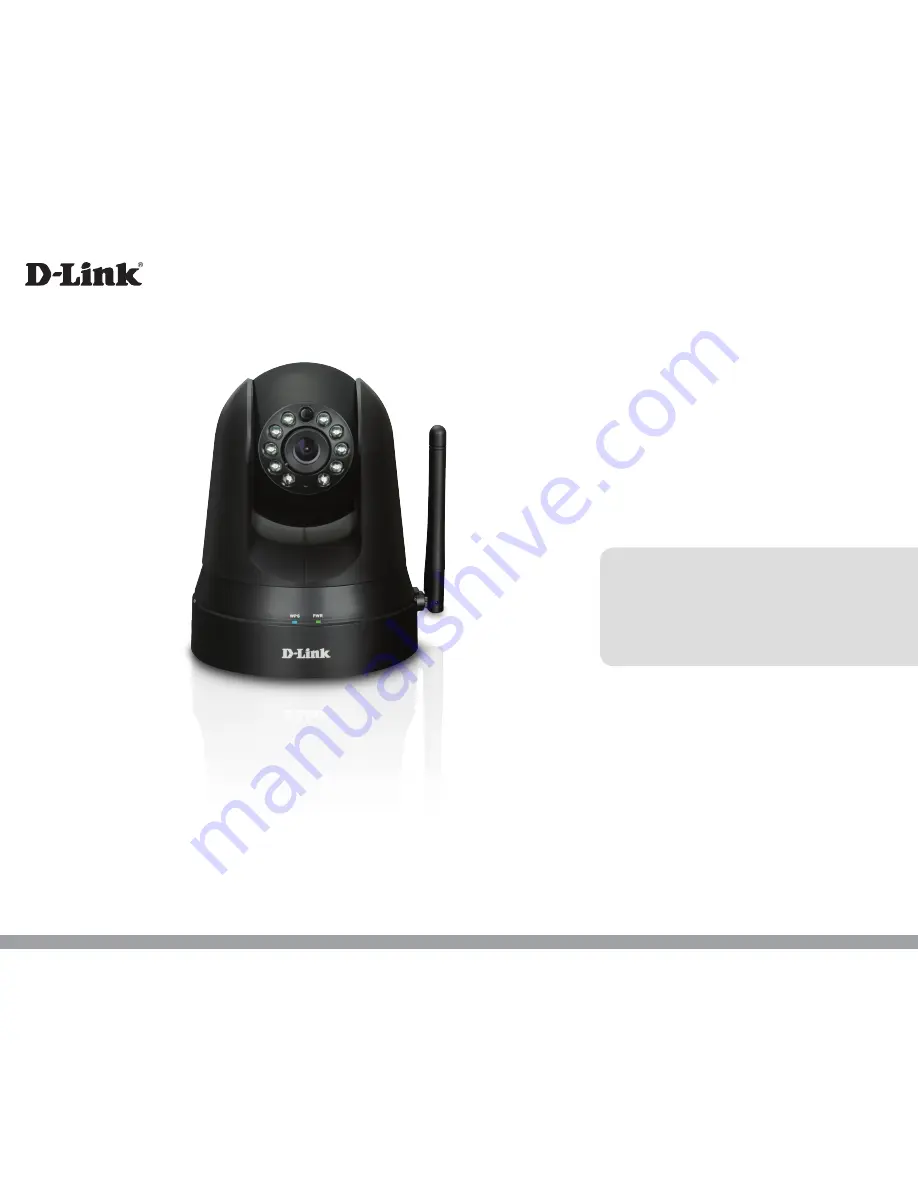
Page 11: ...Camera Lens Microphone IR LEDs Light Sensor Power and Link LED WPS LED Manual Focus Bezel Note If you see a white haze when viewing in night vision mode the IR lights on the camera may be reflecting off a nearby surface Try repositioning the camera in order to avoid glare from the IR LEDs ...
Page 12: ...12 D Link DCS 5009L User Manual Section 1 Product Overview Rear View Power Connector Ethernet Port Reset Button WPS Button ...
Page 13: ... a meter at a 45 degree angleappearstobealmost3feetthick 1meter Ata2 degreeangle itlooksover46feetthick about14meters Position your devices so that the signal will travel straight through a wall or ceiling instead of at an angle for better reception 3 Building materials make a difference A solid metal door or aluminum studs may weaken the wireless signal Try to position your access points wireless...
Page 14: ...up Wizard on page 19 Manual Hardware Installation This section shows you how to manually set up your camera However in order to use the mydlink features of your camera you will still need to run the Camera Setup Wizard Refer to Manual Hardware Installation on page 20 Installation Note Ifyouexperienceissuesregisteringthisdevicewithyourmydlinkaccount orIfyoupurchasedanopenboxorresoldunit perform a h...
Page 15: ... 1 Attach the power supply to the power receptor located on the back of the DCS 5009L and connect it to a wall outlet or surge protector Power is confirmed when the Power LED is lit Step 2 Connect the included Ethernet cable to the Ethernet port located on the back of the DCS 5009L Plug the other end into an available LAN port on your D Link Cloud Router Note If you later decide to use your camera...
Page 16: ...edtotheInternet openaWebbrowser e g Internet Explorer Chrome Firefox or Safari and log in to your mydlink account Step 4 The mydlink page will automatically check for new devices Once mydlink detects your camera a notice will appear that says Zero Configuration at the bottom of the screen Click the notification to continue ...
Page 17: ...on Your router s wireless settings were automaticallytransferredtothecameraduringZeroConfigurationSetup sono further configuration is required Ifyouareinterestedinlearningaboutadvancedconfigurationofyourcamera you can skip to Configuration on page 25 Note If the live image is blurry or out of focus you can manually adjust the focus by rotating the manual focus bezel that surrounds the camera lens ...
Page 18: ... configure The DCS 5009L will automatically create a secure wireless connection to your router While connecting the blue LED will flash and your camera will reboot WPS Push Button Setup WPS Button If you have a D Link Cloud Router and an active mydlink account the easiest way to create a secure wireless connection is by using the WPS Button on the back of the DCS 5009L After you complete Step 3 be...
Page 19: ...onds the SetupWizard will open which will guide you step by step through the installation process from connecting your hardware to configuring your camera and registering it with your mydlink account Click Start to begin WindowsUsers DownloadtheWindowsSetupWizardfiletoyourcomputer MacUsers Download the Mac OS SetupWizard Open the SetupWizard file and launch the application Note Ifyouexperienceissu...
Page 20: ...For more information refer to WPS Push Button Setup on page 18 If your router does not support WPS you will still be able to set up your camera s wireless settings using the camera sWeb interface Refer to Wireless Setup on page 32 Connect the Power Cable and Ethernet Cable Step 1 Attach the power supply to the power receptor located on the back of the DCS 5009L and connect it to a wall outlet or s...
Page 21: ...oles insert the plastic anchors and then insert the screws 2 The power and Ethernet cables can be concealed behind the mounting bracket Run the cables through the back of the mounting bracket securing them with the built in guides Be sure to leave enough cable length protruding from the top to connect the cables to the camera 3 1 Usingthesuppliedthumbscrew fastenthe camera to the mounting bracket ...
Page 22: ...or tablet mydlink Apps mydlink Lite App Free Search for mydlink lite to download and install the app on your smartphone or tablet when connected to the Internet You can also find the app by scanning the QR code to the right with a QR code scan app mydlink App Paid Tablet Only mydlink Requirements for mydlink and mydlink app requirements refer to www mydlink com Cloud Camera Cloud Router mydlink cl...
Page 23: ...ce list you will see a Live Video screen similar to the one shown below Windows does not have Java installed by default Please download it from http www java com In Mac OS X 10 7 x Java applets are disabled by default Click the Finder Applications Utilities Java Preferences and check the Enable applet plug in andWeb Start applications option The ActiveX controls in IE will install automatically if...
Page 24: ... offline try the following Check to make sure that the power LED on your camera is lit either solid red or solid green If it is solid green check to make sure that the Internet connection to your camera is working properly Ifitissolidred reconnectyourcameratoyourrouter Refer to Zero Configuration Setup on page 15 or Manual Hardware Installation on page 20 Forawiredconnection makesuretheEthernetcon...
Page 25: ...ngs tab and click on Advanced Settings to access your camera s Web configuration utility You can also access the interface locally by entering the IP address of your camera into a Web browser such as Internet Explorer To log in enter the User name admin and the Password you created in the Setup Wizard If you did not create a password leave the password field blank After entering your password clic...
Page 26: ...much the camera should move up or down each time the user presses the up down pan arrow on the pan tilt wheel Select a number that controls how much the camera should move left or right each time the user presses the left right tilt arrow on the pan tilt wheel You can select the desired language for the Web interface from this drop down menu Click on these buttons x1 x2 etc to adjust the level of ...
Page 27: ...n Setup Wizard which includes step by step instructions If you prefer to manually configure your camera select Manual Internet Connection Setup and skip to Network Setup on page 30 Note To register your camera with mydlink and enable its mydlink related features you should use the Camera Setup Wizard for installation Please refer to Camera Setup Wizard on page 19 ...
Page 28: ...g on your network and would like a dynamic IP address to be assigned to your camera automatically Static IP Address This will allow you to manually enter your network settings for the camera Select this option if your Internet Service Provider ISP or network administrator has provided you with a set of predefined IP addresses If you are not sure what settings to enter check with your ISP or networ...
Page 29: ...ggered captured and scheduled at the right time Click Next to continue This page displays a summary of your settings Click Apply to save and activate your settings Click Back if you need to change your settings If you have a Dynamic DNS account and would like the camera to update your IP address automatically click Enable and enter your host information Otherwise simply select Disable Click Next t...
Page 30: ...es to IP addresses SecondaryDNS Enter the IP address for the secondary domain name server to backup the Primary DNS If your camera is directly connected to the Internet through a DSL modem youmayconnecttotheInternetusingPPPoE ClickonPPPoE and enter the User ID and Password provided to you by your ISP or network administrator You may configure a second HTTP port that will allow you to connect to th...
Page 31: ...e this service Bonjour is a software that enables automatic discovery of devices on a LAN local area network Note This software comes built in with Apple s OS X and iOS It can be installed on computers running Microsoft Windows Enter a name to identify this camera on Bonjour Click Save Settings ...
Page 32: ... wireless network In most cases you should select Infrastructure Ad Hoc is only used if your camera is directly connecting to another PC or device without the use of a router or access point Clicking this button will allow you to select an available wireless network to connect to and will fill in the necessary settings for you Select the wireless security mode used by your wireless network If yous...
Page 33: ...ct to the DDNS server Enter your Password used to connect to the DDNS server This allows you to specify the periodic update time for the DDNS address Click Save Settings Enable Server Address Host Name User Name Password Timeout Dynamic DNS DDNS This section allows you to configure the DDNS Dynamic Domain Name System settings for your camera DDNS will allow users to access your camera using a doma...
Page 34: ...alledupsidedown FlipImageandMirrorshould both be checked Allows you to adjust the brightness level Select a setting between 5 and 5 from the drop down menu Allows you to adjust the contrast level Select a setting between 5 and 5 from the drop down menu Allowsyoutoadjustthecolorsaturationlevel Selectasettingbetween 5 and 5 from the drop down menu Click Save Settings Enable Anti Flicker Flip Image M...
Page 35: ...2 Higher settings offer better quality but will require more bandwidth to stream Select the desired Bit Rate for the video using H 264 compression A higher bit rate will increase image quality but will require more bandwidth to stream SelecttheFrameRate FPS touseforthevideostream Highersettings offer better quality but will require more bandwidth to stream Select one of five levels of image qualit...
Page 36: ...ings for your camera Note Please wait a few seconds for the camera to adjust the audio after making changes Audio Settings Volume Settings You can click Enable in order to hear audio from your camera s microphone Selectanumberfromthedrop downmenutoadjustthevolumelevel of the camera s microphone Click Save Settings ...
Page 37: ...tion Time Sensitivity Detection Areas Click to enable the motion detection feature of your camera Select Always if you want to have motion detection always enabled or click Schedule and select day s and a time period Select a number representing the measurable difference between sequential images required to determine whether there is motion A higher number makes it easier for motion to be detecte...
Page 38: ...re not sure what settings to use check with your e mail provider e g Gmail Yahoo Mail etc Select a protocol for security For example if you want to use Gmail with SSL TLS for e mail notifications you can follow the steps below Step 1 Enter smtp gmail com in the SMTP Server Address field Step 2 Change the SMTP Server Port number from 25 to 465 Step 3 Enter your Gmail e mail address in Sender E mail...
Page 39: ...ected Youcanchoosewhetherto e mail a snapshot immediately or e mail six snapshots together with three frames before and after motion was detected You can also set the Frame interval time to specify how far apart the snapshots should be in seconds This number determines how frequently e mail notifications will be sent Specify a number in seconds representing the period of time between snapshot e ma...
Page 40: ...a to send snapshots and video clips to an FTP server Enable uploading of images to an FTP server Image Frequency Base File Name Check the box to enable uploading of snapshots to an FTP server Images will be uploaded as specified below Click Always to upload snapshots continuously based on the Image Frequency specified Click Schedule to set a schedule for starting and stopping the uploading of snap...
Page 41: ...t file name up to the number you specify after which the oldest files will be overwritten Check the box to enable the uploading of video clips to an FTP server Video clips will be uploaded as specified below Click Always to upload video continuously based on the Video Limit specified below Click Schedule to set a schedule for starting and stopping the uploading of video clips Click Motion Detectio...
Page 42: ...risenabled youcanselecttheNTPServer closest to you from the drop down menu Click to enable Daylight SavingTime DST If DST is enabled you can select an Offset using the drop down menu or enter a Start and End date with the Month Week Day of Week and Time When SynchronizeNTPServer is not enabled you can set the date and time of the internal system clock manually Or you can click on Copy Your Compute...
Page 43: ...receiving little or no light Auto Manual Always Day Mode Always Night Mode Day Mode Schedule Click Auto to allow the camera to automatically switch between Day and Night mode based on the amount of available lighting Click Manual to allow the user to manually switch between modes through the Live Video page Click Always Day Mode to allow the camera to always use Day mode Click Always Night Mode to...
Page 44: ... pan tilt wheel ClickDefaultHometo return theHome location to the factory default setting Select a number that controls how much the camera should move up or down each time the user presses the up down pan arrow on the pan tilt wheel Select a number that controls how much the camera should move left or right each time the user presses the tilt left right tilt arrow on the pan tilt wheel The camera...
Page 45: ...e the LEDs Disabling the LED function may be useful if you want to make the camera less obvious Click Enable to enable user access control or Disable to allow only the administrator account to access the camera Click Enable to allow access to the current camera snapshot using the Web address displayed Click Enable to allow on screen display of the current time to be added to the video If OSD is en...
Page 46: ...he Device Click Save Configuration to save the current camera configuration to your local PC To load a previously saved configuration click Browse and select yoursavedconfigurationfile ThenclickRestoreConfigurationFrom File to load the file from the local hard drive ClickRestoreFactoryDefaults toresetallsettingsbacktothefactory defaults Please note that this will erase any changes you have made to...
Page 47: ...9L download the latest firmware from the D Link Support Page to your local hard drive Click Browse and select the firmware file then click the Upload button to start the firmware upgrade Warning The firmware upgrade process must not be interrupted or the camera may be damaged When upgrading firmware do not unplug the camera or your PC or close your Web browser until the process is complete It is a...
Page 48: ...48 D Link DCS 5009L User Manual 48 Section 4 Configuration Status Device Info This section displays all the detailed information about your device and network settings ...
Page 49: ...49 D Link DCS 5009L User Manual 49 Section 4 Configuration Active User This page lists all the active users information including the User Name IP address and the Time that camera access began ...
Page 50: ... WAN connections are working properly your router has UPnP enabled for more information refer to your router s user manual your router can get a public IP address your router s firmware has been upgraded to the latest version you have tried rebooting your router by unplugging it then plugging it back in After checking the above items you can click the Retry button to refresh the summary screen to ...
Page 51: ...work If the cabling is OK and your network is reachable you should receive a reply similar to the following bytes 32 time 2 ms Another possibility may be that a network device such as a hub or switch utilized by the network camera is not functioning properly Please confirm the power for the devices are well connected and functioning properly If you are using a wireless connection to connect the ca...
Page 52: ...properly For more information refer to Image Setup on page 34 9 Why are no images available through the Web browser ActiveX might be disabled If you are viewing the images from Internet Explorer make sure ActiveX has been enabled in the Internet Options menu You may also need to change the security settings on your browser to allow the ActiveX plug in to be installed Also check that you have the l...
Page 53: ...D Link DNS Client DDNS Client Dyndns and D Link SMTP Client FTP Client HTTP Server PPPoE UPnP Port Forwarding LLTD BUILT IN PROTOCOL 10 100 BASE TX Fast Ethernet 802 11g n WLAN WIRELESS CONNECTIVITY 802 11g n Wireless with WEP WPA WPA2 Security WPS WIRELESS TRANSMIT OUTPUT POWER TYPICAL 11g 11n 14 dBm SDRAM 64 MB FLASH MEMORY 8 MB VIDEO CODECS H 264 MJPEG JPEG for Still Images VIDEO FEATURES Adjus...
Page 54: ...o Gain Control AWB Auto White Balance AES Auto Electronic Shutter POWER Input 100 240 V AC 50 60 Hz Output 12 V DC 1 A DIMENSIONS W X D X H Camera Only 4 03 x 3 99 x 5 26 inches 102 35 x 101 27 x 133 6 mm Camera Including the Mounting Bracket 4 03 x 3 99 x 9 06 inches 102 35 x 101 27 x 230 0 mm WEIGHT Device 0 64 lbs 292 4 grams Mounting Bracket 0 13 lbs 60 8 grams MAX POWER CONSUMPTION 8 64 W OPE...
Page 55: ...ardware Revision located on the label on the bottom of the network camera e g rev A1 Serial Number s n number located on the label on the bottom of the network camera You can find software updates and user documentation on the D Link website as well as frequently asked questions and answers to technical issues For customers within the United States Phone Support 877 453 5465 Internet Support http ...
Page 56: ...der this Limited Warranty will be at D Link s option to repair or replace the defective Hardware during the Warranty Period at no charge to the original owner or to refund the actual purchase price paid Any repair or replacement will be rendered by D Link at an Authorized D Link Service Office The replacement hardware need not be new or have an identical make model or part D Link may at its option...
Page 57: ...the non conforming Software will be refunded by D Link provided that the non conforming Software and all copies thereof is first returned to D Link The license granted respecting any Software for which a refund is given automatically terminates Non Applicability of Warranty The Limited Warranty provided hereunder for Hardware and Software portions of D Link s products will not be applied to and do...
Page 58: ...ped in accordance with the foregoing requirements or that is determined by D Link not to be defective or non conforming Submitting A Claim Canada The customer shall return the product to the original purchase point based on its return policy In case the return policy period has expired and the product is within warranty the customer shall submit a claim to D Link as outlined below Customers need t...
Page 59: ...0AM 9 00PM EST What Is Not Covered The Limited Warranty provided herein by D Link does not cover Productsthat inD Link sjudgment havebeensubjectedtoabuse accident alteration modification tampering negligence misuse faultyinstallation lack of reasonable care repair or service in any way that is not contemplated in the documentation for the product or if the model or serial number has been altered t...
Page 60: ...Y OF SUCH DAMAGES THE SOLE REMEDY FOR A BREACH OF THE FOREGOING LIMITED WARRANTY IS REPAIR REPLACEMENT OR REFUND OF THE DEFECTIVE OR NONCONFORMING PRODUCT THE MAXIMUM LIABILITY OF D LINK UNDERTHISWARRANTY IS LIMITEDTOTHE PURCHASE PRICE OFTHE PRODUCT COVERED BYTHEWARRANTY THE FOREGOING EXPRESS WRITTEN WARRANTIES AND REMEDIES ARE EXCLUSIVE AND ARE IN LIEU OF ANY OTHER WARRANTIES OR REMEDIES EXPRESS ...
Page 61: ...na Increase the separation between the equipment and receiver Connect the equipment into an outlet on a circuit different from that to which the receiver is connected Consult the dealer or an experienced radio TV technician for help FCC Caution Any changes or modifications not expressly approved by the party responsible for compliance could void the user s authority to operate this equipment This ...
Page 62: ...e and 2 this device must accept any interference received including interference that may cause undesired operation IMPORTANT NOTE Radiation Exposure Statement This equipment complies with Canada radiation exposure limits set forth for an uncontrolled environment This equipment should be installed and operated with minimum distance 20cm between the radiator and your body This device has been desig...
Page 63: ...DCS 5009L User Manual Appendix D Registration Version 1 1 October 15 2014 Product registration is entirely voluntary and failure to complete or return this form will not diminish your warranty rights Registration ...