background image

30

Cable Modem Front and Rear Panels

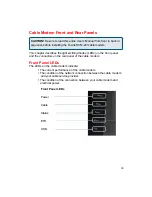
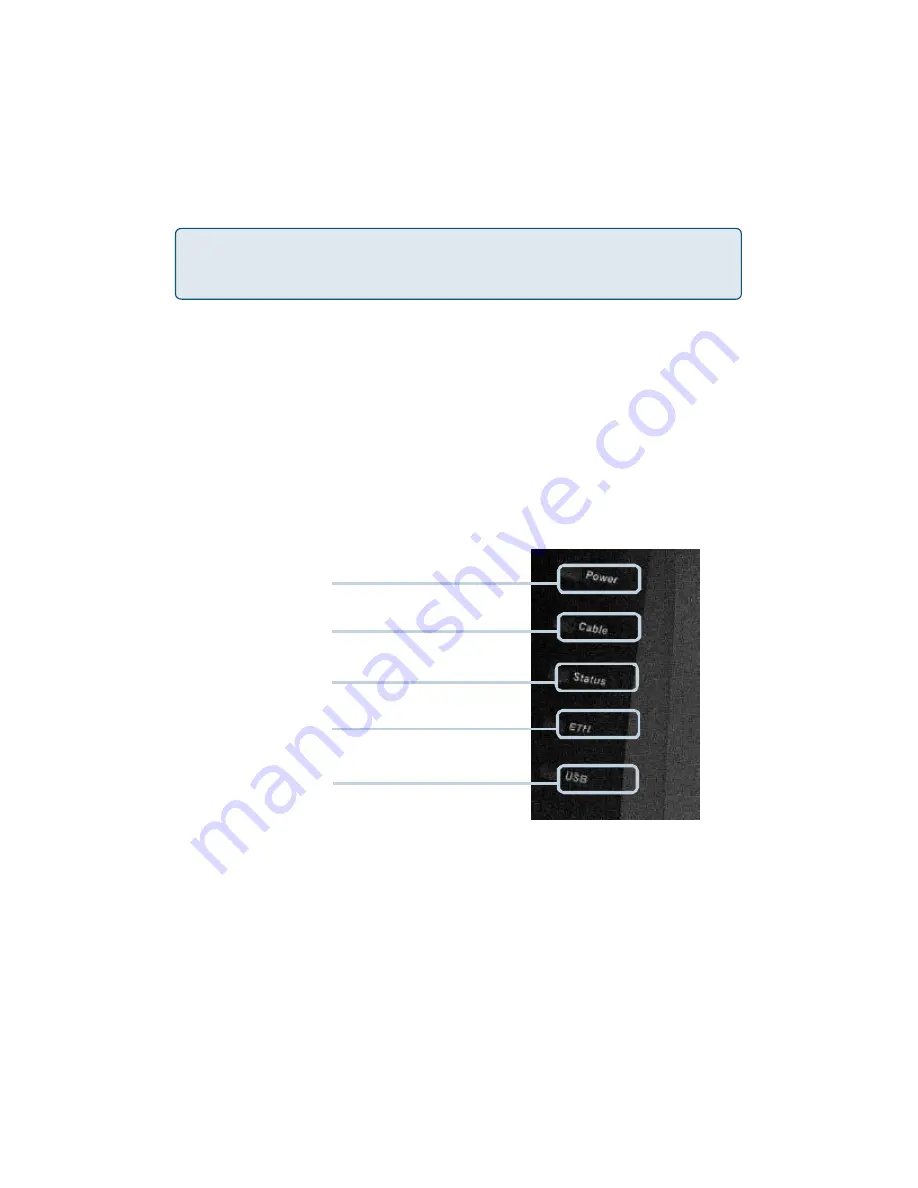
This chapter describes the light emitting diodes (LEDs) on the front panel
and the connectors on the rear panel of the cable modem.

Front Panel LEDs

The LEDs on the cable modem indicate:

• 

The current performance of the cable modem.

• 

The condition of the network connection between the cable modem

   and your cable service provider.

• 

The condition of the connection between your cable modem and

   electrical power.

CAUTION! 

Be sure to read this entire User’s Manual from front to back in

sequence before installing the D-Link DCM-201cable modem.

Front Panel LEDs

Power

Cable

Status

ETH

USB

Summary of Contents for DCM-201

Page 1: ...Manual Building Networks for People USB Ethernet D Link DCM 201 Broadband Cable Modem ...

Page 2: ... the Installation 5 Introduction 7 Which Installation to Use 8 Ethernet Installation 9 Troubleshooting the Ethernet Installation 12 USB Installation 15 Troubleshooting the USB Installation 27 Front and Rear Panels 30 LEDs 31 Back Panel Connectors 32 Technical Specifications 33 Technical Support 34 Warranty and Registration 35 ...

Page 3: ... n n n CAUTION You must use the 12VDC 1 25A power adapter that comes with the D Link DCM 201 cable modem Using the wrong power adapter can damage the cable modem One 12VDC 1 25A Power adapter n 1 CAT 5 UTP Ethernet cable 1 USB cable 1 Cable modem stand to install the cable modem in a vertical position CAUTION Be sure to read this entire User Manual from front to back in sequence before installing ...

Page 4: ...indows 98 Windows Me Windows 2000 Windows XP or Windows NT operating systems or a computer running any other operating OS that supports the TCP IP Internet protocol An active Ethernet port on your computer TCP IP protocol installed See the Configuring the TCP IP Communications Protocol section for more information on installing the TCP IP protocol A PC running Windows XP Windows 2000 or Windows Me...

Page 5: ...local cable service provider about adding additional IP addresses to your account See Which Installation to Use for more information Local Cable Network Service Prepare Your Workspace for the Cable Modem Installation Before installing the cable modem you should prepare your workspace You can install the cable modem vertically with the included bracket or install the cable modem horizontally To pre...

Page 6: ... 4 To enhance the best performance and proper function of the cable modem place it on a horizontal surface or workplace and make sure that the cable modem does not move when it is operating Prepare Your Workspace for the Cable Modem Installation continued ...

Page 7: ...sidential Internet access The cable modem provides a downstream speed of up to 38 Mbps from the cable network to your computer and 10Mbps from your computer to the cable network The DES data encryption helps ensure privacy for the transmitted information Another distinctive feature of the cable modem is its easy installation because DHCP and TFTP clients can obtain automatic access to the IP addre...

Page 8: ...ter The USB port however only enables you to connect one computer to the cable modem See Installing the Cable Modem Using the Ethernet Port or see Installing the Cable Modem Using the USB Port in the following pages for more information n n n n n n n n Full featured compact economical cable modem with Ethernet and USB ports DOCSIS 1 1 compliant Capable of handling downstream data transmission spee...

Page 9: ...9 Installing the Cable Modem Using the Ethernet Port DCM 201 ...

Page 10: ...ual to set up the USB Connection You can use the Ethernet port to connect to the Internet with the following operating systems Windows 95 Windows 98 W indows 98SE Windows 2000 Windows Me Windows NT Macintosh 7 6 or later and other popular operating systems Verify the TCP IP Protocol Configuration Before installing the modem using the Ethernet setup you must verify that your computer has the TCP IP...

Page 11: ...ws 95 Windows 98 and Windows Me continued Configuring TCP IP on the Windows XP or Windows 2000 Operating Systems To configure TCP IP on your Windows XP and Windows 2000 PC 1 Right click the My Network Places icon and select Properties 2 Right click Local Area Connection and click Properties Look for an entry named TCP IP If you see TCP IP listed next to your Ethernet hardware device you can now go...

Page 12: ...or the instructions Configuring TCP IP on a Macintosh Computer Before you install your cable modem you must verify that the TCP IP communications protocol and an Ethernet device are installed on your system Many Macintosh computers have Ethernet devices installed at the factory To configure TCP IP on a Macintosh 1 Click the Apple icon in the Finder 2 Select Control Panels and then TCP IP The TCP I...

Page 13: ...e end of the Ethernet cable into the cable modem s Ethernet port and the other end of the cable into the existing NIC 4 Plug in the computer 5 Power on the computer When installation is complete your setup should resemble the illustration above The modem is operating properly if the Power Cable Status and ETH light emitting diodes LEDs are solid green lit and not blinking Troubleshooting the Ether...

Page 14: ...be malfunctioning Refer to its documentation for troubleshooting information 8 Check for a resource conflict Windows users only To do this a Right click the My Computer icon on the Windows desktop b Click Properties c Click the Device Manager tab and look for a yellow exclamation point or red X over the NIC in the Network adapters field If you see either you have an IRQ conflict To correct this re...

Page 15: ...lugging it back into the outlet Wait several minutes for the cable modem to re establish communications with your local cable operator then try accessing the Internet 3 Verify that you have installed TCP IP properly for Windows 95 Windows 98 Windows 98SE and Windows Me winipcfg for Windows 2000 and Windows XP ipconfig and that the TCP IP parameters provided by your local cable provider are correct...

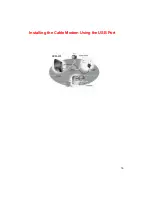
Page 16: ...16 Installing the Cable Modem Using the USB Port DCM 201 ...

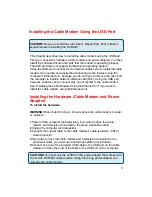
Page 17: ...read this entire User s Manual from front to back in sequence before installing the DCM 201 Installing the Cable Modem Using the USB Port Installing the Hardware Cable Modem and Power Adapter To install the hardware WARNING Risk of electric shock Do not expose the cable modem to water or moisture 1 Power off the computer and television if you plan to have the cable modem and television connected t...

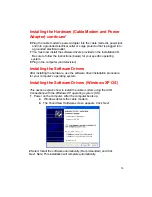
Page 18: ...lug in the computer and television Installing the Software Drivers After installing the hardware use the software driver installation procedure for your computer s operating system Installing the Software Drivers Windows XP OS This section explains how to install the cable modem using the USB Connections with the Windows XP operating system OS 1 Power on the computer After the computer boots up a ...

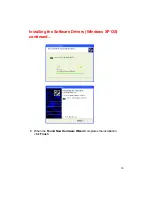
Page 19: ...19 Installing the Software Drivers Windows XP OS continued 3 When the Found New Hardware Wizard completes the installation click Finish ...

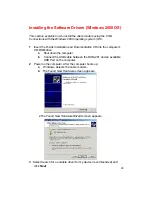
Page 20: ... appears 3 Select Search for a suitable driver for my device recommended and click Next 2 Power on the computer After the computer boots up a Windows detects the cable modem b The Found New Hardware screen appears 1 Insert the D Link Installation and Documentation CD into the computer s CD ROM drive a Shut down the computer b Connect the USB cable between the DCM 201 and an available USB Port on t...

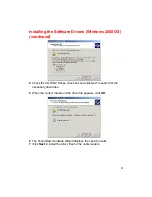
Page 21: ...the correct location of the driver file appears click OK 6 The Found New Hardware Wizard displays the search results 7 Click Next to install the driver files for the cable modem 4 Check the CD ROM Drives check box and click Next to search for the necessary driver files ...

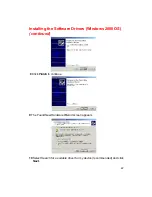
Page 22: ...talling the Software Drivers Windows 2000 OS continued 8 Click Finish to continue 10 Select Search for a suitable driver for my device recommended and click Next 9 The Found New Hardware Wizard screen appears ...

Page 23: ...the CD ROM Drives check box and click Next to search for the necessary driver files 12 When the correct location of the driver file appears click OK 13 The Found New Hardware Wizard displays the search results 14 Click Next to install the driver files for the cable modem ...

Page 24: ... appears 15 Click Finish Installing the Software Drivers Windows Me OS This section explains how to install the cable modem using the USB port with the Windows Me operating system OS 1 Insert the D Link Installation and Documentation CD into the computer s CD ROM drive a Shut down the computer b Connect the USB cable between the DCM 201 and an available USB Port on the computer ...

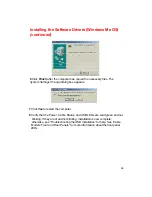
Page 25: ...25 Installing the Software Drivers Windows Me OS continued 3 Select Specify the location of the driver Advanced and click Next c The Add New Hardware Wizard screen appears Click Finish ...

Page 26: ...nge dialog box appears 7 Click Yes to restart the computer 8 Verify that the Power Cable Status and USB LEDs are solid green and not blinking If they are lit and not blinking installation is now complete otherwise see Troubleshooting the USB Installation for help See Cable Modem Front and Rear Panels for more information about thefront panel LEDs ...

Page 27: ...wer off the computer b Unplug the computer from its electrical outlet or surge protector and then plug it back into the electrical outlet or surge protector c Power the computer on d Try accessing the Internet 6 Call your cable operator to verify that their service is two way This cable modem is designed for use with two way cable plants 7 If you are using a cable line splitter so that you can con...

Page 28: ...Adapter Information group area click the drop down arrow and select the D Link cable modem 4 Click Release The IP address changes to 0 0 0 0 5 Click Renew Windows refreshes the IP address The refreshed address may or may not be the same as the original IP address 6 Click OK to return to the Windows desktop To release and renew the IP address for the Windows 2000 and Windows NT 4 0 operating system...

Page 29: ...have installed TCP IP properly for Windows 95 98SE and Me winipcfg for Windows 2000 ipconfig and that the TCP IP parameters provided by your local cable provider are correct for your computer 4 If you are using a cable line splitter so that you can connect the cable modem and a television to the same outlet a Try removing the splitter and reconnecting the cables so that the cable modem is connecte...

Page 30: ... modem indicate The current performance of the cable modem The condition of the network connection between the cable modem and your cable service provider The condition of the connection between your cable modem and electrical power CAUTION Be sure to read this entire User s Manual from front to back in sequence before installing the D Link DCM 201cable modem Front Panel LEDs Power Cable Status ET...

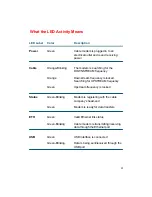
Page 31: ...tream frequency is locked Status Green Blinking Modem is registering with the cable company s head end Green Modem is ready for data transfers ETH Green Valid Ethernet link status Green Blinking Cable modem is transmitting receiving data through the Ethernet port USB Green USB interface is connected Green Blinking Data is being sent received through the USB port What the LED Activity Means LED LAB...

Page 32: ...CATV RF connector to attach the cable for broadband Internet access POWER Jack to connect the power adapter included in the product package Caution You must use the 12VDC 1 25A power adapter that comes with the DCM 201 cable modem Using the wrong power adapter can damage the cable modem RESET Restores factory default settings Ethernet Port Receptor for Power Adapter USB Port Receptor for CATV Rese...

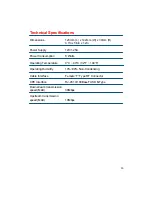
Page 33: ...er Supply 12V 1 25A Power Consumption 8 Watts Operating Temperature 0 C 40 C 32 F 104 F Operating Humidity 10 90 Non Condensing Cable Interface Female F Type RF Connector CPE Interface RJ 45 10 100BaseT USB B Type Downstream transmission speed MAX 38Mbps Upstream transmission speed MAX 10Mbps ...

Page 34: ... this product U S customers can contact D Link technical support through our web site or by phone D Link Technical Support over the Telephone 877 453 5465 24 hours a day seven days a week D Link Technical Support over the Internet http support dlink com When contacting technical support please provide the following information n n n Model number or product name Serial number of the unit Bottom of ...

Page 35: ...fications for the Software as set forth in the applicable documentation from the date of original retail purchase of the Software for a period of ninety 90 days Warranty Period provided that the Software is properly installed on approved hardware and operated as contemplated in its documentation D Link further warrants that during the Warranty Period the magnetic media on which D Link delivers the...

Page 36: ...f the product for repair and shipping costs Operational adjustments covered in the operating manual for the product and normal maintenance Damage that occurs in shipment due to act of God failures due to power surge and cosmetic damage Any hardware software firmware or other products or services provided by anyone other than D Link Products that have been purchased from inventory clearance or liqu...

Page 37: ...his equipment generates uses and can radiate radio frequency energy and if not installed and used in accordance with the instructions may cause harmful interference to radio communication However there is no guarantee that interference will not occur in a particular installation If this equipment does cause harmful interference to radio or television reception which can be determined by turning th...

Reviews: