7
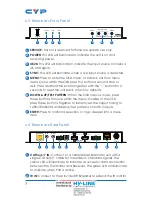
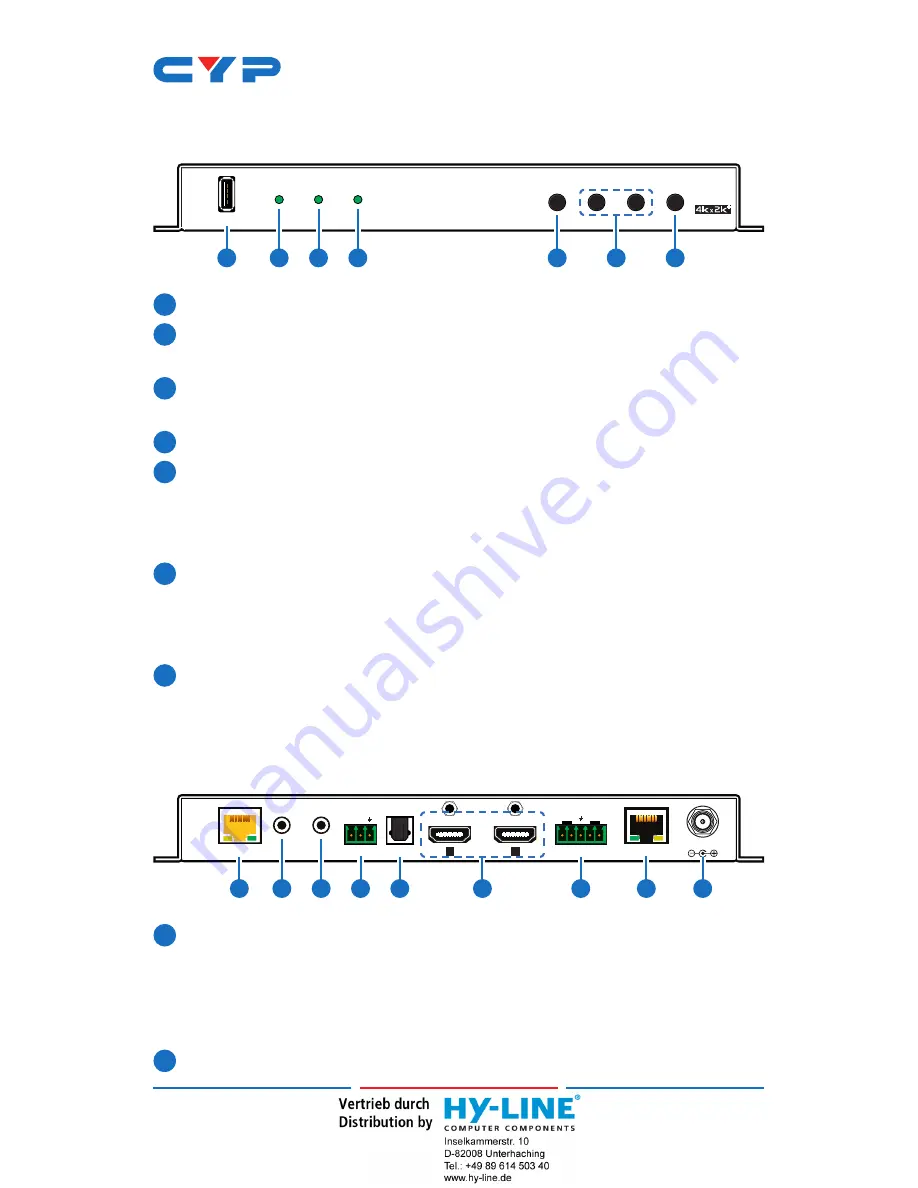
6.3 Receiver's Front Panel
POWER
4K2K
SYNC
MENU
ENTER
TEST PATTERN
-
+
SERVICE
+
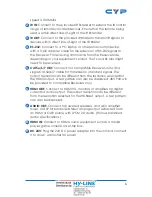
4K UHD+ HDBaseT to HDMI Scaling Rx
1
2
3
4
5
6
7
1
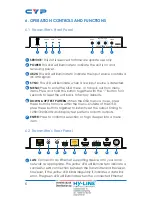
SERVICE:
This slot is reserved for firmware update use only.
2
POWER:
This LED will illuminate to indicate the unit is on and
receiving power.
3
4K2K:
This LED will illuminate to indicate the input source contains a
4K UHD signal.
4
SYNC:
This LED will illuminate when a live input source is detected.
5
MENU:
Press to enter the OSD menu, or to back out from menu
items. Once within the OSD press this button a second time to
exit. Press and hold this button together with the “-” button for 3
seconds to reset the unit back to factory defaults.
6
DOWN & UP/TEST PATTERN:
When the OSD menu is in use, press
these buttons to move within the menu. Outside of the OSD,
press these buttons together to instantly set the output timing to
1280×720@60Hz and display test patterns on both outputs.
7
ENTER:
Press to confirm a selection or to go deeper into a menu
item.
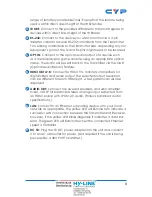
6.4 Receiver's Rear Panel
DC 5V
LAN
AUDIO OUT
L
R
+ −
+ −
B
A
HDMI OUT
OPT IN
RS232
RX TX
CAT5e/6/7 IN
IR OUT
IR IN
1
2
3
4
5
6
7
8
9
1
CAT5e/6/7 IN:
Connect to a compatible Transmitter unit with a
single Cat.5e/6/7 cable for transmission of all data signals. The
yellow LED will illuminate to indicate a successful data connection
between the Transmitter and Receiver. The green LED will illuminate
to indicate when PoH is active.
2
IR IN:
Connect to the provided IR Extender to extend the IR control
Summary of Contents for CSC-6012RX
Page 2: ......
Page 40: ...CYPRESS TECHNOLOGY CO LTD www cypress com tw ...


