background image

DVD

AUDIO

DIGITAL OUTPUT

SET

THE DVD PLAYER SETUP MENU

32

DIGITAL OUTPUT

Select the setting 

BITSTREAM

 or 

LPCM 

(Linear Pulse Code 

Modulation) for each Audio format: 

DOLBY

 & 

MPEG

. Select 

48KHz or 96KHz sampling depending on your audio content. 
Generally the 48KHz is better for most audio, and 96KHz is 
reserved for super-high quality audio. 

The 

DIGITAL OUTPUT

 setting enables or disables the 

Optical Digital Output connector. 

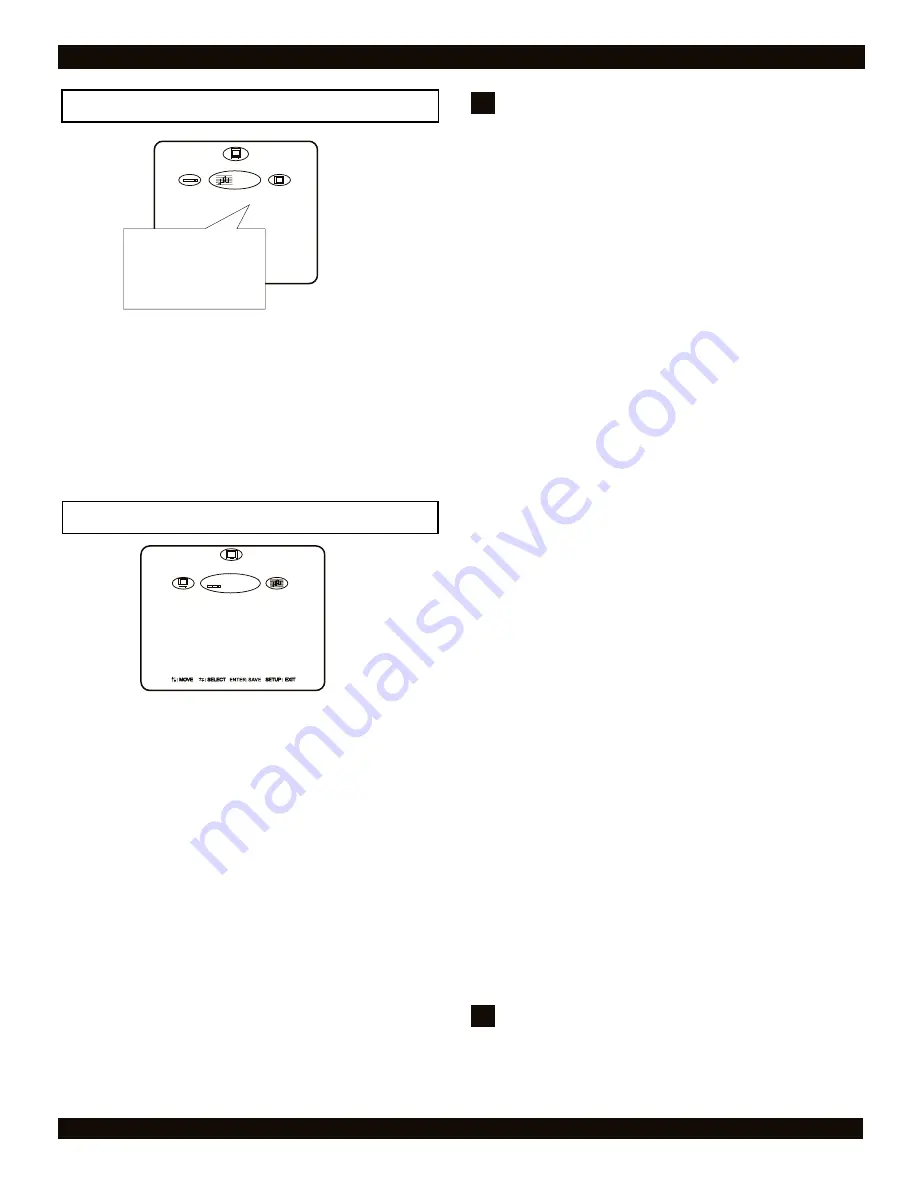
The AUDIO SETUP page

DOLBY

MPEG

PCM

DIGITAL OUTPUT

BACK

BITSTREAM

LPCM

LPCM 48KHz

ON

EXIT

The DVD SETUP page

MENU, AUDIO, SUBTITLE LANGUAGE

Default setting: 

ENGLISH

Use these settings to set the player’s preferred language for 
DVD Audio tracks, subtitles and menus.   

ASPECT RATIO

Default setting: 

16:9

This option is set to match the aspect ratio of the display, 
monitor or TV used with the player. The default setting of

 16:9


matches the aspect ratio of the player’s LCD display. Use this 
setting for the LCD or when using the player to output to a 
Widescreen TV. When using the player’s Video Output with a 
“normal” TV (4:3 aspect ratio), the 

4:3 PS

 (Pan & Scan) 

setting or 

4:3 LB

 (Letterbox) setting should be used, 

depending on which video format is supported on the DVD 
disc you are playing. 

This setting should ALWAYS be set to 

16:9

 when using the 

Ÿ

player’s built-in LCD Display. 
To view DVDs marked as “FULL SCREEN” on the 

Ÿ

player's LCD, DO NOT change this setting to 4:3. Instead, 
change the 

LCD Mode

 to 

4:3 Normal

 (See Page 10). 

Bars on the top and bottom of the screen will be visible 

Ÿ

when viewing “Anamorphic” widescreen movies. 

DVD SETUP

MENU
AUDIO
SUBTITLE
ASPECT RATIO
ANGLE MARK
CLOSE CAPTIONS
PARENTAL CONTROL
NEW PASSWORD

DVD

ENGLISH
ENGLISH
ENGLISH
16:9
ON
OFF
8
_ _ _ _

ANGLE MARK

Default setting: 

ON

When used with discs supporting multi-angle features, the 
Angle Mark continuously displays the current angle you’re 
viewing on screen. Setting ANGLE MARK to 

OFF

 will cancel 

continuous display, and the current angle will be displayed on-
screen for just a few seconds after an angle change.

CLOSED CAPTIONS

Default setting: 

OFF

Not all discs support Closed Captions. However, setting 
CLOSE CAPTION to 

ON

 will result in captions always being 

displayed when discs supporting captions are used. If you don’t 
wish to automatically enable captions, set this option to 

OFF

.

PARENTAL CONTR

Default setting: 

8

The Parental Lock allows you to limit the use of your DVD 
Player to only those DVD discs that do not exceed the rating 
you specify. When the Parental Control is set, DVD discs that 
support this feature will play only after the password has been 
entered. However, typically only discs produced by major 
entertainment companies support Parental Control. You can 
choose from eight levels of Parental Control, corresponding to 
the standard rating system in the USA. You will need to enter a 
valid password before making changes to Parental Control 
settings - refer to the section below.

PASSWORD

To begin using the Parental Control, enter the factory password 
of 3351. Once this password is entered, you will be able to 
change the Parental Control setting or enter an additional user 
password (the factory password cannot be deleted or changed). 
To enter your own user password, key in a four digit number 
into the NEW PASSWORD field. The user password and the 
factory password can now both be used. You can change the 
user password at any time after entering a valid password. The 
user password is useful for allowing others - for example a 
babysitter - temporary access to Parental Control settings.

!

Remember to keep in mind that the key to the Parental 
Control feature is the factory default password of 3351. 
Consequently, your player may not be secure if this manual 
is accessible by your children. 

Note on Parental Security

!

Don't confuse the ASPECT RATIO setting with the LCD 
MODE (Page 10). The ASPECT RATIO setting is set to match 
the LCD SCREEN, TV or MONITOR that the player is using 
as a video output device. By default this is the player's built-
in LCD, which is 16:9 WIDESCREEN format. 

The LCD MODE setting depends on the aspect ratio of the 
MOVIE (DVD or SVCD/VCD). Since the player features a 
WIDESCREEN LCD, the picture will appear stretched when 
viewing non-widescreen material. Change the LCD MODE 
(Page 10) to 4:3 NORMAL to simulate a normal TV screen 
when viewing non-widescreen material. This includes "4:3", 
"FULLSCREEN" or "PAN/SCAN" movie formats. 

Note on Aspect Ratio

Summary of Contents for CH-LDV 700B

Page 1: ...CH LDV 700B DVD Progressive Player Operation Guide Scan Portable TM Theater with TM TM Theater ...

Page 2: ...apparatus has been damaged in any way such as when the power supply cord or plug is damaged liquid has been spilled objects have fallen into the apparatus the apparatus has been exposed to rain or moisture or when the unit does not operate normally or has been dropped Power cord protection To avoid any malfunctions of the unit and to protect against electric shock fire or personal injury please ob...

Page 3: ... 3 Notes on Copyright This product incorporates copyright protection technology that is protected by method claims of certain U S Patents and other intellectual property rights owned by Macrovision Corporation and other rights owners Use of this copyright protection technology must be authorized by Macrovision Corporation and is intended for home and other limited viewing uses only unless otherwis...

Page 4: ...rk 25 THE FUNCTION MENU 10 Playing a bookmark 25 Using the function menu 10 Clearing a bookmark 25 Function menu options 10 The DISPLAY menu 26 DVD PLAYER CONNECTIONS 11 Overview of the display menu 26 THE INTERNAL BATTERY 12 Using the display menu 26 Accessing the battery 12 MP3 MUSIC AND JPG IMAGES 27 Removing the battery 12 The MP3 JPG navigator 27 Inserting the battery 12 Selecting which files...

Page 5: ...coming bent or deformed they should be vertically kept in the disc storage case To prevent damage avoid leaving discs in your car where they may be subject to direct sunlight and high temperature Do not use any disc accessory to improve the audio quality disc protective solutions or lens cleaner These products may damage the disc surface Caring for Optical Discs DISC COMPATIBILITY CARE 5 FEATURES ...

Page 6: ...ition to the DVD player your package should contain the following accessories Check the contents of the package carefully as some items may be located under or inside the packing foam Composite S Video Video cable Stereo Audio Cable Remote control Remote Control Battery Power cord This operation manual and warranty card AC Power Adapter TM TM Headphones Car Adapter Internal Battery Pack ...

Page 7: ...nt before installing a new battery 30 30 Operating the Remote Control When using the remote control be sure to stay within a 30 degree angle of the sensor on the receiver Keep in mind that any obstructions between the remote control and the receiver will affect performance GETTING STARTED Notes on battery 6 2 Place the battery into the holder as pictured below with the POSITIVE SIDE marked on Batt...

Page 8: ...ay mode you wish includes full wide normal or off TITLE Accesses Menus on DVD Discs With VCD discs turns the PBC function On Off MENU PBC Accesses the Title menu on DVD Discs BOOKMARK Press to store the current point on the disc as a bookmark that can be accessed quickly without searching ANGLE Selects between the multiple angle views on supported DVD s FAST REVERSE Scan in fast reverse on DVD s a...

Page 9: ...D screen PREVIOUS FAST REVERSE MONITOR Press to begin scanning in Fast Reverse mode Switches to External Monitor Output or A V Press and HOLD to return to the previous Input mode chapter track FUNCTION VOLUME Press to enter the Function Menu to control Use the or buttons to control the options such as LCD mode and Display volume level during playback MENU PBC ENTER Accesses the main menu with DVDs...

Page 10: ...r complete description BRIGHTNESS Adjusts the brightness of the LCD screen Use the ENTER key to circle through the brightness level LCD MODE Change the LCD MODE to match the player s LCD screen to the movie you re watching For 16 9 or ANAMORPHIC Widescreen movies the default setting of 16 9 WIDESCREEN is used However if you re watching a 4 3 Full Screen movie change this setting to 4 3 NORMAL to s...

Page 11: ...g input Use the provided video cable or optional Component P SCAN cable BATTERY STATUS LED only for this connection Provides the charge status of the internal battery when the unit is off and the battery is being charged A RED color AUDIO IN OUT OPTICAL DIGITAL IN OUT signals that the battery is in need of recharging and GREEN Use the provided analog stereo INPUT OUTPUT cable to designates that th...

Page 12: ...de the battery latch to UNLOCK Press down on the DOTS to unlock the battery compartment cover while sliding the cover off Top To remove the battery gently lift up the end closest to the edge of the unit as shown below Then pull the battery out 1 2 Important The battery must be inserted with the connector pins aligned to those in the compartment as shown above Removing the Battery RearPanel Top Ins...

Page 13: ...the BATTERY STATUS LED turns green the charging cycle has been completed 1 2 FrontPanel BATTERY PACK LED RearPanel DC IN 9V Important Recharge your battery pack only when the battery status is less than 25 Unnecessary charging will reduce the battery pack service lifetime When the battery pack is being charged the LED will glow RED After successfully charging the battery pack the LED will glow GRE...

Page 14: ...ical wall outlet as depicted below and the other end into the unit s DC IN 9V connector 1 Once power is applied with the POWER button set to ON the unit will be in STANDBY Mode Unplug the adapter from the AC outlet if the unit won t be used for a long time Remove the battery pack when using the AC adapter Important Using the Headphones The DVD player comes complete with headphones to use when you ...

Page 15: ...shown below 2 If you wish to hear sound through the TV connect the included red and white analog stereo cable to the audio inputs on the TV 1 3 On your TV select the video input This is normally done by selecting Video 1 or Video Input with the TV s remote control On some TVs this is done by selecting a particular channel 5 You should now see the splash screen of the portable DVD player on your TV...

Page 16: ...he DVD player once to change the video output selection TV with S Video Input S VIDEO INPUT 16 4 You should now see the DVD player s splash screen on your TV 2 Enter the Setup Menu Page 30 by pressing SETUP on the remote control or by using the FUNCTION key on the player Page 10 Change the VIDEO OUTPUT setting to YCbCr and exit the SETUP MENU 1 3 Press the MONITOR key to switch to External Video Y...

Page 17: ...u can use the digital optical audio output to send an encoded digital bit stream to a receiver suitable for receivers with Dolby Digital decoding capability This output requires a special mini optical digital cable not included OPTICAL DIGITAL AUDIO IN R STEREO AUDIO IN TV receiver or recording equipment with stereo audio in L 17 EXAMPLE OF AN OPTICAL DIGITAL AUDIO CABLE WITH MINI OPTICAL ADAPTER ...

Page 18: ...hanging the LCD Mode You can change the built in LCD to match the aspect ratio of the movie you re watching or the video input from an external source Also when listening to music from an external A V source or from an Audio CD or MP3s in the player you can turn off the built in LCD display to save battery power Press the LCD key repeatedly or use the FUNCTION MENU see page 10 to choose an option ...

Page 19: ...ton on the remote control or the ON button on the front panel has been pressed The unit is ready to use Press the PUSH OPEN button on the front panel to open the disc door 1 Inserting a Disc Labeling Side Surface Close the disc tray door and the unit will automatically start playback of the disc 3 19 GETTING STARTED To power off the unit press the POWER key on the remote control or the OFF key on ...

Page 20: ... playback on a single frame press the key again To resume normal playback press again and so on 1 Basic Disc Playback Starting pausing and stopping disc play STOP To stop playback of a disc press STOP The first time STOP is pressed the location where disc play was halted is saved and you can begin playback where you left off by pressing PLAY If STOP is pressed twice the playback location is reset ...

Page 21: ...6X 32X To resume normal playback press the PLAY key 1 Fast Forward and Fast Reverse You can scan through DVDs VCDs and other discs in forward or reverse direction at speeds up to 32X thirty two times normal speed Fast forward reverse scanning will only work during disc playback not when disc play is stopped 21 Advanced playback Jumping to a specific Chapter or Track You can jump directly to any ti...

Page 22: ...ears briefly on the screen 3 Changing the Audio Track Most DVD discs are recorded with multiple audio tracks These can contain multiple languages and different audio formats such as 2 Channel Stereo or Dolby Digital A director s commentary track where the director can be heard discussing the movie is a common example of an extra audio track on During playback press the AUDIO button to cycle throug...

Page 23: ...ring up the Program Menu There are 10 locations on each page with a total of 3 pages available Additional pages are displayed after all locations on a page are filled 1 PROGRAM 1 2 3 4 5 6 7 8 9 10 0 0 5 TRACK Play PRG Play ENTER SELECT PRG EXIT To add tracks to the playlist use the NUMBER keys to enter a track number listed under CHOICE then press ENTER The track now appears in the playlist in th...

Page 24: ...ANGLE DISPLAY MENU TITLE MONITOR SETUP PBC Jumping to a Specific Time on a disc ZOOM 0 C 9 6 5 4 3 8 7 2 1 VOLUME MUTE AUDIO ZOOM 0 C 9 6 5 4 3 8 7 2 1 VOLUME MUTE AUDIO ENTER RETURN REPEAT SLOW BRIGHTNESS STOP PLAY PAUSE A B 1 ALL To go directly to any title chapter or track on a disc press the GOTO key TWICE The on screen display will indicate the current track as well as the total number of tit...

Page 25: ...e to playback after the movie is finished You can store up to five bookmarks on a disc Bookmark locations are cleared when the disc is removed This function also works with VCDs and Audio Cds Press BOOKMARK to access the Bookmark Menu There are 5 locations for bookmark storage You may wish to hit the PAUSE key first to freeze playback 1 Saving a Bookmark location POWER LCD GOTO PROGRAM BOOKMARK SU...

Page 26: ...Current Title and Total Titles on the disc and allows you to navigate to any Titles 3 4 2 1 5 6 1 Current Chapter Track Displays the Current Chapter Track and Total Chapters Tracks on the disc Also allows you to navigate to any track on the disc Elapsed Time Shows the Elapsed Playback Time of the current session Also allows you to go to any time point on the disc Angle Mark Displays the Current An...

Page 27: ...s 3 4 2 20 MP3 MUSIC AND JPG IMAGES 1 5 6 Rock and Roll Pop and R B Picture 01 Picture 02 Childrens Song DISC JPG JPG DISPLAY MIXED PLAY MODE NORMAL 00 00 00 00 ENTER 3 4 5 6 7 1 Jazz Press the keys to toggle between Folder File List and the Display Menu 2 7 8 Navigator Overview 27 The Navigator has the ability to filter the files on a disc to display only those files you wish to use When a disc i...

Page 28: ...ee page 26 1 By default the Navigator will play MP3 or display JPG all files in a directory and then stop when a file is selected and the PLAY key is pressed Alternatively you can choose to play one or more files continuously REPEAT or change the playback order RANDOM or SHUFFLE Changing the PLAY mode 5s JPEG JPEG POWER LCD GOTO PROGRAM BOOKMARK SUBTITLE ANGLE DISPLAY MENU TITLE MONITOR SETUP PBC ...

Page 29: ...or decrease the SIZE of the selection rectangle use the PREVIOUS NEXT keys In this example we ll use the PREV key to make the selection area smaller 3 ENTER RETURN REPEAT SLOW BRIGHTNESS STOP PLAY PAUSE A B 1 ALL Finally press ENTER to enlarge the selected area 4 To EXIT ZOOM mode press the RETURN key This will bring the image back to normal viewing 5 RETURN REPEAT SLOW A B 1 ALL ZOOM 6 5 4 3 2 1 ...

Page 30: ...SWORD DVD ENGLISH ENGLISH ENGLISH 16 9 WIDE ON OFF 8 _ _ _ _ Next let s move down to the CLOSE CAPTION setting with the DOWN ARROW key 4 ZOOM SLOW PAUSE STOP PLAY BOOKMARK ENTER RETURN DVD SETUP MENU AUDIO SUBTITLE TV SCREEN ANGLE MARK CLOSE CAPTIONS PARENTAL CONTROL NEW PASSWORD DVD ENGLISH ENGLISH ENGLISH 16 9 WIDE ON OFF 8 _ _ _ _ Now we ll change the CLOSE CAPTIONS setting to ON by using the R...

Page 31: ...ing ONLY if you are sure your TV supports Progressive Scan CONTRAST Adjust the CONTRAST level with the LEFT RIGHT ARROW keys SATURATION Adjust the SATURATION of the video with the LEFT RIGHT ARROW keys TV OUTPUT VIDEO OUTPUT CONTRAST SATURATION OSD LANGUAGE Default setting ENGLISH Sets the On Screen Display language for the Setup Menu SCREEN SAVER Default setting OFF The screen saver will automati...

Page 32: ...er setting CLOSE CAPTION to ON will result in captions always being displayed when discs supporting captions are used If you don t wish to automatically enable captions set this option to OFF PARENTAL CONTR Default setting 8 The Parental Lock allows you to limit the use of your DVD Player to only those DVD discs that do not exceed the rating you specify When the Parental Control is set DVD discs t...

Page 33: ...ff and back on or press the MONITOR key to switch back to LCD Display Mode BLACK BARS ON TOP BOTTOM OR SIDES OF SCREEN If you see black bars on the SIDES of the screen the LCD mode is set to 4 3 mode This is CORRECT if you are viewing a Fullscreen DVD movie made to fill the fullscreen of normal non widescreen TVs Use the LCD key on the remote or FUNCTION key on the player to adjust the LCD mode If...

Page 34: ...ery Operating Temperature Signal to Noise Ratio Charging 0 45 C 90dB Discharging 20 60 C Audio Dynamic Range Storage 20 50 C RH 60 20 80dB Battery LED Indicator Harmonic Distortion Charging Red 0 015 Fully Charged Green Wow and Flutter Dimensions 0 001 W PEAK Player 184mm x 35mm x 144mm W x H x D Component Video Out 7 24 x 1 38 x 5 67 W x H x D Battery 110mm x 12mm x 72mm W x H x D Y 1 0Vp p 75 Oh...

Page 35: ...17 reset SETUP Factory Defaults 32 car adapter 14 video output 31 connections 11 return key 20 contents package 6 rf modulator 15 disc compatibility 5 safety instructions 2 discs care 5 safety instructions battery 2 display function 26 screen saver 20 dvd settings 31 setup menu 30 32 shuffle play 26 28 enter button 8 skip ahead back 9 21 slow motion 21 fast forward 21 specifications 34 features 5 ...

Reviews: