


8
A
P
P
5
M
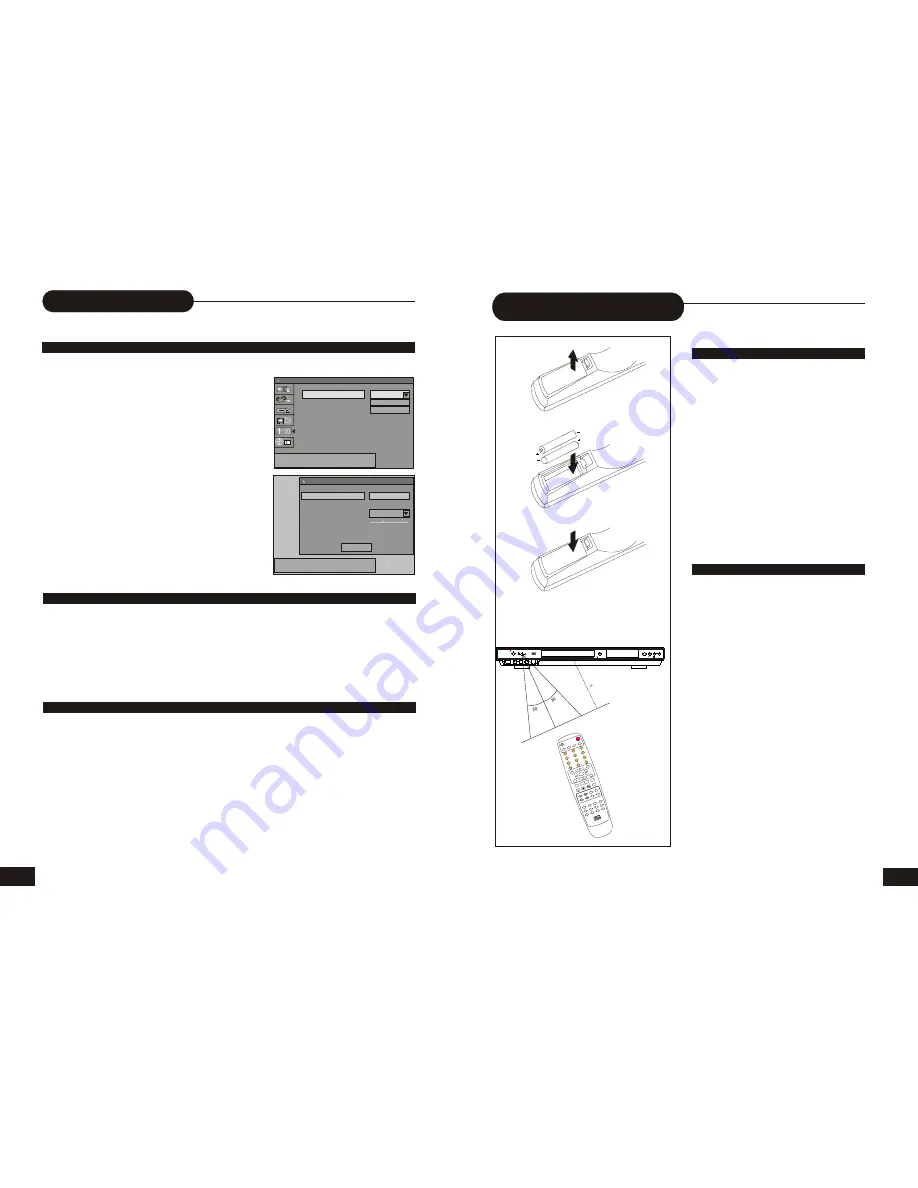
1. Push the leaf spring down and out to
remove the battery compartment cover.
2. Insert two size AA batteries according to the
"+" and "-" markings.
3. Make sure the batteries have been properly
installed, then close the battery compartment cover.
Notes:
Do not mix different types together, or old
batteries with new batteries.
If the remote control will not be used for an
extended period of time, remove the batteries to
prevent corrosion.
To prevent corrosion resulting in damage,
remove exhausted batteries immediately. When
the remote control appears not to operate
normally, replace both batteries.
Typical life for the batteries provided with this
product is about 6 months. The life expectance
may vary according to the use status.
Point the remote controller toward the remote
sensor on your DVD home theater center. Upon
receipt of the signal from the remote controller, the
equipment will operate accordingly.
The description in this Manual is based on the
buttons on the equipment. You may use the
counterparts on the remote controller to do the same.
Notes:
Do not place this equipment in a place exposed
to direct sunlight or strong light source like inverting
fluorescent light, or else it may interfere with correct
operation of the remote controller.
When other similar remote controller is used in
the same room, or when this product is used near
other equipment using infrared ray, interference with
the operation of this remote controller may occur.
Do not place any object on the remote controller,
or else it may cause unintentional depression of the
buttons and waste the batteries unnecessarily.
The front of the chassis should not be glazed
with color glass, or else it may cause interference
with normal operation of the remote controller.
Any barrier between the remote controller and
remote sensor will inactivate any operation of the
remote controller.
The operating range between the remote
controller and the equipment shall be no more than
5 meters (16 inches). When the operating range
becomes shorter, replace the batteries with new
ones.
Battery Installation
Use of the remote controller
OPERATING INSTRUCTIONS
OF THE REMOTE CONTROLLER
27
Recording Options
CHANNEL SEARCH
To record TV programs, you should search TV channels first.
1. Press SCAN to access the TV setup menu.
2. Use the UP/DOWN button to highlight SCAN
and press SELECT.
It will search channels automatically.
During auto-searching, press STOP to cancel
searching.
3. To browse the found channels, use the UP/
DOWN button to highlight EDIT and press
SELECT to setup it, press UP/DOWN to Name,
and you can also input numbers and press SELECT.
In the SKIP column, If a channel cannot be found, it
will be highlighted “YES”.
4. If you want to skip one channel, select the
corresponding channel. Use the UP/DOWN button
to highlight the channel you want to skip and press
SELECT. Press the UP/DOWN button to highlight
YES, and press SELECT,
5.use UP/DOWN to highlight the OK and press SELECT.
6. Press SETUP again to exit.
NORMAL RECORDING
SETUP RECORD QUALITY
1. Make connections illustrated as page9-12.
2. Insert a recordable DVD+RW or DVD+R into the recorder.
3. Press DV. TV or AV to select the input source which you have connected as step 1.
F-A/V: Front Audio/Video Input (on the front panel)
R-A/V: Rear Audio/Video Input (on the rear panel)
F-SV: Front S-Video (on the front panel)
R-SV: Rear S-Video (on the rear panel)
TV: (you can select it by pressing /- or input the assigned number of the
channel to select your desired one directly)
DV: Digital vidicon
4. Press RECORD to start recording.
If you want to stop recording, press STOP.
If the DVD+RW or DVD+R is new, it will take about three minutes to stop.
1. Press SETUP during stop status.
2. Press direction keys (UP/DOWN) to select.
3. Select default quality.
HQ: Perfect quality, nearly 60 minutes in a blank disc
SP: Standard play quality, nearly 120 minutes in a blank disc
EP: Extend play, nearly 240 minutes in a blank disc
SLP: Standard long play, nearly 360 minutes in a blank disc
Tuner input source
Scan channels
Modify channel information
Standard
SCAN
EDIT
SYSTEM SETUP - CHANNEL SCAN
Select source of TV program.
Name
Frequency
Fine tune
Skip
CH 001
55.25MHz
OK
CHANNEL EDIT
NO
UP/DOWN to change item, SELECT to edit,
0~9 or CH+/CH- to Change Channel
MU
TE
PLA
Y
S
TO
P
PAU
SE/S
TEP
AD
D/C
LEA
R N
AVI
GA
TIO
N
SE
LEC
T
OPE
N/CL
OSE
STA
NDB
Y/O
N
SC
AN
SE
TU
P
TIT
LE
TIM
ER
RE
C/O
TR
ED
IT
AV
TV
DV
DISC
OPE
R
ME
NU
CH
+
RE
V
P
RE
V
FW
D
N
EX
T
CH
-
VO
L+
VO
L-
AU
DIO
SU
BTI
TLE
AN
GL
E
RE
TU
RN
RE
PE
AT
SLO
W
ZO
OM
GO
TO
PS/
IS
PR
OG
DIS
PLA
Y
RAN
DOM
0
//
1
2
3
4
5
6
7
8
9
DV
D +
Re
Wr
ita
ble
OPEN/CLOSE
PLAY
SOURCE
STOP
DV INPUT
VIDEO S-VIDEO
L---- AUDIO ----R
RECORD
STANDBY/ON
DVD + ReWritable


