background image

1 Press 

SETUP

.

Settings

Note

You have to select the audio and subtitle language 

  according to the disc.

Note

• If the setup option is grayed out, it means the setting

  cannot be changed at the current state.

General Setting

Basic operation for the menu

System

1

Screen Saver: 

Turn on/o

ff the screen saver.

The screen saver will display in 3 mins without any 

   operation when the function

’s on.

2

Disc Auto Playback: 

Turn on/o

ff the disc auto playback

   function.

3

Load Default: 

Return to 

DEFAULT SETTING.

4

Upgrade:

Select the device that you want to upgrade from.

5

Easy Setup: 

Select the easy setup mode.

6

Buda:

Select the buda mode.
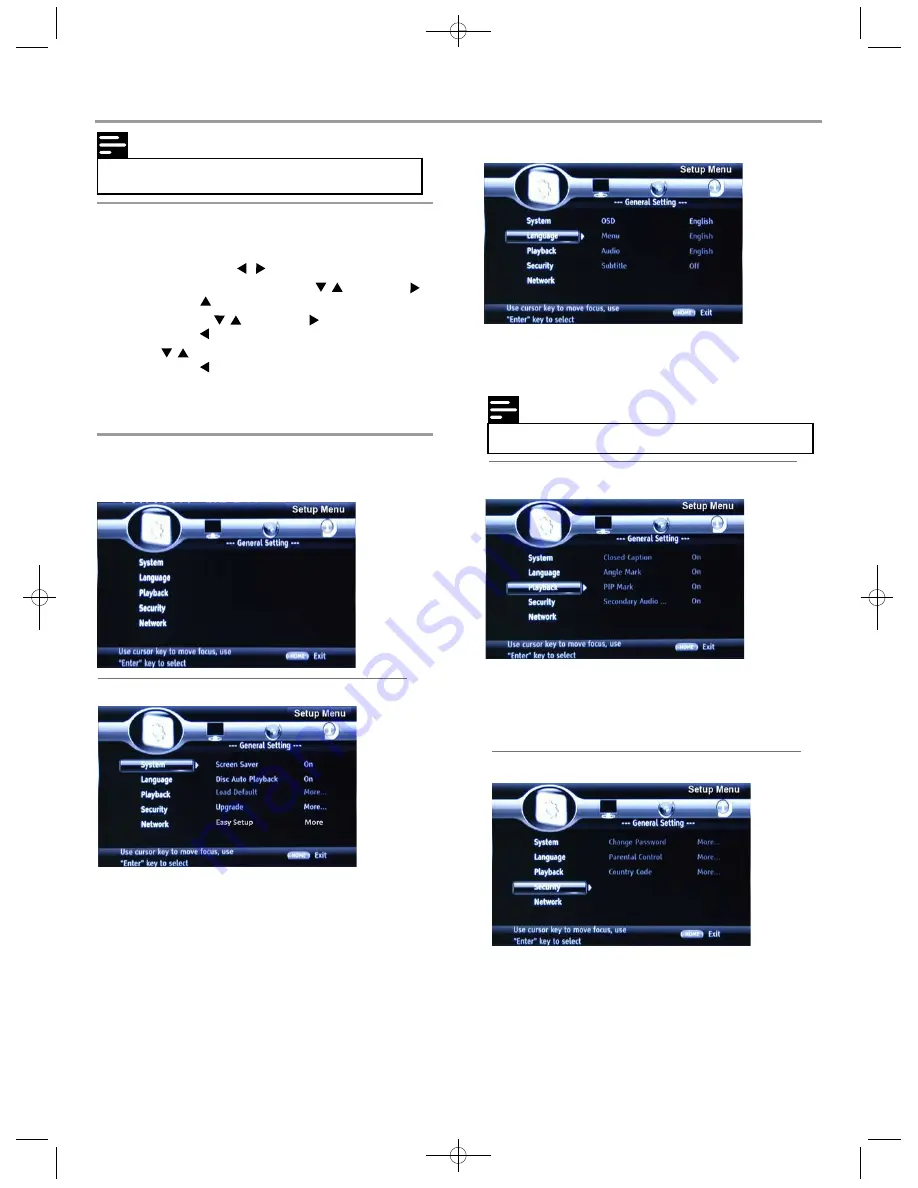
Language

1

OSD:

Select the OSD language.

2

Menu:

Select the menu language of the disc.

3

Audio:

Select the audio language for the program.

4

Subtitle:

Select the subtitle language for the program.

2 Select a mains menu by          .
3 Select the menu you want to setting by          , and press

   .

Y

ou could press     up to mains menu.

4 Select the option by          , and press     .

   •

Y

ou could press     to return to the previous menu.

6 T

o return to the mains menu from the submenu, press

   RETURN

.

7 T

o exit the menu, press 

SETUP

.

5 Select  by          , and press

 ENTER

 to confirm.

   •

Y

ou could press     to return to the previous menu.

Playback

1

Closed Caption: 

Turn on/o

ff the Closed Caption function.

2

Angle Mark: 

Turn on/o

ff the Angle Mark function.

3

PIP Mark: 

Turn on/o

ff the PI

P

 Mark function.

4

Secondary Audio...:

Turn on/o

ff the secondary audio 

   language select.

1

Parental Control: 

Enter to set the parental control. The

password is 0000.

Security

13

Summary of Contents for DVD8532

Page 1: ...TM DVD8532 Model No...

Page 2: ...18 System Information 3 3 17 17 17 17 17 Connect Speaker s 8 9 10 12 13 14 14 14 15 16 16 16 16...

Page 3: ...Once the Blu ray system is operated abnormally the system will be hanged up due to circuit protection If user unplugs the power cord this system can normally be operated 1...

Page 4: ...and Canada Europe Japan the Middle East Egypt South Africa Greenland Taiwan Korea the Philippines Indonesia and Hong Kong Mexico South America Central America Australia New Zealand Pacific Islands and...

Page 5: ...OUTPUT 8 SL FL FR SR CEN SW 5 1 CHANNEL OUT PLAY PAUSE Press to play the loaded disc press again to pause current playback Rear panel POWER SupplySocket Wire Create power between wall outlet and the u...

Page 6: ...UT Speaker rear panel 2 RCA STEREO 5 1CH INPUT 3 SPEAKER CONNECTIONS 4 POWER Press to turn the subwoofer power off or on L FL SW SL SR CEN SR SL CEN FL FR FR R 5 1CH INPUT AUX SPEAKER OUTPUT POWER AC...

Page 7: ...NUS VIEW 1 2 3 4 5 6 7 8 9 10 11 12 13 14 15 16 17 18 7 VOLUME Press volume or volume control the volume Press this to return to the DVD menu Standby MENU 25 24 23 22 21 20 19 26 27 29 28 30 31 32 33...

Page 8: ...VIDEO IN CVBS 1 Connect a composite video cable to the VIDEO jack on this product the VIDEO input jack on the TV 2 Connect the audio cables to the AUDIO L R AV OUTPUT jacks on this product the AUDIO i...

Page 9: ...IO input jacks on the device the 5 1CH OUTPUT jacks on this product the 5 1CH input jacks on the device Connect this product to the network to enjoy software updates and BD Live bonus content Connect...

Page 10: ...Connection Speaker s L FL SW SL SR CEN SR SL CEN FL FR FR R 5 1CH INPUT AUX SPEAKER OUTPUT SR SL CEN FL FR SPEAKER OUTPUT POWER AC 110V 60Hz ON OFF I O Connection 8...

Page 11: ...The batteries shall not be exposed to excessive heat such as sunshine fire or the like 9 not included...

Page 12: ...playing DVD VCD CD This function not support BD Use the UP DOWN button to highlight the desired title then use Nemeric Buttons to input the title what you want to play To play selected chapters use t...

Page 13: ...mains 2 11...

Page 14: ...that contains the JPEG photos 2 Select a photo folder then press ENTER to enter To select a photo press the Navigation buttons To enlarge the selected photo and start slideshow press ENTER Control pho...

Page 15: ...SD language 2 Menu Select the menu language of the disc 3 Audio Select the audio language for the program 4 Subtitle Select the subtitle language for the program 2 Select a mains menu by 3 Select the...

Page 16: ...TV Connect this product to the broadband modem or router This product starts to detect if there is a connection to the network If the connection test fails select Retry and press ENTER to re connect a...

Page 17: ...Process Display the system information The information on the picture above is for reference only System Information 1 Configuration Select configuration mode 2 Test Tone Select the text tone mode 1 U...

Page 18: ...Audio CD AC100 240V 50 Operating conditions 0 C 40 C Operating conditions 0 C 40 C Amplifier 60Hz 14 W Cb Cr AC110V 60Hz 16 Total Output Power 40W Sub woofer Output Power 10W 4 Ohm Satella CH 5 channe...

Page 19: ...of the TV to the corresponding video input See the TV user manual for details No audio output from the loudspeakers of the audio device stereo system amplifier receiver Ensure that the audio cables ar...

Page 20: ...s high quality picture and sound quality completely free from noise HDMI is fully backward compatible with DVI As required by the HDMI standard connecting to HDMI or DVI products without HDCP High ban...

Page 21: ......

Reviews: