The Hardware Unit
you will likely need an adapter or insert cable (aka, a Y-cable) for connecting the two
devices.
In the case of using powered speakers, you need only connect each of Organelle’s audio
outputs to one of your speaker’s inputs.
In addition to our trusted USB drive, a MIDI controller is connected to the other USB port.
Any incoming MIDI messages are sent directly to the current patch, which will determine
how to use them. As long as it is class compliant, any device supporting MIDI over USB
would work, whether it is an 88-key piano-style controller or a DJ-style controller, etc. Even
MIDI-only controllers will work when connected to Organelle via a USB class compliant MIDI
interface.
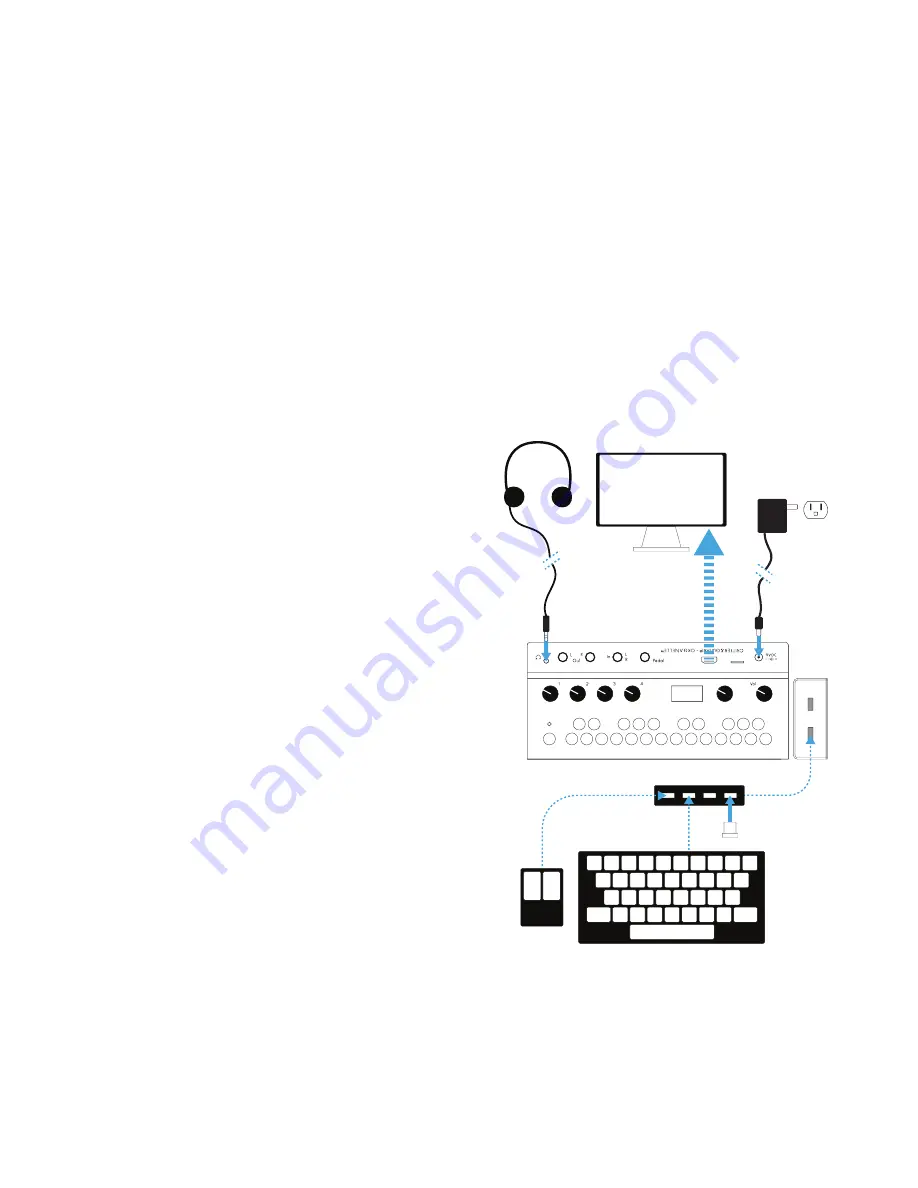
An External Monitor, a USB Hub,
and Computer Peripherals
This example uses headphones for audio output,
a USB hub for connecting more than two
devices, and an HDMI monitor for seeing
Organelle’s microcomputer at work.
Connecting an HDMI monitor to Organelle
shows the internal microcomputer’s command-
line interface and graphical user interface. [For
additional information on using the HDMI port,
see
chapter six
.]
Our USB drive is still connected, but it is now
running through a class compliant USB hub. By
adding a hub to our configuration, the number of
USB devices we can connect grows to the
capacity of the hub. Connecting an HDMI
monitor assumes that you want to operate
Organelle’s microcomputer in a typical way, and
this implies the use of peripherals, such as a mouse and keyboard. This necessitates the use
of a USB hub. And even without using an HDMI monitor, a USB hub would be needed if you
wanted to connect multiple MIDI controllers at once, etc.
Page
!
of
!
17
51