


15
Connecting External Devices
The Sonic Carrier features a wide range of connectivity options. Refer to the following sections to learn about the
connection possibilities, required cables and steps to connect.
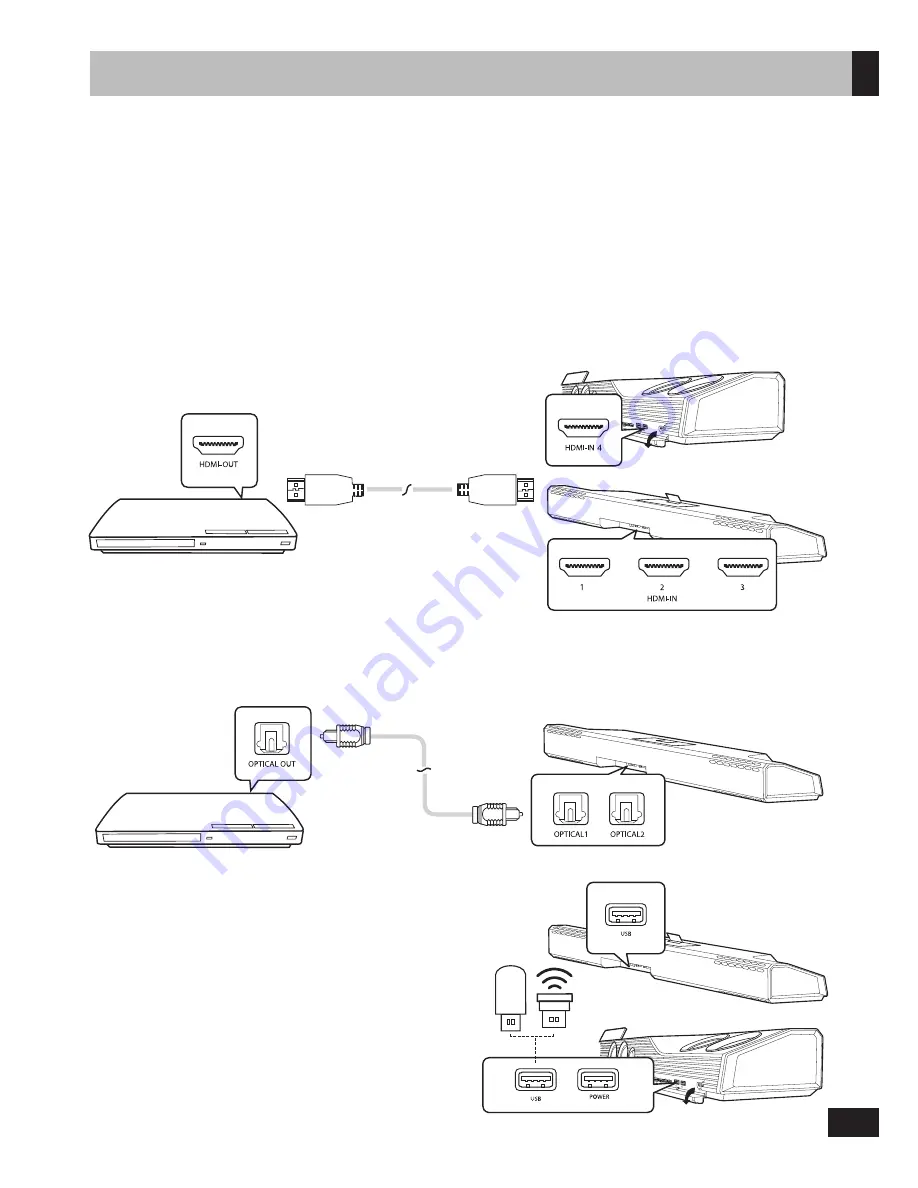
1. HDMI
2. Optical
3. USB
Connect USB flash drives, external hard disk drives, wireless
keyboard or mouse dongles to the front and rear USB ports.
A wireless keyboard with built-in trackpad, such as
Microsoft
®
All-In-One Media Keyboard, is highly
recommended for ease of navigating the Android interface.
The USB port labeled “POWER” does not support data
transfer, but could be used to provide power to devices
such as TV sticks (maximum: 5V 2A).
Connecting Your Sonic Carrier
When a Dolby encoded input signal is detected, it is automatically
decoded and “Dolby ...” is displayed on the main display.
TOSLINK cable
Press
HDMI
to cycle through the available HDMI inputs.
HDMI cable
For the best possible audio quality, please connect all HDMI source devices directly to the Sonic Carrier, instead of the
TV (i.e. using HDMI ARC for audio input).
For Wi-Fi equipped dongles such as the Google Chromecast Ultra, we recommend connecting it to HDMI-IN 3 on the
back panel to allow more space around the device for the best Wi-Fi reception.
Two optical digital inputs capable of supporting 24-bit/96kHz PCM audio are available for connection to digital audio
source devices and to TV sets without compatible HDMI ARC support.
OR
OR


